DIY Bullwinkle Costume
How to Make a Moose Hat for a Bullwinkle Costume
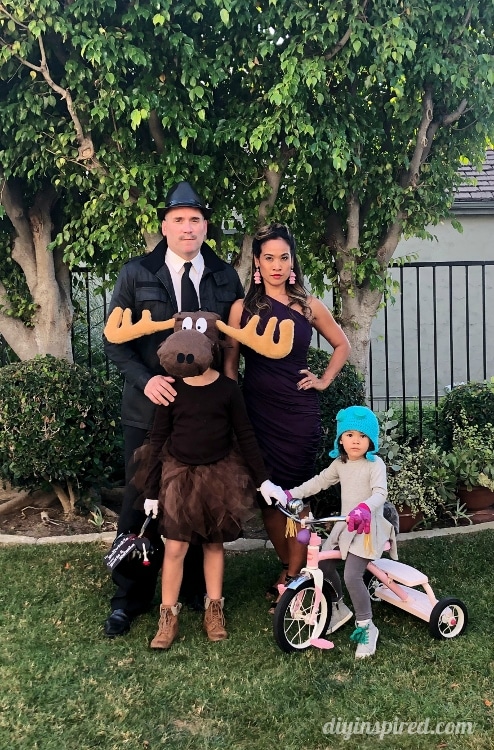
As you may have read, my daughter’s are Rocky and Bullwinkle this year for Halloween. I made my 2-year old’s Rocky Squirrel costume the other day. She loves it. For my older daughter, I had the idea of turning a baseball hat into a moose head for her Bullwinkle costume.
It was challenging for sure.
So, today’s tutorial is kind of, sort of, a tutorial. In other words, I’ll do my best to explain how I made it, but honestly, I was winging it the entire time. Here’s what I did.
Time: Forever…J/K about 3 Hours
Materials:
- Old Baseball Hat
- Brown Fur
- Light Brown Fur
- Scissors
- Chalk
- Hot Glue and Glue Gun
- Black and White Felt
- Polyester Stuffing
- Needle and Thread
- Chopsticks
- Wire Hanger
- Wire Cutters
Instructions:
Making the Nose
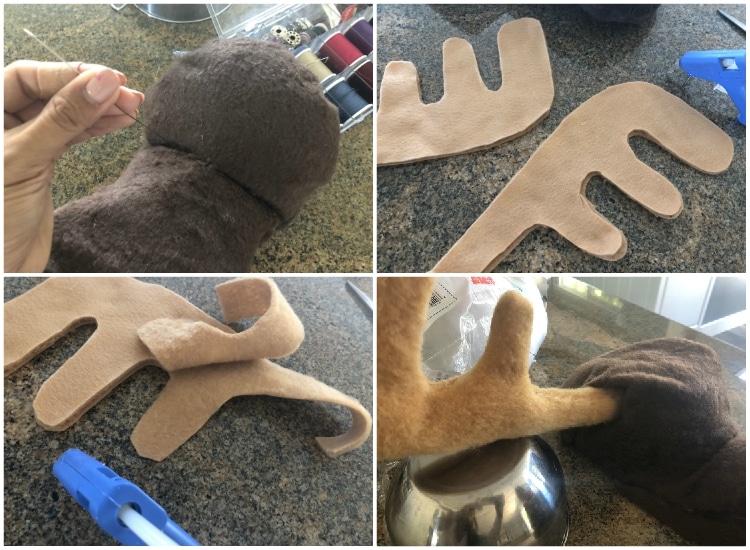
Using the baseball hat bill as a guide, I drew my own pattern for the nose with chalk and cut it out. I also cut a curve out for the top of the hat bill. Next, I glued to two sides together (right side inside) and turned it inside out and stuffed it with polyester fiber fill.

I separated the stuffing, right at the curved crease of the nose and slipped the hot bill through. I glue the top of the nose to the hat bill. Pinching the nose to curve down, I hand sewed it to make the nose point downward.
Covering the head is hard to explain. I wrapped the fabric around the hat and glued it. I basically folded, glued, and cut until I thought it looked right. DO NOT glue the fabric to the top of the hat. I’ll explain later…
Making the Antlers
Using chalk, I free hand drew the antlers and cut them out. I glued them together and stuffed them as well. To make them more sturdy, I slipped a chopstick into the opening. I glued them onto the head and then hand sewed them for extra support.
At this point, my daughter tried the hat on and the antlers flopped over. To correct it, I straightened a wire hanger and slipped it all the way through the hat and both antlers. This is why you do not glue the fur to the top of the hat. I curved the part over the head. This worked perfectly.
Adding the Details
I cut out the eyes, ears, and hair with felt and glued them with hot glue.

For the hair, I cut thin strips. Glued a small part together and then glued it to the top of the head. For the ears, I cut out a large tear drop shape, pinched the top center and glued together and then glued the ears onto the head.
My daughter is wearing a brown long sleeve dress I found on Amazon. Here is my affiliate link for it. She will also wear white gloves.


Make the Matching Trick or Treat Pails
Here is a quick YouTube video of the Rocky and Bullwinkle trick or treat pails I made for these costumes. You can get the tutorial and free printables for these here: Rocky and Bullwinkle trick or treat pails