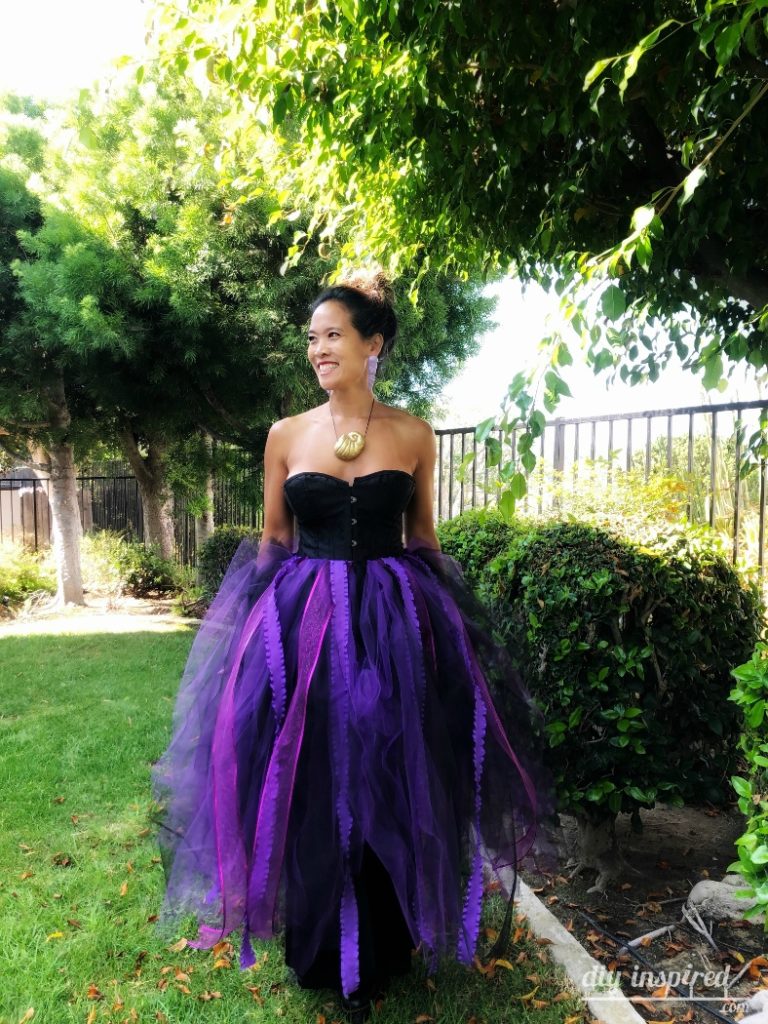
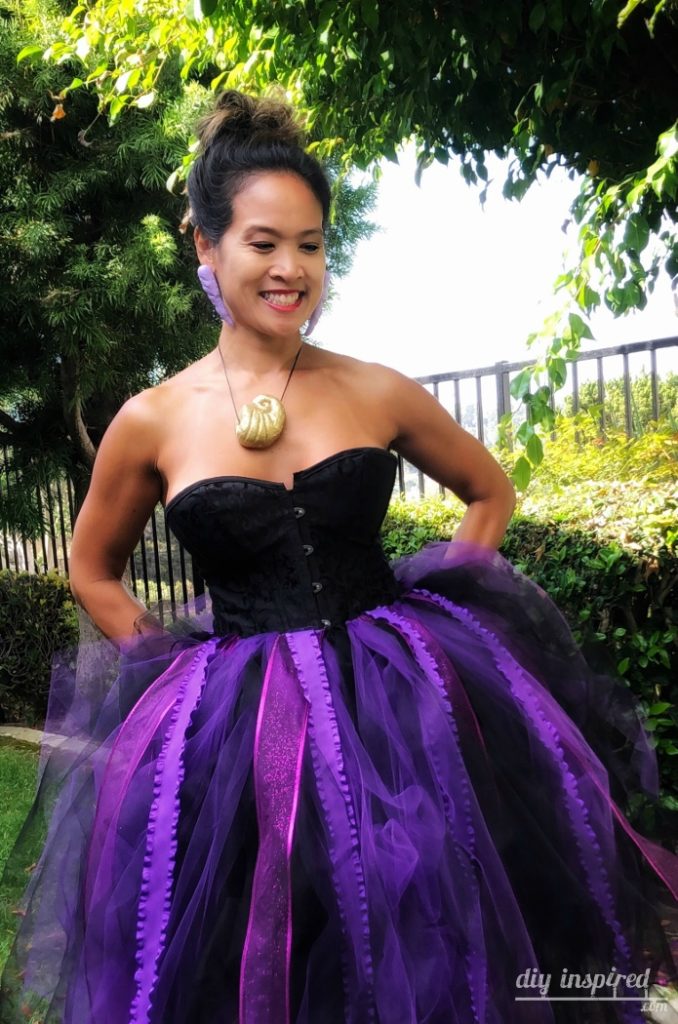
DIY Ursula Halloween Costume
Easy DIY Ursula Halloween Costume Idea
My family is so excited to be Disney Villains for Halloween this year. So far, I have shared my daughter’s Queen of Heart’s Guard trick or treat bag, my oldest daughter’s Queen of Hearts costume, as well as how to make Ursula’s shell necklace and earrings and my husband’s Dr. Facilier costume. Today, I want to share a simple DIY Ursula Halloween costume.
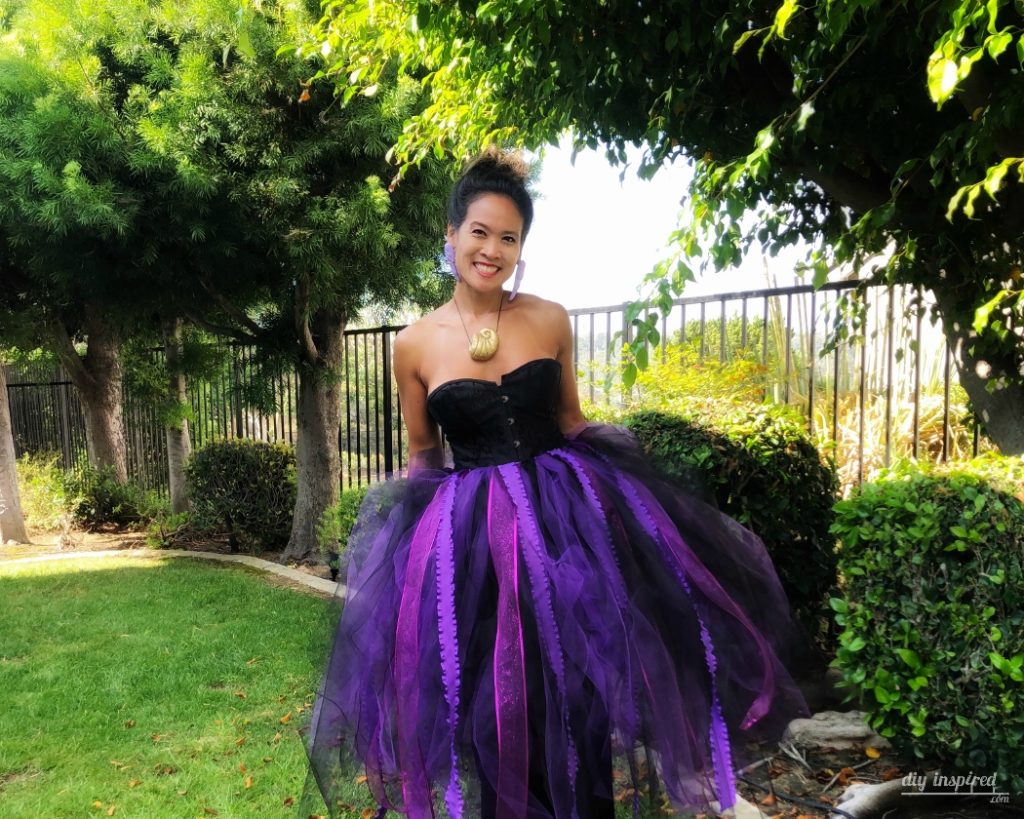
I went back and forth trying to figure out how I wanted to make her tentacles, but then thought that I wanted something simple and easy to walk around in and get in and out of the car in. As a result, I came up with this fluffy tutu.
Watch the Video
Here’s a quick DIY video to help you. Keep scrolling for the full instructions if needed!
Time: 1 hour
Materials:
- Ribbon (for Waist)
- Purple Tulle
- Black Tulle
- 2 Types of 1.5” and 2” Ribbon (for Tentacles)
- Scissors
- Hot Glue and Glue Gun
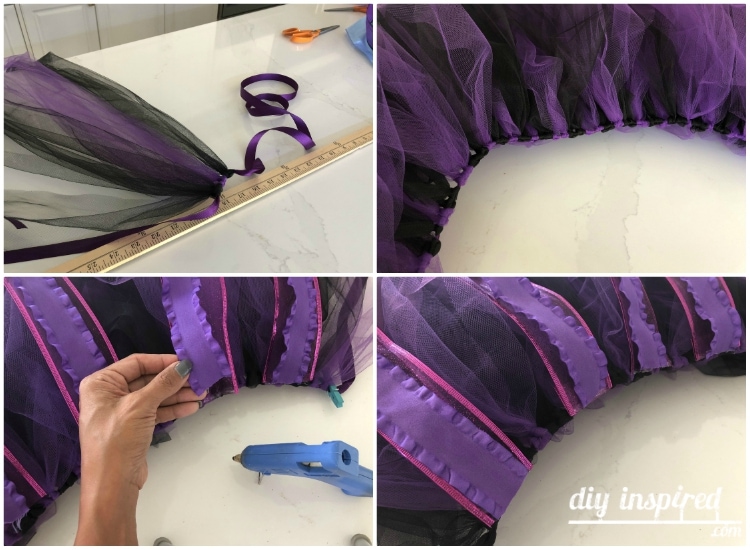
Making the Tulle Skirt
- Measure the desired length of your skirt. For the skirt in this tutorial, I measured one yard.
- Cut DOUBLE the length of tulle. For example, each piece for this skirt is 2 yards long.
- Measure and cut the length of ribbon to be tied around your waist. Be sure to leave enough ribbon to tie a bow in the back.
- Fold each piece of tulle in half and create a lark’s head knot around the ribbon for the waist. I alternated colors, 2 black and 2 purple.
- Continue until you have the desire width to fit around your waist.
Adding the Ribbon Tentacles
- Cut 8 pieces of 1.5” width ribbon at the length of your skirt. For example, I cut 8 pieces at one yard in length. I found the one in this tutorial at Hobby Lobby. It came in rolls of 3 yards, so I needed 3 rolls. It’s perfect because to me, it looks like purple seaweed.
- Next, I cut another 8 pieces of 2” wide (or larger) ribbon to layer behind the “tentacle”. The glitter ribbon on this skirt was found at the 99 Cent Store. It also came in 3 yard rolls, so I needed 3 rolls.
- Measure around your waist to make sure you have enough tulle. Place clothespins at the ends of the ribbon belt to indicate where the tulle should stop around your waistline. Spread out the tulle (or add more) so that it is even up to the clothespin line.
- Lay the skirt flat on a table and spread out. Next, lay the 8 layered “tentacles” on top. Make sure they are evenly spaced around the skirt.
- Lastly, Hot glue the tops of the “tentacles” to the lining of the skirt.
As you can see, it’s important to make sure the tulle is evenly spaced and measured to fit around your waist. For this skirt, I ordered a 100 yard spools of black and purple (I had WAY more than needed but I still need to make my daughter’s skirts). But, the amount of tool you will need depends on your length and size. Here are the Amazon affiliate links for the exact rolls I used: 1) black tulle, 2) purple tulle.
DIY Ursula Halloween Costume Finishing Touches
I chose to wear a black skirt under my tutu. You can also wear leggings or black pants. For the corset, I ordered THIS ONE on Amazon. It was inexpensive and works great. Lastly, you can use my tutorial to make REALLY inexpensive jewelry for your DIY Ursula Halloween Costume. I used a salt dough recipe to make them.
Here is the video for Ursula’s shell necklace and earrings. This is a link to the post.

So beautiful!!! Love love love your costume!
Thank you so much!!
I love your tutorial, I’m hopping to recreate this look for myself…. fingers crossed 😊
Awesome…and thank you SO much! I would love to see how it turns out! Feel free to send me a photo to share if you want! dwulf@diyinspired.com
Hi! I love this idea and tutorial but I don’t see the DIY video. Do you have a link for it? Thank you!
Thanks, Aimee! So strange you can’t see it! Here is the link to the Costume: https://youtu.be/RCjMLOwBrE4 and here’s the link to the jewelry: https://youtu.be/HHPIr46ps80
I already have a long black tulle skirt. Hoping to be able to hot glue the ribbons in the layers.
Super cute idea!!!
Thank you! That’s a great idea too!