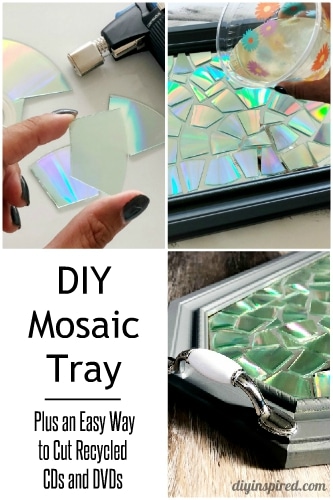
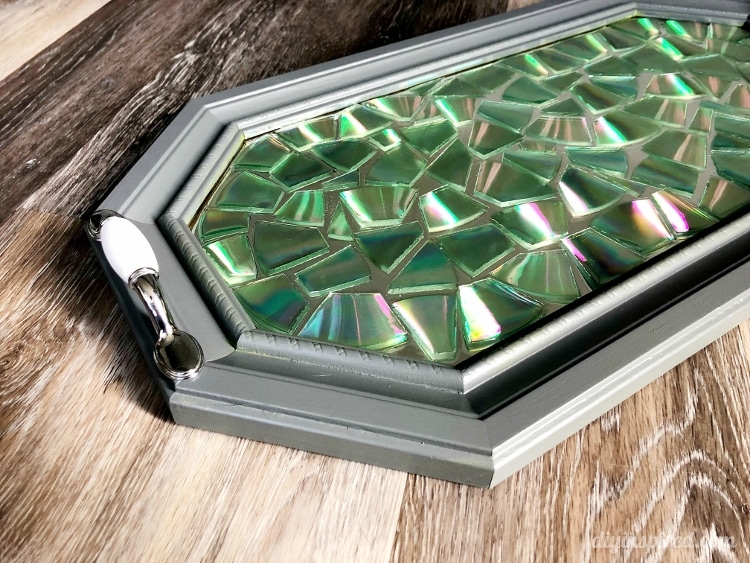
Resin Mosaic Tray with Recycled CDs and DVDs
DIY Mosaic Tray Plus an Easy Way to Cut Recycled CDs and DVDs
This article, Resin Mosaic Tray with Recycled CDs and DVDs, is sponsored by Bernzomatic. All opinions are 100% my own.
You can recycle old CDs and DVDs for many different crafts like jewelry or mosaics. I have seen yard art, endless kids crafts, and even an upcycled kitchen backsplash made out of them. The most difficult and time-consuming part of crafting with CDs and DVDs is cutting them. Through trial and error, I have found the easiest way to cut CDs and DVDs when transforming this thrift store mirror into a beautiful mosaic tray. Here is how I did it.
Time: A few hours
Materials:
- Old Mirror
- 2 Handles and Screws
- Drill
- Paint
- Paint Brush
- Painter’s Tape
- Old CDs and/or DVDs
- Scissors
- Bernzomatic ST2200T
- 5 OZ. Butane Cylinder
- Glue
- 4 OZ. Resin and 4 OZ. Hardener
- Wooden Stick
- Plastic Cup
- Plastic or Paper to protect work surface
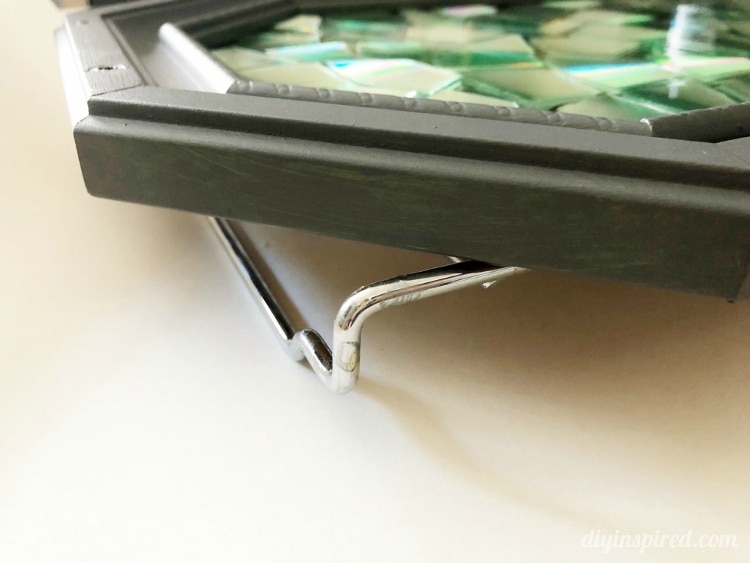
Prepping the Mirror
You can use an old mirror, picture frame, or tray for this project. I used a thrift store mirror and drilled holes to add hardware. Once bright green, I ended up painting it to match the Repurposed Spoon Hanger I made. Painter’s tape was a big help.
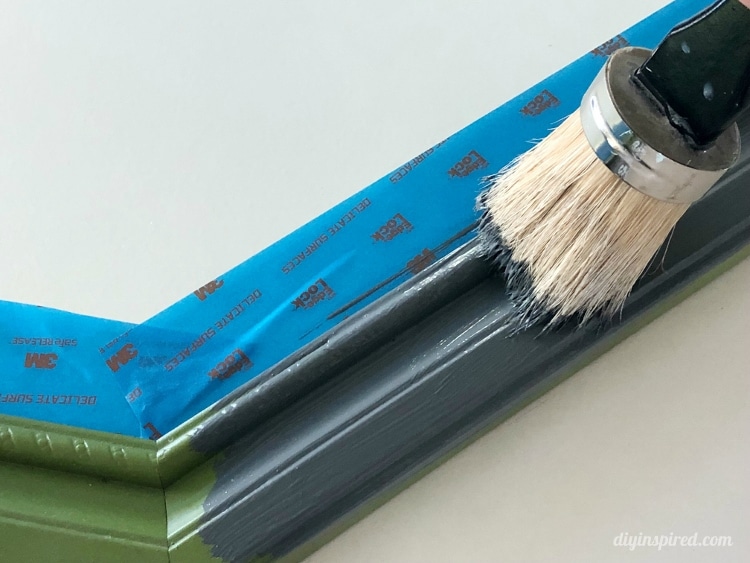
Another note, I picked a mirror in which the back was sealed. This was ideal when pouring the resin resulting in just a little bit of leakage. Consider this when choosing your piece to upcycle. If you use a picture frame, for example, you will have to seal the glass to the frame.
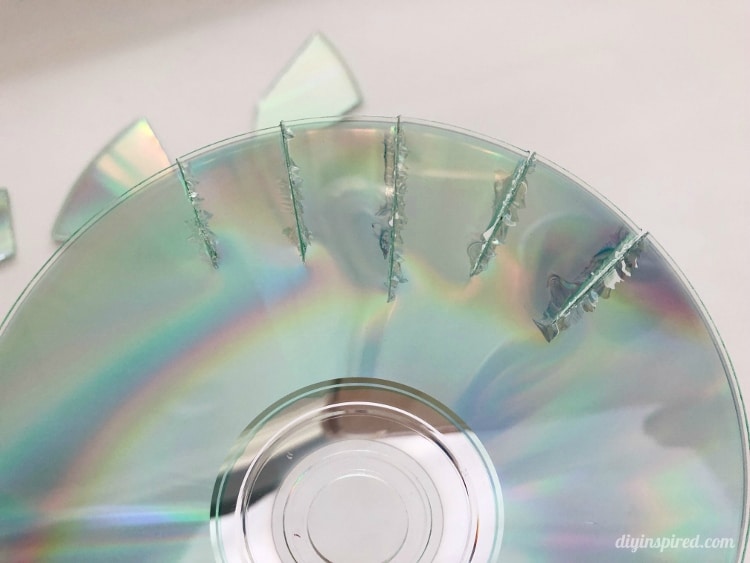
How to Cut CDs and DVDs
When figuring out the best way to cut CDs and DVDs without fraying and splintering the film, I tried five different types of scissors and several strategies such as blow drying them, freezing them, and soaking them in hot water. Although these tactics seem to work well for some YouTubers I watched, none of them worked well for me. They were all time consuming and hurt my hand.
Then it hit me.
The main goal was to apply cold or heat to make the disc more pliable, so why not try my Bernzomatic ST2200T hand torch? With a few quick strokes of heat from the torch and a pair of scissors, each disc can be easily cut, and with very little waste.
Here is a photo without using the Bernzomatic ST2200T.
Here is a photo using the Bernzomatic ST2200T.

See it in action.
Watch the Video Tutorial
Tips for Arranging and Placing Each Tile
I found it best to cut and place each tile down as you go; and move as you need to. Cut all the larger pieces first, and then fill in the smaller sections last. A good pair of mixed media scissors was also helpful; however, any kind of scissors will work. You can always move them, cut new pieces, or trim if needed. This tray is 19.5” X 8.5” and I used 7 discs. Make sure the mirror or glass is clean before placing each piece.

Once the tray is covered, feel free to move each piece around to get your final design. Once you are satisfied, glue each piece down. I chose to use DAP glue. Any glue, like hot glue works, however, hot glue dries too fast if you need to re-position, while DAP gives you about 30 seconds to move the piece into the exact spot you want. Allow the glue to dry.
Adding the Epoxy Top
Protect your work surface. In a plastic cup, mix 4 OZ. of resin and 4 OZ. of hardener. Mix well with a wood stick. Pour the mixture evenly over the mosaic. Lift the tray and tilt it side to side allowing the liquid to flow to the ends of each side, ensuring that the top is completely covered.
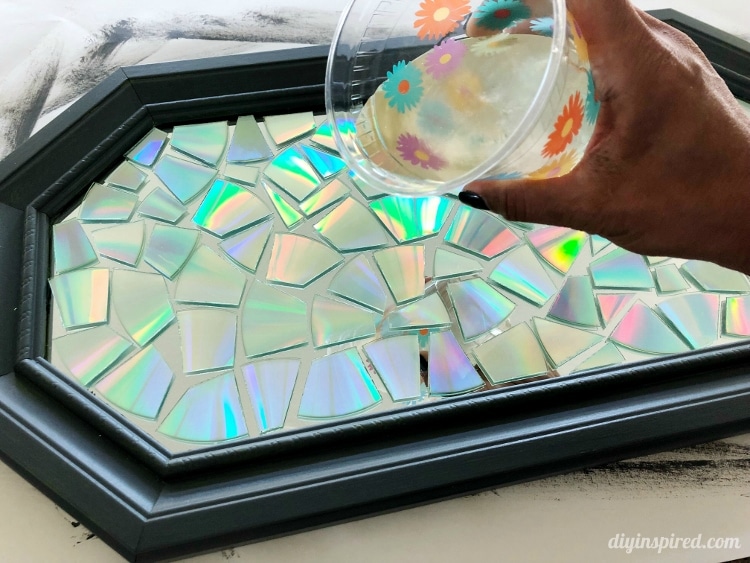
Pro Tip: Let the tray dry on a cooling rack so it doesn’t stick to the paper.
There will be small air bubbles. Use the Bernzomatic ST2200T hand torch to pop the bubbles. I checked on the tray every 15 minutes or so and popped air bubbles until no more appeared. I did this for the first two hours of dry time. Allow the resin to dry overnight, then add the handles. The complete drying time for the epoxy for this tray was about 72 hours.
Like it? Pin it!