Reupholstering a Dumpster Find
Reupholstering a Dumpster Find, Written by Loren Crane
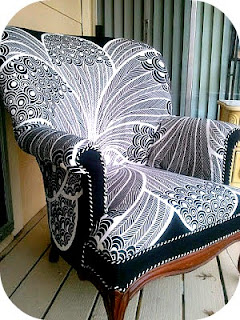
I thank you for Dinah for letting share my new chair with you guys. If you remember my last chair was done with Ikea fabric.
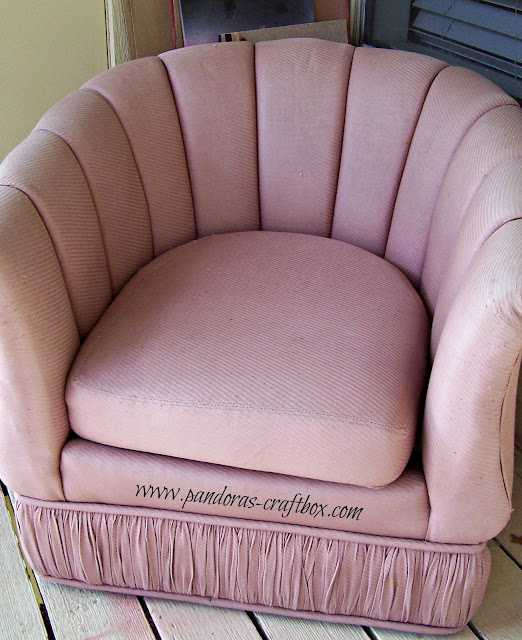
I decided to go in another adventure in reupholstering a dumpster find. The new chair is completely different from the other one I did and it had different challenges. I again found this beauty by the dumpster months ago. It just seating in my porch getting abused by my cat. My kitty and dog love to abuse furniture that does not belong in our home. I believe they smell other animals on fabric and they start just smelling it and stretching their nail on it. Also with the warm weather coming in and the bugs coming out, I decided to start reupholstering process. I really did not want to be outside in 90 degree weather.
Reupholstering a Dumpster Find
The first thing to do was to remove the fabric from the frame of the chair. Removing the fabric is my least favorite part because there are thousand of staple to remove. Unlike the previous chair this chair was factory made and there was not as many staples but it took three days to remove all the fabric. It took so long because I was doing it all by my lonesome. I finally convince the hobby to help remove the last of the fabric since I need some muscle to pull it off.
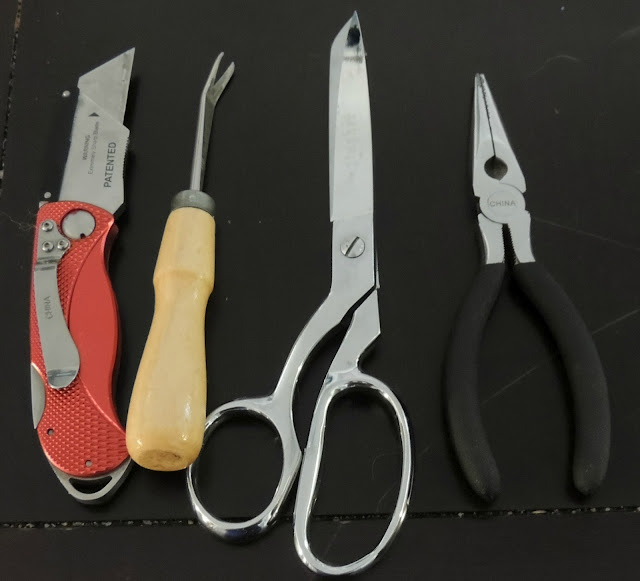
Here are the tools you might need:
1. Knife
2. Tack lifter
3. Fabric Scissors
4. Pliers
You might also want to wear a mask when removing the fabric. The fabric will through up dust that will irritate your sinus, trust me.
The first thing I did was to find a place where the fabric was no longer attached to the frame. Then I a used the tack lifter to help pull the staples away from the frame enough to where they can be pulled out with the pliers. The foam in the inside of the chair was in good condition so this time around I won’t need to replace it.
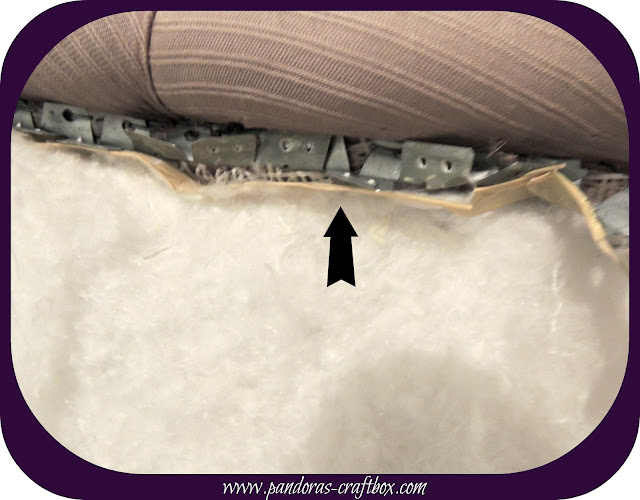
You might find this funny but I use a oven mitten to remove the metal things ( I really don’t know what they are) in one pull. You will need to be careful not to damage the frame. At times when removing staples you can crack the wood.
In some places where the staples were impossible to remove I use a knife or fabric scissor take off the fabric. I really was trying not to damage the frame of the chair while removing the staples. The chair is modern and the wood is not really good quality wood.
The bottom fabric of the chair needs to be removed by placing the chair upside down and removing the black fabric. I going to keep the black fabric because it helps keep out dust and other things from getting in the chair.
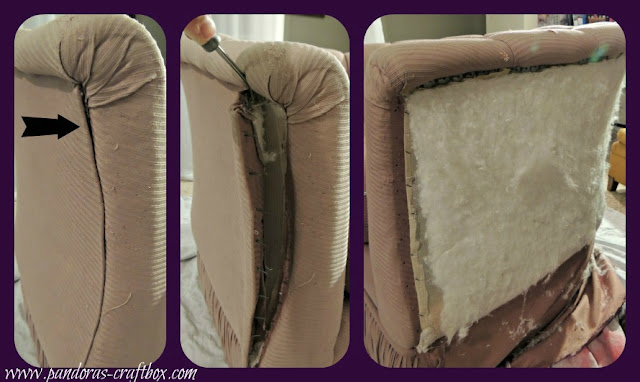
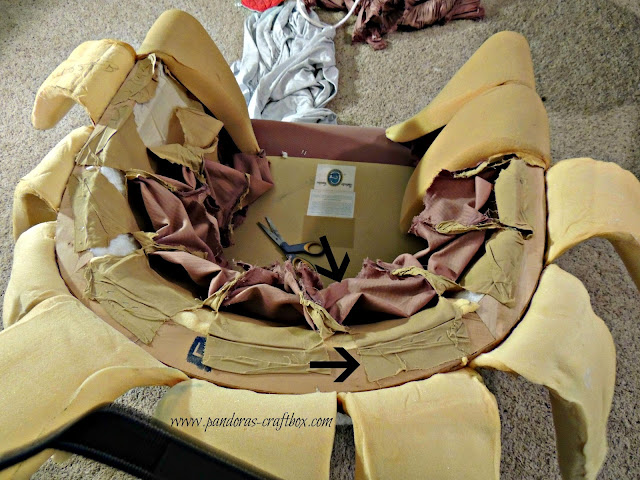
On the top third bottom picture you see a thin rope where the stables there was twice the amount of staples. You will need to remove staples from the top and the bottom of the rope line.
The inside foam was cut into different panels and each one was inserted in between two pieces of fabric. One fabric was the reupholstering fabric and the other looked like muslin which was stapled to the frame of the chair.
Once the purple fabric was taken off the back of the chair it expose the foam and then I just pulled it up to slip off the foam from both fabrics. Then I just removed all the staples from the inside of the frame of the chair. The foam looks like tentacles…I must be tired.
I am sorry I am repeating the word remove but that’s all you are doing. haha. Trust me this step is super frustrating. Because it seems like the staples never end.
I finally finished!! All of foam and the batting was in good shape and it did not need to be replace. So I just Lysol the crap out of it (excuse my language, hehe).
The only piece of fabric that I did not remove was where the cushion would rest. This piece of fabric is attached to the inside of the frame while the chair was in two different pieces in the manufacturing process. It would be impossible to attach a new piece of fabric. I decide to leave it and I’ll show you what I did with it later on.
I hope you like my post on Reupholstering a Dumpster Find!
Till Later,





Cute pup! 😉
Hi This looks fantastic! I have a few similar ideas stashed for one that I would like to make for our family room. Take care