DIY Reupholstered Chair
Tips and tricks on how to reupholster a chair yourself.
Where Can I Find Old Chairs to Reupholster?

You can find old chairs in a variety of places, both online and offline. Here are some options to consider:
- Thrift Stores & Secondhand Shops:
- Local thrift stores or secondhand shops often have a range of vintage furniture, including chairs. Check places like Goodwill, Salvation Army, or other local consignment stores.
- Flea Markets & Antique Stores:
- Flea markets and antique shops are great places to find old and vintage chairs. Sellers at these markets often specialize in reclaimed furniture, so you might discover some unique pieces.
- Estate Sales & Garage Sales:
- Estate sales can be a goldmine for vintage furniture, as many people sell off old items when moving or downsizing. Keep an eye out for local listings in your area, and check websites like estatesales.net for upcoming events.
- Online Marketplaces:
- Websites like eBay, Facebook Marketplace, Craigslist, and OfferUp often have listings for old chairs. You can search for specific styles or types of chairs and contact the seller directly.
- Vintage and Antique Furniture Stores:
- If you’re looking for a specific style, such as mid-century modern or Victorian, specialized vintage or antique furniture stores are a good place to start. Some stores may even refurbish chairs before selling them.
- Upcycling or Repurposing Stores:
- Some stores focus on upcycling and repurposing old furniture. These places can offer old chairs that have been beautifully restored or given new life through creative touches.
- Social Media & Online Forums:
- Join Facebook groups or other community forums where people often trade or sell vintage furniture. Apps like Instagram also have shops and accounts that specialize in vintage furniture.
Reupholstering Tips
Reupholstering a chair can be a fun and rewarding project. Here are some tips to help you get started:
Choose Your Fabric
Choose a fabric that is durable, especially if the chair will get heavy use. Consider upholstery fabric, leather, or even canvas, depending on the chair’s style and use. Measure the seat, back, and arms (if applicable) of the chair to determine how much fabric you need. Add a little extra for mistakes or pattern matching.
Gather Your Tools
-
- Staple gun and staples (try a heavy-duty one for upholstery)
- Scissors or fabric cutter
- Flathead screwdriver or upholstery tack puller
- Pliers
- Measuring tape
- A hammer (if needed)
- Fabric (your choice)
- Foam (optional, for cushion repairs)
- Batting (optional, to add padding)
Remove Old Upholstery
-
- Disassemble the chair: If possible, remove the cushions and backrests. If the seat is attached with screws or bolts, remove them.
- Take off the old fabric: Start by pulling out the old staples with pliers or a flathead screwdriver. Keep the old fabric as a template for cutting the new fabric to the right size.
- Inspect the frame: Once the fabric is removed, check the frame for any necessary repairs. Tighten any loose screws, nails, or bolts, and address any damage before proceeding.

Replace or Add Padding
-
- Replace foam: If the foam is worn out, replace it with new upholstery foam. Cut it to size with a utility knife. If you want more cushion, you can stack multiple layers of foam.
- Add batting: Wrap the foam with batting (optional) to give the chair a softer, more even appearance. This can help smooth out any irregularities in the foam.
Cut Your New Fabric
-
- Use the old fabric as a template: Lay the old fabric flat on your new fabric and cut around it, leaving extra fabric (about 2-3 inches) for stapling or tacking down.
- Align patterns: If your fabric has a pattern, be sure to align the pattern carefully before cutting.

Attach the New Fabric
-
- Start with the seat: Begin by stapling the fabric to the underside of the seat. Pull the fabric tight as you go, working from one side to the other. Don’t staple it completely all around at first—just staple along one side to hold it in place, then move to the other side and pull tightly.
- Work in opposite sides: After securing the fabric on one side, move to the opposite side, pulling it tight and securing it with staples. Repeat this process for the front and back of the seat.
- Tuck and fold corners: When you reach the corners, fold the fabric like you would wrap a gift, making sure it’s neat and smooth. Secure it with staples to keep the folds in place.
- Trim excess fabric: Once the fabric is secure, trim the excess fabric to make it neat. Be careful not to cut too close to the staples.
Reassemble the Chair
After the fabric is securely attached to the seat, backrest, and any other parts, reassemble the chair. Replace any cushions or padding, screw in the backrest, and reattach any other parts of the chair that were removed.
Finishing Touches
-
- Add trim (optional): If you want a more polished look, you can add trim around the edges, such as piping, nailhead trim, or cording. This can be stapled or tacked along the edges of the seat and back.
- Check for wrinkles: Make sure there are no wrinkles or lumps in the fabric. If any areas look uneven, you can pull the fabric tighter and re-staple it.
- Clean up: Vacuum any loose fabric pieces, and you’re done!
Helpful Tips:
-
- Take before and after photos to track your progress.
- Work in a well-lit area so you can see your fabric and the edges clearly.
- Don’t rush; take your time to make sure the fabric is smooth and taut.
Reupholstering can be a bit challenging, especially if it’s your first time, but with patience and the right tools, you’ll end up with a beautiful chair that looks brand new!
Loren’s Story
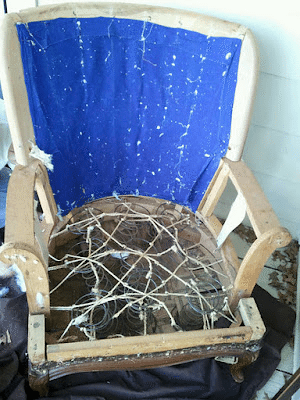
One cloudy day we found this lonely, awkward looking chair by the dumpster. I just saw the potential and the beauty this chair could bring to my home. We took it in and wondered what we had gotten ourselves into! We knew nothing of reupholstering and we found more bad news as we when we removed the fabric! All of the foam was dusty and by just looking at it the chair made me itch. We decided to remove everything from the chair. All was left was the frame, nails and springs.
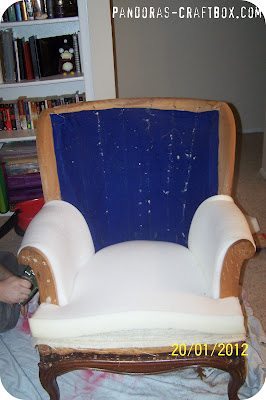
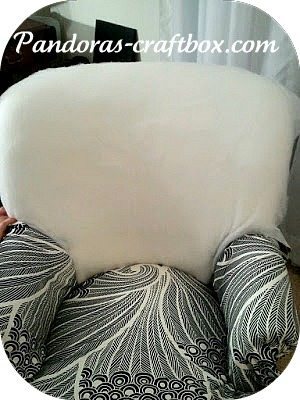
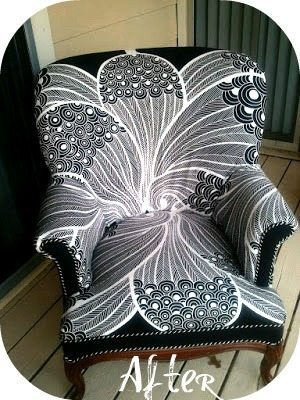
Then the long journey to reupholstering began. It took about a month of long nights and hard work to finish the chair. I looked at other blogs and I could not find references to help with the process. Most blogs only had the before and after pictures, so I decided to step by step tutorials for those who might need a little guidance in reupholstering. I go through step by step on how we attached the foam to the frame. When all was said and done the foam was stapled to the frame. I think the easiest part of the chair was gluing the decorative trim to the chair.
I hope you all enjoy reading about my journey with taking this chair from blah to glam. After this chair I don’t think there is anything I can’t do! I can’t wait to hear what you all have to say.
2/12
That’s awesome work! I think this has inspired me to go looking for a living room chair!!
Thanks!
My thoughts exactly! Loren did an amazing job!
I agree . Me too!
Wow! Love the fabric choice!
Yes, it’s not a boring neutral, yet it’s subtle enough to go with everything.
It’s absolutely beautiful! Thanks for the tutorial.
Absolutely gorgeous! Thank you so much for the tutorial! I’m very impressed. I have a much simpler chair to do, but this is great!
How did you do the lines for the back? I couldn’t find a picture and I have 2 chairs just like that but I have no idea how.
Loren…..you really nailed this one! A wonderful job and the fabric is just awesome! !!
Can you add a link to the fabric? I’m in love!
Hi Stacy! I tried to look for it but couldn’t find it. I’m not sure if you can still buy it, but I know Loren got it at IKEA. http://www.ikea.com/us/en/catalog/categories/departments/Textiles/10655/
The links for reupholstering the chair are not working, is it possible to have them emailed to me?
Thank you
Hi Laurece! I was just informed by Loren that her blog is no longer functioning properly. In the meantime, I will try to get these fixed. So sorry for the inconveience!
Wow you did an amazing job. The chair is beautiful!
beautiful results. I am heartened to hear this was saved from the landfill. older chairs are constructed much better than new ones (generally) unless you want to break the bank and buy kittinger or some other top name maker. there is so much upholstered furniture that gets discarded when worn. if they are from 1940 or before they are worth saving.