Repurposed Chicken Wire Earring Holder
How to Make a Repurposed Chicken Wire Earring Holder from an Old Frame
Hi there! My name is Laci from Lacijane.com or Laci Jane DIY on YouTube. Today I’m partnering with Dinah with DIY Inspired to share a repurposed chicken wire project and I couldn’t be more excited to be here! Thank you so much for having me! I’m honored to be posting on this blog and thrilled to be here!

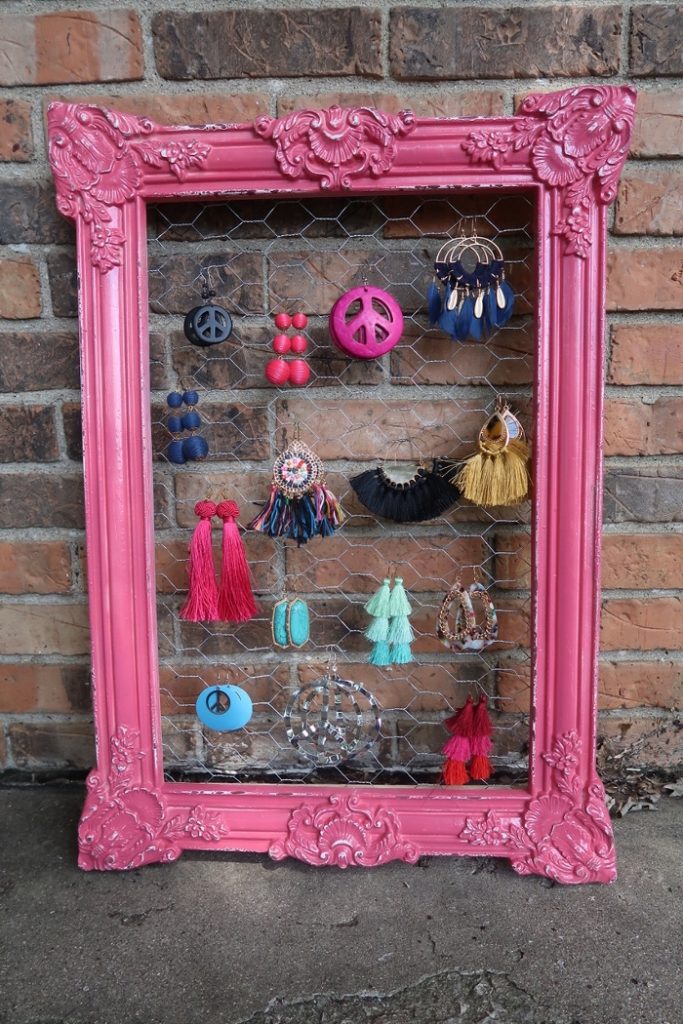
Today, I’m going to show you how I made this DIY Earring Holder using material that I already had on-hand: chicken wire and a picture frame. You may already have these items on hand, but if you don’t, don’t worry! You can make this DIY earring holder on-the-cheap. Seriously! I’m all about easy and inexpensive DIY’s. I love re-purposing materials as well.
You can accomplish this DIY within an hour and just a few bucks!
Watch the IGTV Video
Find an Old Frame
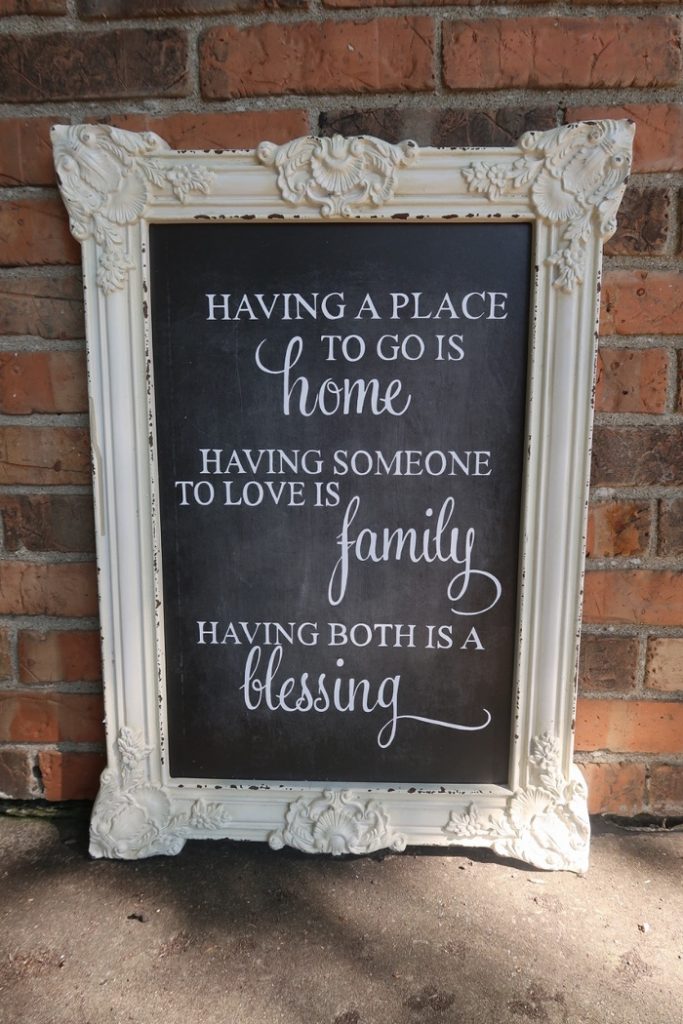
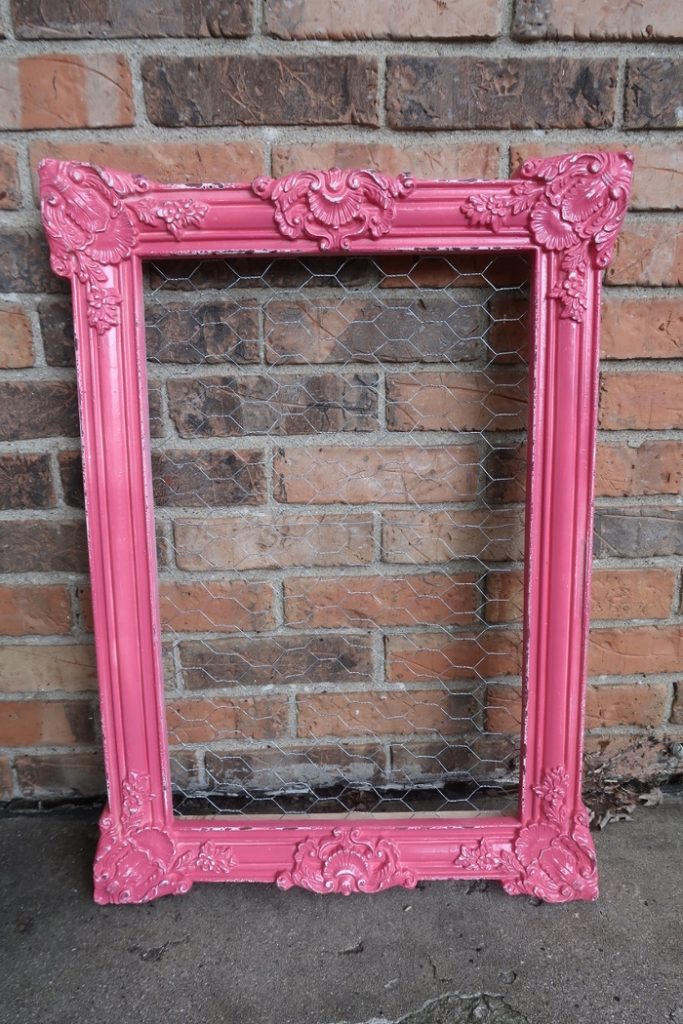
I got this wall art from Hobby Lobby several years ago. The only reason I bought this piece of art was because I loved the vintage-inspired, ornate framing. Don’t get me wrong, I also love the quote that was written inside of it, but the font just wasn’t my jam. So I bought it solely because I fell in love with the frame and I knew it would be for a DIY project later on down the road. At the time, I didn’t know what I was going to do with it, but I was just waiting patiently for the perfect DIY to incorporate.
If you’ve got an old photo frame that’s just sitting around, but you love it too much to let it go, this would be the perfect DIY. You could also use a thrifted picture frame; thrift stores and flea markets have the most beautiful intricate frames that would make a bold statement on this DIY earring holder.
Oh and by the way, I know I keep calling this an earring holder, but you can also hang/store necklaces, sunglasses, hair bows, ribbons, or photos with clothespins. Hey, this is your project-I’m just (hopefully) giving you some inspiration.
Making the Repurposed Chicken Wire Earring Holder
What you’ll need:
- Picture frame
- Chicken Wire
- Staple Gun
- Screws or industrial strength glue
- Spray paint / chalk paint (whatever paint you like, this is optional)
- Sandpaper (optional, if you want the vintage look)
Instructions
Prepping the Frame
First, you’ll want to remove the hanging hardware from the back of your frame. Set the hardware to the side, but don’t lose it. You’re going to need it later.
* I had to remove the wall art inside of the frame. The wall art was stapled inside of the frame, so I removed it with a mallet and a chisel (with a rubber guard on it).*
Painting the Frame
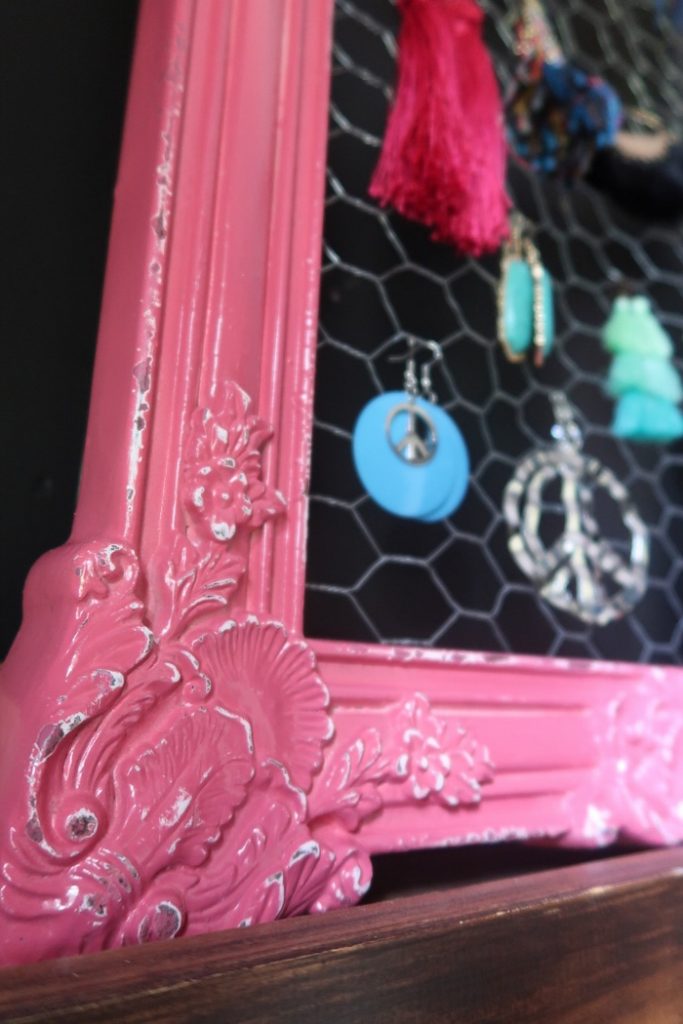
Then, paint your frame (this step is optional). I opted to go bold with my favorite color, pink! The spray paint I used is Krylon in the color “Watermelon” in gloss.
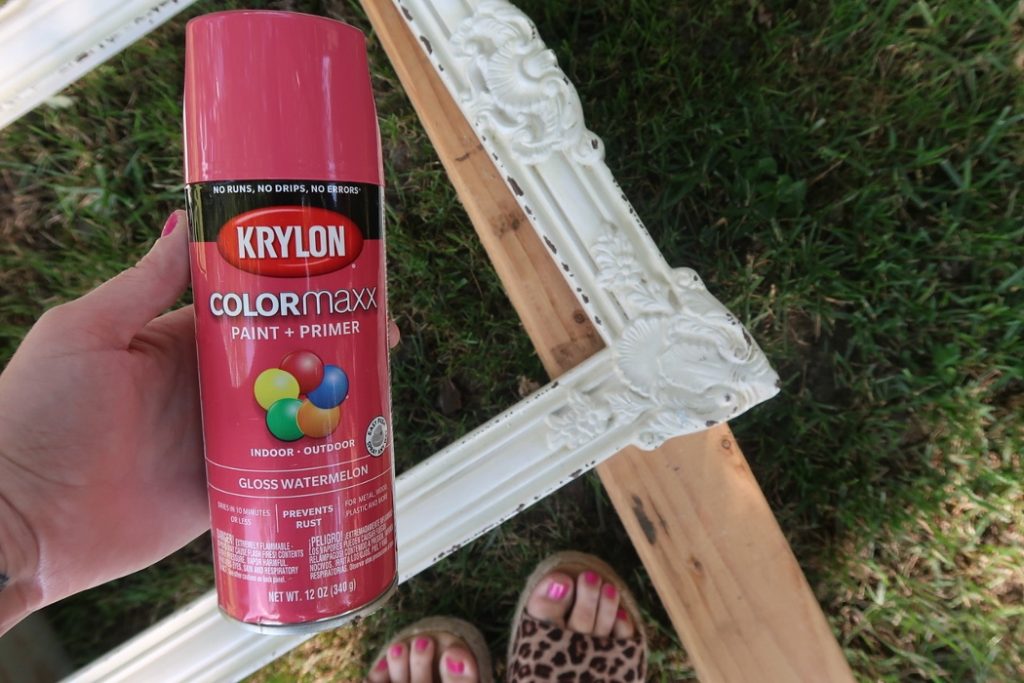
This color looked great, but it wasn’t exactly what I had envisioned. It looked too pretty. I wanted to create a vintage and worn look, so after the paint was dry I lightly went over the frame with some sandpaper. Doing that gave it the look I was going for.
Adding the Chicken Wire
I flipped the frame onto the back and attached the chicken wire with a staple gun and made sure the chicken wire was cut bigger than what I needed. I stapled one in every four-wire hole and cut the excess chicken wire off with wire snips. Be careful handling chicken wire! It is exposed wire; it’s very sharp and will cut you! Wear gloves to protect your hands from cuts.
Hanging the Frame
If you want to hang this frame from the wall-this step is critical! You need to frame the back. I attached the frame with some 1×2’s cut to size and screwed them into the back.
By framing out the back, will offset from the wall so that it’s not flush against the wall.
Then you just want to attach your hanging hardware back onto the frame and call it a day!

I hope that this Repurposed Chicken Wire Earring Holder post gave you some inspiration to create something today! Thank you again for having me on your blog and I’m looking forward to sharing more projects with you.