• Project Gallery
  • DIY
    • Recycled DIY
    • Upcycled DIY
    • Repurposed DIY
    • Refurbished DIY
    • DIY Furniture
    • Repurposed Furniture
    • Thrift Store Transformations
  • Crafts
    • Wood Crafts
    • Paper Crafts
    • Photo Crafts
    • Kids Craft Ideas
    • Doll Crafts
    • Felt Crafts
    • Stenciling
    • Gift Wrapping
    • Printables
  • Party
    • Birthday Party
    • Baby Shower
    • Bridal Shower
    • Wedding
    • Team Sports
    • Sweets and Treats
    • Cocktail Corner
  • Holidays
    • St. Patrick’s Day
    • Easter
    • Earth Day
    • Teacher Appreciation
    • Mother’s Day
    • Father’s Day
    • Fourth of July
    • Back to School
    • Halloween
    • Halloween Costumes
    • Thanksgiving
    • Elf on the Shelf
    • Christmas
    • New Years
    • Valentine’s Day
  • Home & Garden
    • Storage & Organization
    • Cleaning Tips
    • Gardening
    • Makeovers
    • Kid Stuff Makeovers
    • DIY Tips & Tricks
    • DIY Artwork
    • Curb Appeal
  • Health & Beauty
    • Health & Wellness
    • Bath & Body
  • Nav Social Menu

    • Facebook
    • Instagram
    • Pinterest
    • Twitter
    • YouTube

DIY Inspired

Repurpose, Reinvent

  • About
  • Contact
  • Advertising
  • Featured
  • Disclosure

DIY Furniture DIY Tips and Tricks

Wine Crate Shelves

A few posts ago I wrote asking for help on recycled wine crate ideas.  I FINALLY thought of something!

But first, as a recap, I’ve had these wine crates from a Wine Tasting Bridal Shower that I did.  You can get wine crates from any specialty wine store.  Oftentimes they are free or some stores sell them for about five dollars apiece.

Materials:

  • 3 Wine Crates
  • Stain (optional)
  • Polyurethane (Optional)
  • Paint Brush (Optional)
  • Rag (Optional)
  • Four ¼” 20X36” Threaded Rods
  • Eight ¼” Cap Nuts
  • 24 ¼” Flat Washers
  • Knob

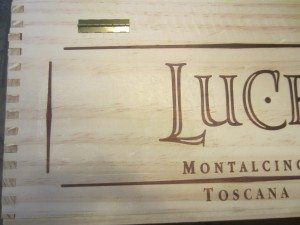
Here are the wine crates before.

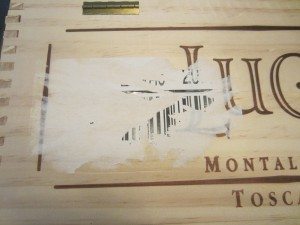
As you can see here, there were white sticker labels on some of them.

To remove stickers from unfinished wood, apply heat directly with a hairdryer, peel, and voila! No sticker!

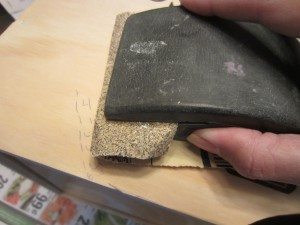
As most wine crates are made out of unfinished wood, I wanted to darken them a little with stain to give them a weathered look.  I purchased a sample from a hardware store for less than three dollars.  To do this, I first sanded and rough spots with 150-grit sand paper.

Next, I applied the stain with a paint brush. Each stroke should be in the direction of the wood grain.

Wipe the stain off with a cloth or old rag in the direction of the wood grain. I did this to the top, bottom, sides, and inside for all three crates.

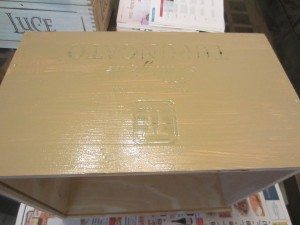
Once the stain is completely dry (check the drying time on the stain you choose), apply a coat of polyurethane to each crate.

When the polyurethane is dry (approximately two hours), align the bottom and middle crate with the bottom crate upside down (as shown below).  This will make it easiest to drill and align the holes.

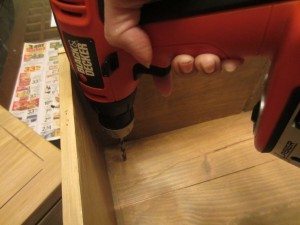
Using a ¼” drill bit, drill a hole in each corner, drilling through both crates.

Next, align the middle and top crates, turning the top crate upside down (as shown).  Using the holes in the middle crate as guides, drill the four holes in the top crate.

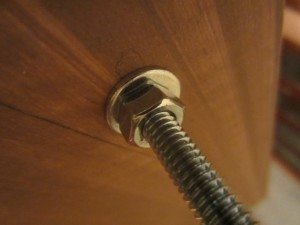
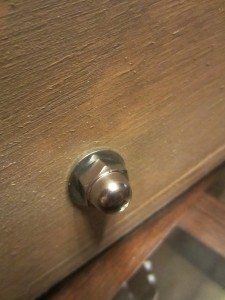
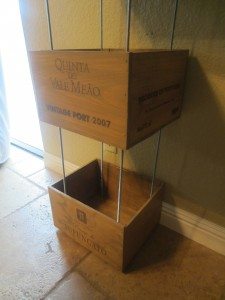
Insert each threaded rod one by one and sucure each one with a nut and bolt on both sides. Use cap nuts for the bottom and top.

I think 24 inch threaded rods may work better (sturdier). I may perhaps add metal brackets for more support too because of the height.

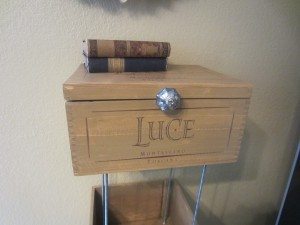
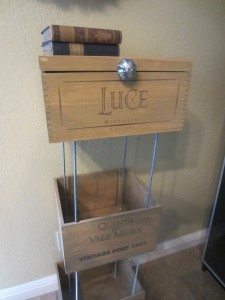
I added a decorative knob to the top crate with a lid.  I used a pre-existing hole.

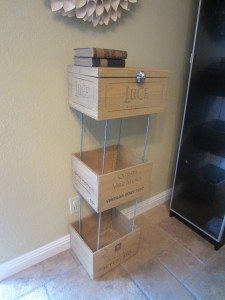
Here are some after photos.

I think this would be perfect in a kitchen or bathroom for extra storage, or for plants!


  • Share
  • Twitter


5 Comments

Join our Community of Crafters!

Stay updated and never miss a thing!

Disclosure and Privacy Policy
Previous Post: « Repurposed Lighting Inspiration
Next Post: TerraCycle Upcycled Valentine’s Craft »

Reader Interactions

Comments

  1. Ann says

    February 13, 2012 at 6:47 am

    Anything for extra storage. I like it as a plant stand for the patio.

    Reply
  2. Marcy says

    February 14, 2012 at 8:23 pm

    Thanks for the hair dryer tip. That’s a good one!

    Reply
    • dwulf says

      February 14, 2012 at 8:25 pm

      You are very welcome! Thank you!

      Reply
  3. Winepine says

    June 1, 2012 at 8:58 pm

    Excellent and very thorough post. I especially liked how you applied the stain with a paint brush. Was streaking an issue or was that the look you wanted? Also, did you encounter and residue upon sticker removal? If so, how did you remove it? The project came out great!

    Reply
    • dwulf says

      June 2, 2012 at 7:08 am

      Thank you s much! Streaking wasn’t an issue at all 🙂

      To remove the sticker, simply heat it with a hair dryer and peel!

      Reply

Leave a Reply Cancel reply

Your email address will not be published. Required fields are marked *

This site uses Akismet to reduce spam. Learn how your comment data is processed.

Primary Sidebar

Welcome!

DIY Inspired Profile Picture 2015Thank you for visiting! I'm Dinah and I am a full time Mother, Blogger and Writer. I'm honored to be named one of Mashable's 10 Mom Blogs Full of Inspiring Advice. {Read more about me here}

Join our Community of Crafters!

Stay updated and never miss a thing!

Disclosure and Privacy Policy

Stay updated and never miss a thing!

Footer

You might also love these

Easy Felt Flower Barrettes

DIY No Sew Felt Flowers

DIY Felt Tassel Keychains

DIY Felt Tassel Keychains

Awkward Shaped Gifts Wrapping Idea

12 Clever Gift Wrapping Ideas

Easy Gift Idea for Boyfriend

Easy DIY Photo Holder

Paper Flower Gold Hoop Wreath

30 Paper Flower Craft Tutorials

Copyright © 2021 · Divine theme by Restored 316

Copyright © 2005–2021 DIY Inspired. Installed and customized by TCN Design Studio