DIY Colored Glass Tutorial
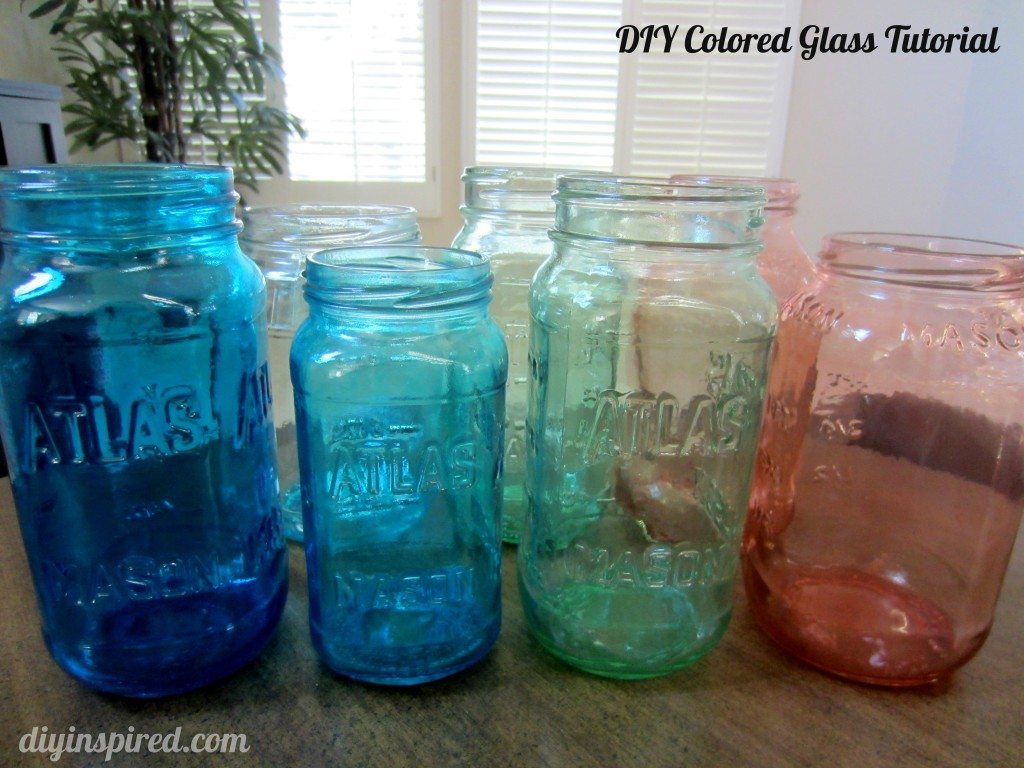
Since I have done so many mason jar crafts, I have always wanted to try DIY Colored Glass. I searched the web and found some great tutorials, but as always found my favorite one and tweaked it a little. I love these jars because they are so pretty and useful at the same time. You can use them for craft, kitchen, or bathroom storage. You can also use them as centerpieces with flowers. Here is my version of the DIY Colored Glass Tutorial with some tips and tricks along the way.
Step One:
Gather your materials.
You will need:
- Recycled glass jars (sauces, pickles, dressings, etc)
- Water
- Craft glue
- Food coloring
(I used neon because that is what I had, but regular food coloring works well too)
- Glass ramekins
- Spoons
- Wax paper
- Cookie sheet
- Paper towel
- Oven
Step Two:
Preheat the oven to 200 degrees and line your cookie sheet with wax paper.
Step Three:
Add the ingredients to the ramikins (approximately)
- 2 tablespoons of glue
- 1 tablespoon of water
Step Four:
Mix your ingredients thoroughly. You don’t want the mixture too thick because it will be too hard to cover the glass, and you don’t want it too watery because it will create streaks. The consistency is similar to Alfredo sauce (that’s the best way for me to describe it)! Also, because you are using such a small amount of glue and water, you only need one or two drops of food coloring depending on the desired color.
Step Five:
Pour the mixture into your glass and slowly tilt and twirl the jar until the entire jar is covered.
Step Six:
Allow the excess to drip back into the ramekin. I was able to color two jars with each mixture.
Step Seven:
Place the jars upside down on a wax lined cookie sheet and allow the liquid to drain. If you notice streaks, your mixture was too thin. You can start over at this point (without rinsing) and cover the glass again with a new and thicker mixture (I know this from experience)!
Step Eight:
Once your jars are drained, remove the wax paper and wipe the edge of the rim with a wet paper towel. Be careful not to wipe off the inside of the rim.
Step Nine:
Place the jars upright onto the cookie sheet and place them in the oven. Let them cure for 45 minutes to one hour.
Handle with care when removing them from the oven. Once they are cool you can use mason jars for so many things including craft storage or flower vases.
Note: The tutorials that I read said that you can put water in them for flowers, however I found this not to be the case! Flowers with no water? No problem. I personally use them for craft storage such as paint brushes, colored pencils, scissors, rulers, markers, etc. Here are some fabulous suggestions from DIY Inspired Facebook friends!
” I just created a girls gift, and put in the jar an entire nail polish kit.” – Manon Roderick
“Christmas lights make a cute night lite.” – Nicki Etheridge
“Colored hanging tea lights, centerpieces, and potpourri pedal holders. My wife suggested filling them with Jewels, stones, seashells and making them into a lamp base.” – Chris Carl
“Pad the top to make it a pin cushion and inside the jar could be a sewing kit. You can use them as candle holders (attach a glass taper candle holder to the bottom so it has a base). Use them as a vase with coordinating colored flowers in them. Put a slot in the top and make it a pretty bank.” – Frugal Sally
“My momma just converted several of her “old blue glass” ones into functioning oil lamps…they’re great!!!” – Heather Mueller
“We are putting bath salts in them.” – Hope E Barker, Photos Of Hope



Can you store food in them? these would look great for gifts jars with peppermint cocoa and Christmas tea!
Hi there!
I read that you could, but I personally would not unless it was wrapped candies or another wrapped food. Thanks for stopping by and commenting!
Step 3 has 1 TBS water listed twice . . . . just checking to make sure this is correct. Thanks
Thank you Camille for catching that! Just corrected it! It only calls for 1 TBS. 🙂
If they are not drying correctly, what is my problem??? I am using Mog Podge glossy and cake coloring ……..I am finding they are not ending up looking even with color AND when i put into the oven~~ the bottom of the jars had bubbles…the size of pea’s…
Hmmm… Try baking them longer to remove bubbles, or just leave them out for a few days to allow them to cure. For the unevenness in color, make sure you mix the glue and coloring very well before adding it to the jar.
I have the same issue!
Hi Dinah- wanted the transparent colour effect… but the paint you used in the step by step instruction is solid. Would it come out transparent after baking?
Hi Lulu! Yes! The color is transparent after you bake it 🙂 Thank you for stopping by!
I only have matte mod podge at the moment, do you think there will be a big difference if i use that instead of the luster?
Hi Kara! I think it will work fine.
What happens if I use mod podge and put water in it for flowers?
In the tutorials I read they said you can put flowers in them with water but I found that this was not the case. What I have done in the past is insert a smaller glass container inside to fill with water and then place the flowers inside. Hope this helps!
What degree on the oven should I bake then?
200
Is this 200F or 200C?
F
Do you have any tutorials on painting glass jars on the outside an how to avoid it looking streaky?
Hi Jenny! This will take some trial and error. For painting on the outside, you will need to try different types of brushes. I would even try a small craft foam roller. If you try a roller, you may need more mixture than what is called for in the tutorial. To avoid streaks, you have to play around with the thickness of your mixture. I hope this helps!