• Project Gallery
  • DIY
    • Recycled DIY
    • Upcycled DIY
    • Repurposed DIY
    • Refurbished DIY
    • DIY Furniture
    • Repurposed Furniture
    • Thrift Store Transformations
  • Crafts
    • Wood Crafts
    • Paper Crafts
    • Photo Crafts
    • Kids Craft Ideas
    • Doll Crafts
    • Felt Crafts
    • Stenciling
    • Gift Wrapping
    • Printables
  • Party
    • Birthday Party
    • Baby Shower
    • Bridal Shower
    • Wedding
    • Team Sports
    • Sweets and Treats
    • Cocktail Corner
  • Holidays
    • St. Patrick’s Day
    • Easter
    • Earth Day
    • Teacher Appreciation
    • Mother’s Day
    • Father’s Day
    • Fourth of July
    • Back to School
    • Halloween
    • Halloween Costumes
    • Thanksgiving
    • Elf on the Shelf
    • Christmas
    • New Years
    • Valentine’s Day
  • Home & Garden
    • Storage & Organization
    • Cleaning Tips
    • Gardening
    • Makeovers
    • Kid Stuff Makeovers
    • DIY Tips & Tricks
    • DIY Artwork
    • Curb Appeal
  • Health & Beauty
    • Health & Wellness
    • Bath & Body
  • Nav Social Menu

    • Facebook
    • Instagram
    • Pinterest
    • Twitter
    • YouTube

DIY Inspired

Repurpose, Reinvent

  • About
  • Contact
  • Advertising
  • Featured
  • Disclosure

Crafts Holidays

DIY Wooden LOVE Sign

How to Make a Glittered Black and White DIY Wood LOVE Sign for Your Home Decor

“Let us always meet each other with smile, for the smile is the beginning of love.” – Mother Teresa

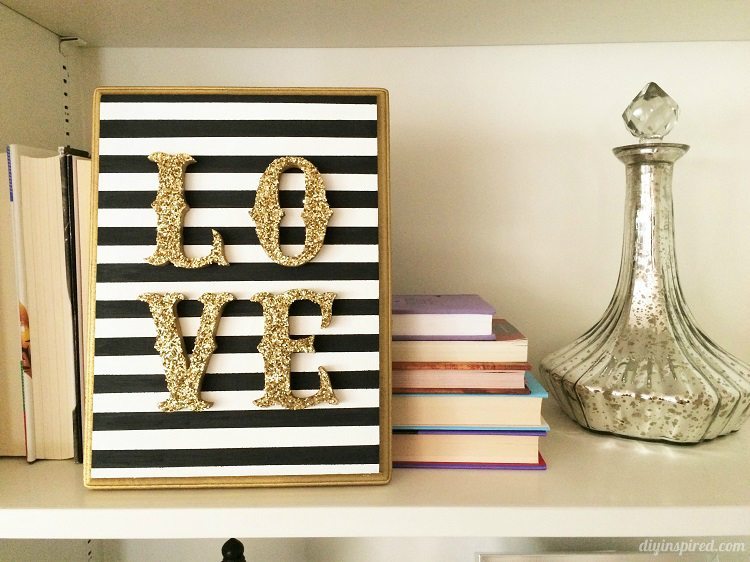
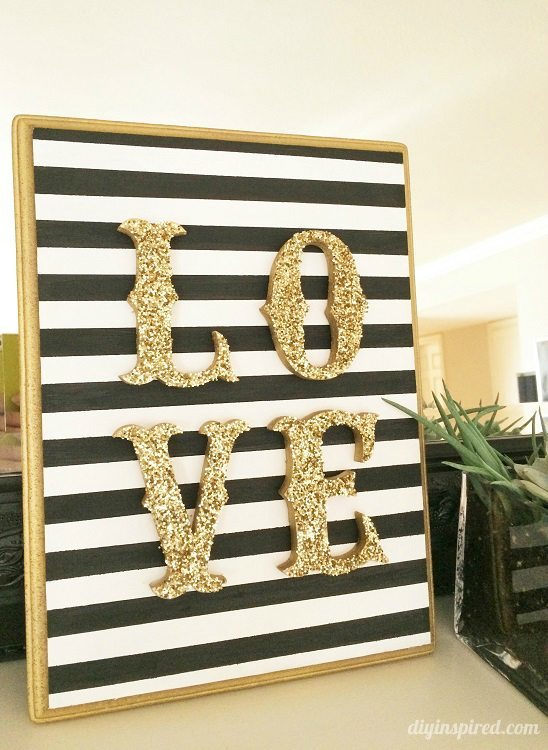
One of the first things I decorated when we moved into our new house was the bookcase.  I love it because now my collections are all displayed in one place versus randomly around the house (or tucked in drawers or cabinets) like they used to be. With Valentine’s Day coming up, I thought I’d make something special for my bookcase that complimented my black, white, and gold décor. So, I came up with this easy DIY wooden LOVE sign.

DIY Wooden LOVE Sign

Time: 60-90 Minutes (including dry time)

Materials:

This materials list contains some affiliate links of recommended products that I use.

  • Wooden Plaque
  • L-O-V-E Wooden Letters
  • Sand Paper
  • Gold Spray Paint or Gold Acrylic Paint
  • White Paint
  • Black Paint
  • Foam Paint Brushes
  • Pencil
  • Ruler
  • Painter’s Tape
  • Glue
  • Gold Glitter
  • Hot Glue and Glue Gun

Making the DIY Wooden LOVE Sign

I found these wooden letters and wood plaque at Michael’s craft store for around $10 total.

The first thing I did was lightly sand the edges to remove splinters.

Next, I used some gold spray paint to paint the edges of the plaque, and the edges and inside of the letters. Since the letters are so small, you may get spray paint on your fingers. The easiest way to remove it is with nail polish remover and a cotton ball.

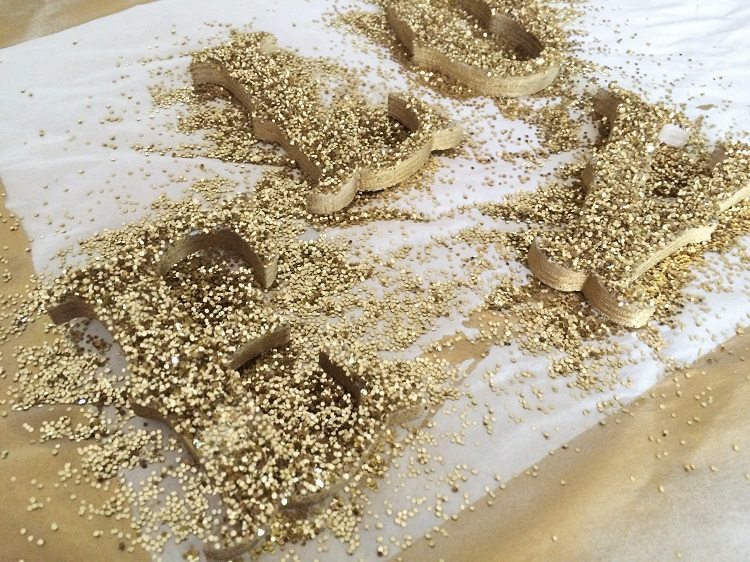
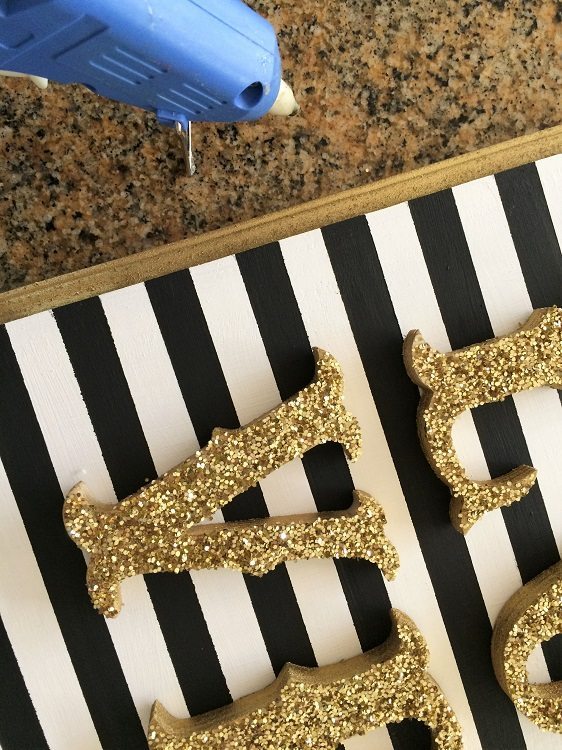
Next, I applied glue to the top of the letters with a foam brush and sprinkled gold glitter on top. Set them aside to dry.

Glittered Gold Letters

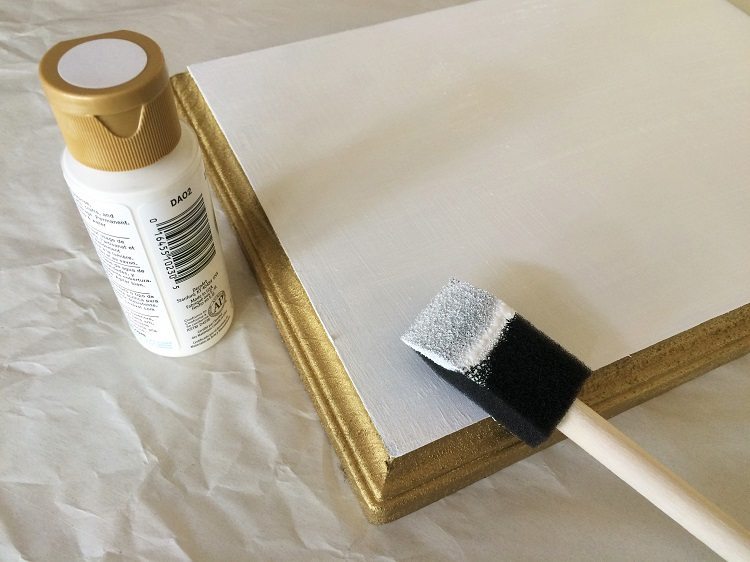
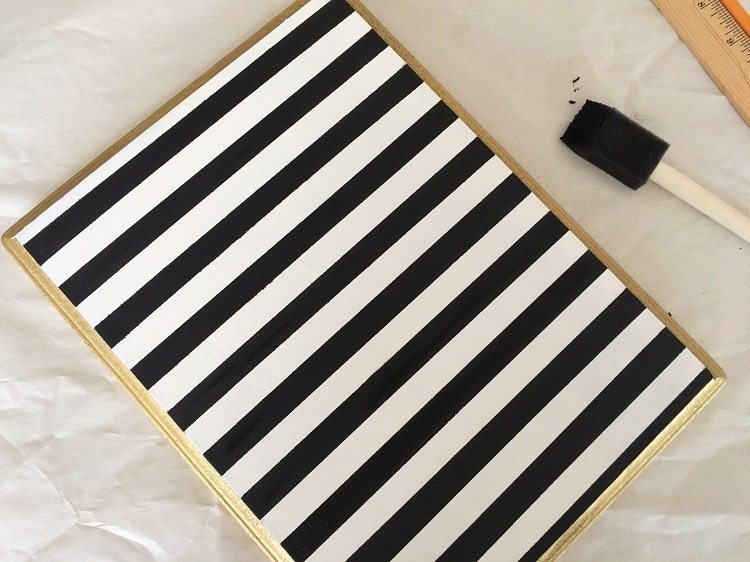
While the letters are drying, paint the top of the plaque white. I painted three coats. I only waited about 5 minutes in between coats.

DIY Valentine's Day Sign

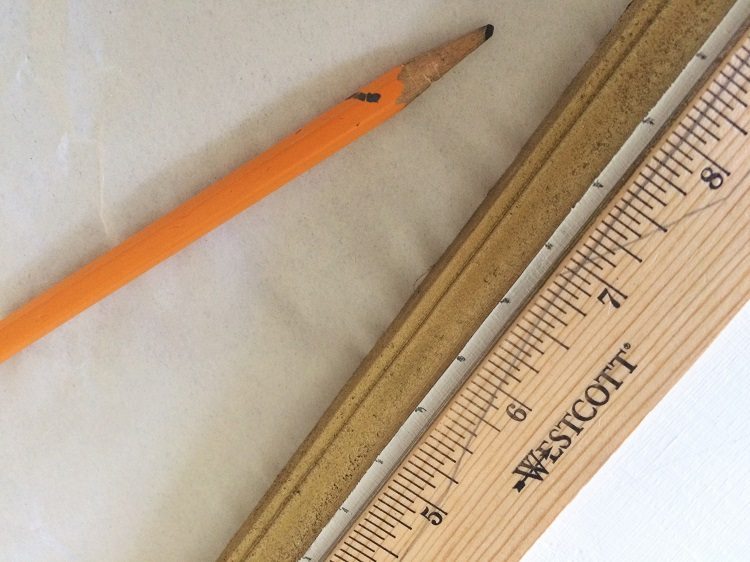
Once the paint is dry, I used a ruler and pencil to mark every half inch on each side.

DIY Valentine Craft

The fastest way to paint the black stripes, paint every other black stripe so you don’t have to wait for each stripe to dry. Them go back and finish the other stripes.

Striped LOVE Sign

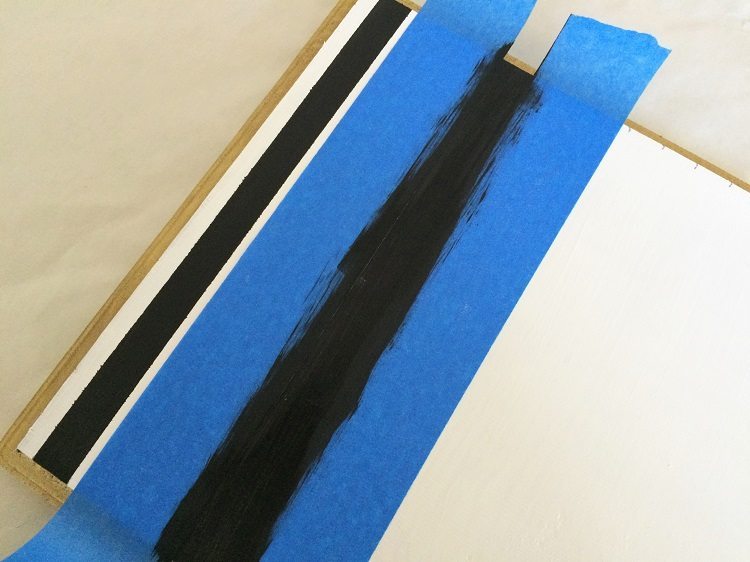
When placing the painter’s tape, use the pencil marks as a guide for straight lines. Make sure the tape is tightly sealed to prevent bleeding.

Black and White Valentines Day Craft

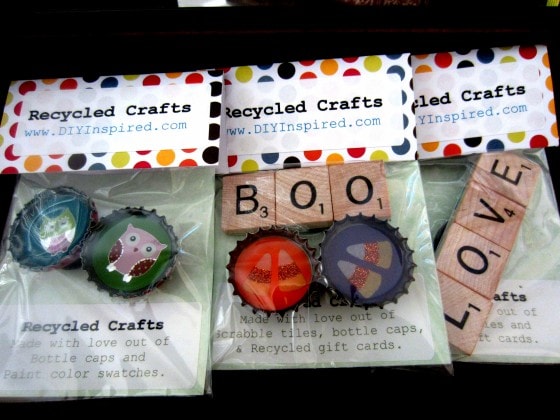
Lastly, use hot glue to glue the letters onto the plaque.

DIY Valentines Day Sign

Like this DIY Wooden LOVE Sign? Pin it!

DIY Wooden LOVE Sign DIY Inspired

More Valentine’s Day DIY’s

  • True Love Punch You in the Face Printable
  • Kid’s Craft: Valentine’s Day Lunch Bags
  • Quick and Easy Valentine Treats
  • DIY Heart Wall Art

You may also like this fun Valentine DIY playlist of my projects!

  • Share
  • Twitter


1 Comment

Join our Community of Crafters!

Stay updated and never miss a thing!

Disclosure and Privacy Policy
Previous Post: « 15 Minute Craft: Paper Towel Roll Valentine Scroll
Next Post: Saint Patrick’s Day Leprechaun Trap Tradition »

Reader Interactions

Comments

  1. Mariyah says

    January 23, 2019 at 12:01 pm

    We loved this project so much we included it in our article – 21 Best Valentine’s Day Decor Ideas! Thank you for creating such a beautiful project. Feel free to check it out! https://www.craftcuts.com/community/valentines/21-best-valentines-day-decor-ideas/

    Reply

Leave a Reply Cancel reply

Your email address will not be published. Required fields are marked *

This site uses Akismet to reduce spam. Learn how your comment data is processed.

Primary Sidebar

Welcome!

DIY Inspired Profile Picture 2015Thank you for visiting! I'm Dinah and I am a full time Mother, Blogger and Writer. I'm honored to be named one of Mashable's 10 Mom Blogs Full of Inspiring Advice. {Read more about me here}

Join our Community of Crafters!

Stay updated and never miss a thing!

Disclosure and Privacy Policy

Stay updated and never miss a thing!

Footer

You might also love these

Thrift Store Tea Party Decorations

Upcycled Thrift Store Teapots

DIY Recycled Milk Jug Flowers Tutorial

Clever Trash to Treasure Earth Day Crafts

Easy Paper Butterflies Craft - DIY Inspired

How to Make Paper Butterflies

Front Door Wreath with Floating Numbers

Torched Address Wreath with Floating Numbers

Crazy Hair Day Yogurt Cup

Crazy Hair Day Ideas for Boys and Girls

Copyright © 2021 · Divine theme by Restored 316

Copyright © 2005–2021 DIY Inspired. Installed and customized by TCN Design Studio