Chigiri-e Flower Notebook Tutorial
If you have been following me, you know that I have been trying a Japanese paper craft called Chigiri-e. I recently made a DYI Memo Board along with a Chigiri-e keep sake card. This time, I thought I would try creating my own design from the left over washi I have from my Japanese Creations design kits to upcycle one of Mia’s notebooks. My daughter is in first grade and learning to read and write. She has to practice several sight words and spelling words every week. I wanted to make a keepsake notebook, separate from her school work so that 1) she can practice, and 2) when she is older she can look back at her writing. As I hone in on my Chigiri-e skills, I wanted to try to make a flower with spring just around the corner. I have noticed that many Chigiri-e art has beautifully detailed flowers. This project was a chance to practice the technique. Here is my Chigiri-e flower notebook tutorial.
Time: 30 Minutes to 1 hour
Materials:
- Notebook
- Cardstock or cardboard
- Washi Papers (two colors)
- Scissors
- Starter Tool Kit
Instructions:
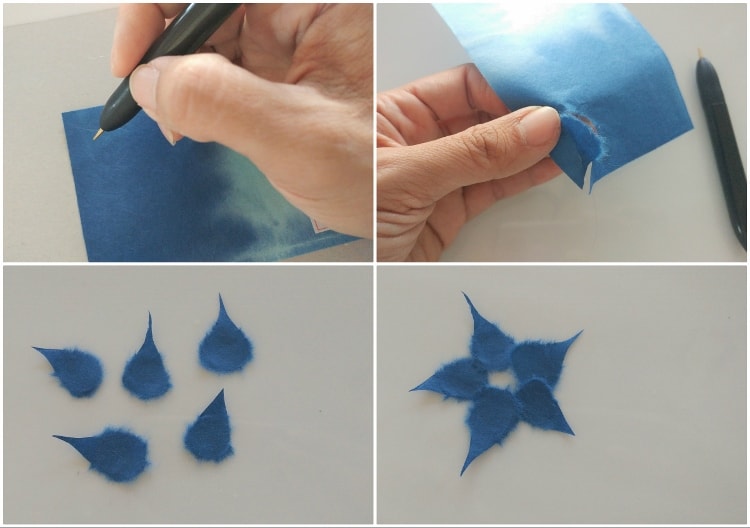
Unlike the other Chigiri-e projects I did, I did not use an image as a template, rather I free handed this flower. First, place the washi paper on top of a piece of cardstock or cardboard. This will make it easier to indent the image into the washi. Next, draw a tear drop shape to form a flower petal with a stylus pen as shown. Be sure to use the stylus with the cardboard underneath applying light pressure. The stylus is helpful because it makes it easier to tear thicker Washi paper. Use scissors to snip the pointed end of the petal and carefully tear out the rest of the petal. Using scissors will give a sharp pointy tip at the base of the flower petal, while tearing it will give a soft fluffy edge, traditional to the Chigiri-e technique. Repeat this process to make five flower petals.
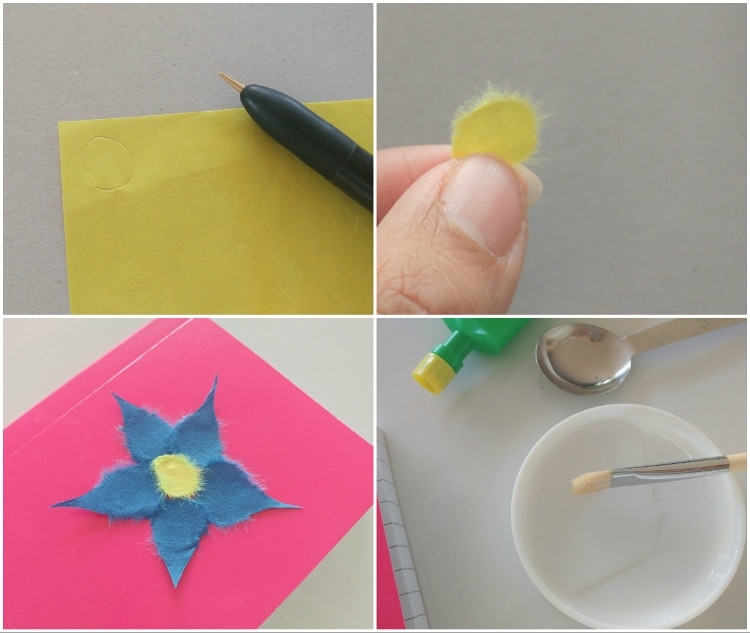
Next, using a contrasting color, draw a circle for the center of the flower with the stylus pen. Tear out the circle. Drop a dollop of Yamato glue in the dish provided in your starter tool kit. I have tried regular glue as well as diluted decoupage medium, however I have found that the Yamato glue works best for this technique and highly encourage using it. Dilute the glue with one spoon of water. Use a brush to mix the glue and the water together. Glue the flower onto the notebook starting with the petals and then ending with the middle of the flower. Allow it to dry completely.
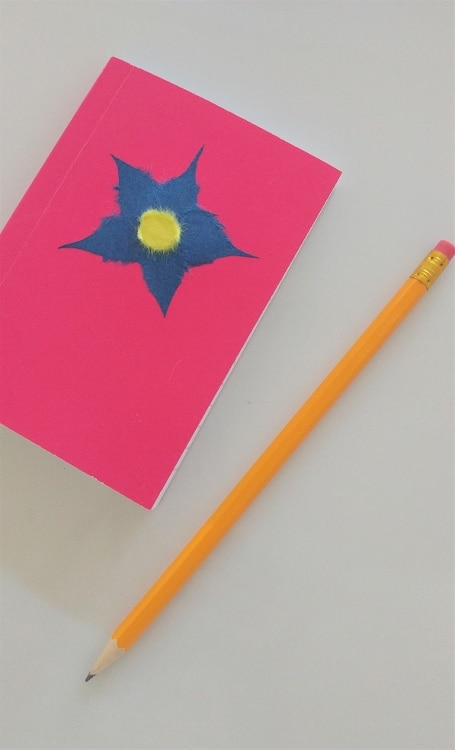
I hope you like it! I’m getting the hang of the Chigiri-e techniques and I think practice makes perfect. I’m looking forward to sharing my next project with you! Stay tuned!
To find out more about the Chigiri-e technique, visit Japanese Creations. There you will find design kits, a complete Chigiri-e Starter Tool Kit, and information on the online instructional program. The online program is a great way to get started learning this fun paper craft. Also, don’t forget to check out my tutorial on how to make a Color Your Heart Out Keepsake, DIY Love in a Cup, and DIY Noshi.
This article, Chigiri-e Flower Notebook Tutorial, is sponsored by Japanese Creations. All opinions are 100% my own.