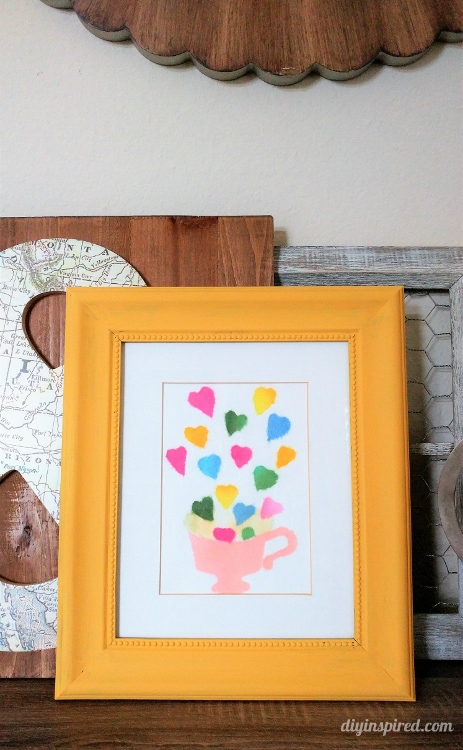
Upcycled Thrift Store Frame with Chigiri-e Art
I am really enjoying fine tuning my Chigiri-e art crafting skills. In my discovery, I have found that this art of tearing Washi paper to create beautiful designs is just that; an art and a technique. For my next project, I decided to try making the Love in a Cup design from Japanese Creations. This kit is a great beginner kit. After I completed it, I thought instead of giving this piece away, I’d rather keep it for myself. Although really fun to do, it’s not a quick and easy craft. I wanted to display my hard work so that I can look at it daily. So today, I am sharing how to make the Love in a Cup design as well as very simple tutorial for an upcycled thrift store frame to display the completed art piece.
Making the Love in a Cup Chigir-e Design
Time: 45 Minutes – 1 hour
Materials:
- Love in a Cup Design Kit
- Starter Tool Kit
- Scissors (optional)
Instructions:
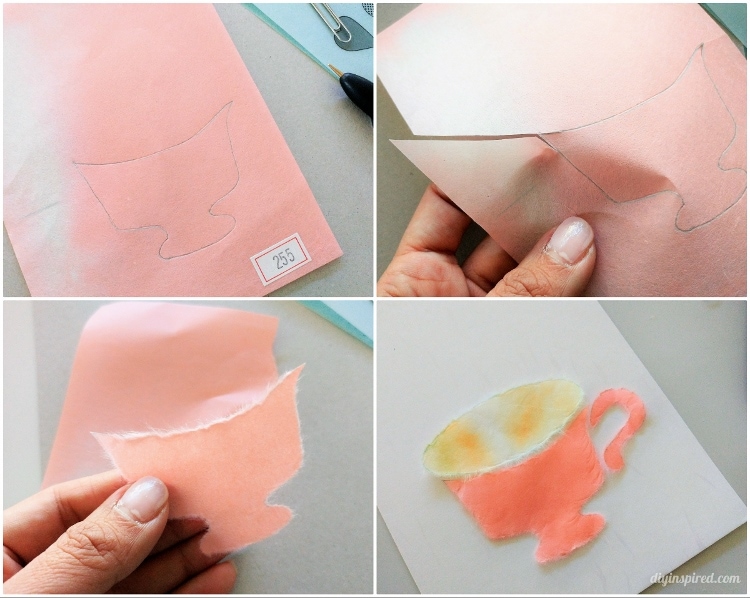
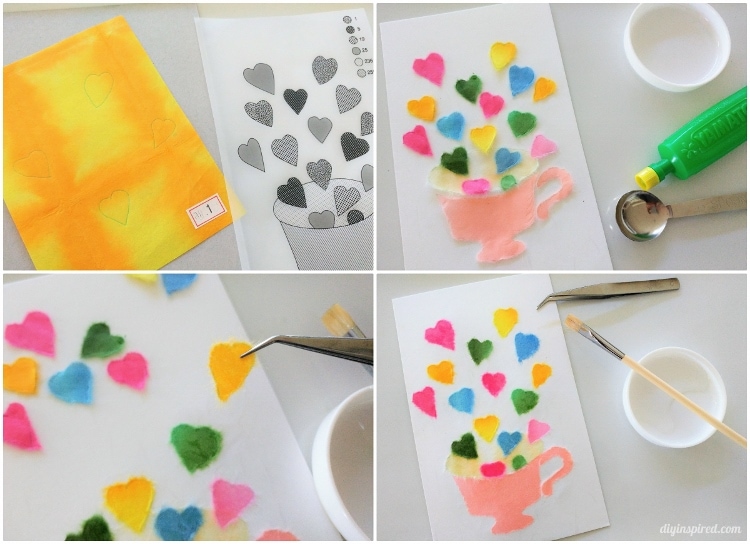
The design kit and starter tool kit come with everything you need to create this design. Using the Chaco paper provided in your kit, transfer each shape onto the Washi using a stylus pen. Start with the largest shape first. In this case, I started with the cup, then the round cup center, then the cup handle, and lastly the hearts. To do this, layer the cardboard on bottom, Washi paper, Chaco paper (rough side down), and lastly the template on top. Secure it with paper clips.
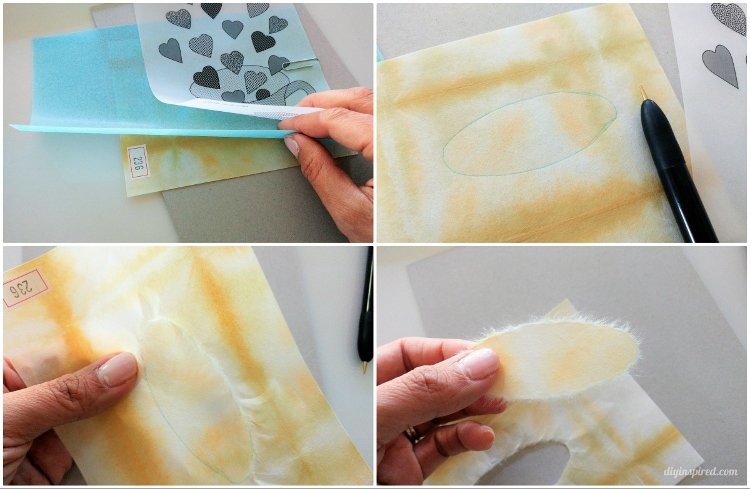
Once your images transferred, use the stylus pen to go over them again with the Washi on top of the cardboard. This is a trick I learned after creating a few of these kits. It makes it easier to tear the Washi. Next, tear the shape out. It helps to use your thumb and fingernail as a guide, while simultaneously tearing., use your thumb and index finger to fluff out the edges. I like to tear out and fluff all the images first before I start gluing the Washi onto the card.
Tip: For small pieces and sharp points, use scissors.
Glue each piece, starting with the largest pieces first and then layering, onto the front of the greeting card provided in the design kit. To glue, mix one small sized drop of glue with one teaspoon of water in the saucer and mix well. I found this ratio to work the best for me. Brush the glue onto the front of the card and place the heart on top smoothing it down. I have tried different types of white glue but found that the best glue to use is the Yamato glue provided in the Starter Tool Kit. Plus, a small amount goes a long way. Therefore, the glue provided in the starter tool kit will last through many design projects.
Allow the design to dry on a flat surface for about an hour. While it dries, it is time to paint a frame.
Upcycling an Old Thrift Store Frame
Time: One hour (includes drying time)
Materials:
- 5 X 7 Frame
- Acrylic Paint
- Paint Brush
- Newspaper
- Clear Sealant (optional)
Instructions:
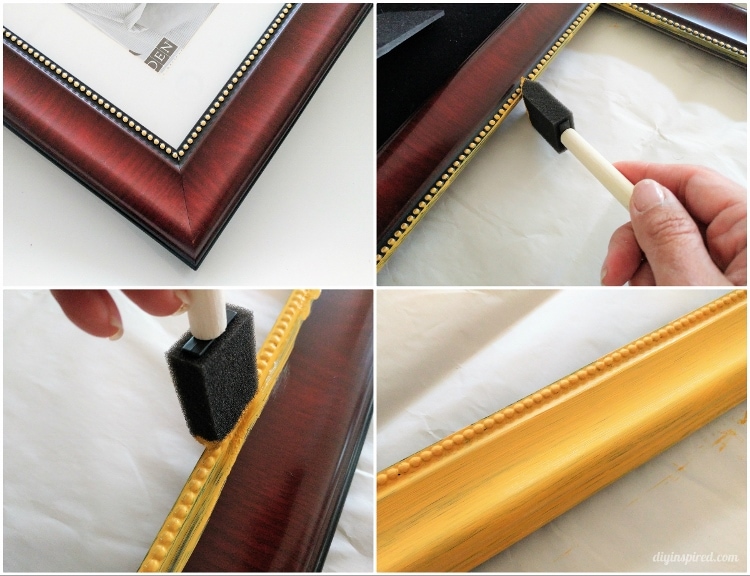
Thrift stores are a great resource for old picture frames. There are usually several styles to choose from for a low price. I picked one that came with a photo mat, to help accentuate the Love in a Cup design. First cover your work surface with newspaper or packing paper. Paint your frame in three light coats of acrylic craft paint, allowing the paint to dry for 10-15 minutes in between coats. If your frame has intricate designs, use an up and down motion with your paint brush to ensure that you reach small crevices. Paint a fourth touch up coat for areas that are needed. If desired, you can distress the paint by lightly sanding over the dry paint with 120-Grit sandpaper. You can also choose to spray a clear sealant on top. I chose yellow to compliment the colors of the Love in a Cup design. This will look great hanging in my daughter’s play area in our living room or in my girl’s bathroom.
I can’t wait to start my next design! The Chigiri-e art form is both challenging and fun and for an avid crafter like me the combination of those two things are very important. Learning this technique has not only been enjoyable, but also stimulating and inspirational. For more information on these beautiful Chigiri-e design kits, please visit Japanese Creations.
Thank you to Japanese Creations for sponsoring this post!
Like it? Pin it!