Decoupage Fabric Pumpkin How To
An Easy Decoupage Fabric Pumpkin How To Tutorial
Decorating for Halloween is always a blast! Making your own Halloween decorations is a great way to add your own style and personality to fit your decor. Today we are sharing a decoupage fabric pumpkin tutorial. All of the supplies for this project can be purchased at your local craft store like Joann or Michaels. Also check the Target Dollar Spot and Dollar tree for inexpensive foam pumpkins.
Materials:
This materials list contains affiliate links for recommended products. If you click on a link and purchase something we will earn a commission at no extra cost to you. Thank you so much for your support!
- Craft pumpkin

- Fabric remnants
- Scissors
- Ruler
- Mod Podge
- Two paint brushes
- Black acrylic craft paint


Instructions:
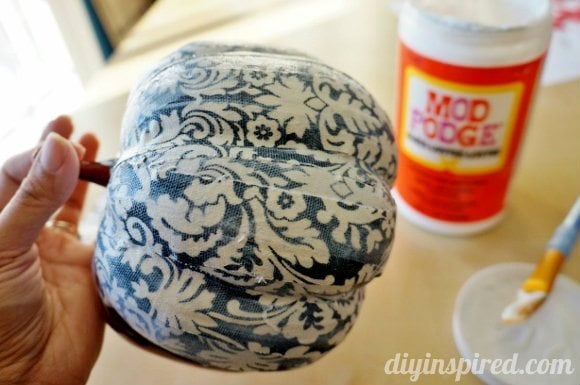
We used fabric remnants for this project to save money. Don’t forget to check your craft stash as well. First, prepare your materials. Measure the distance from the top and bottom core of the pumpkin and cut approximately 1-2 inch thick strips. For this pumpkin, my strips were 9” long.
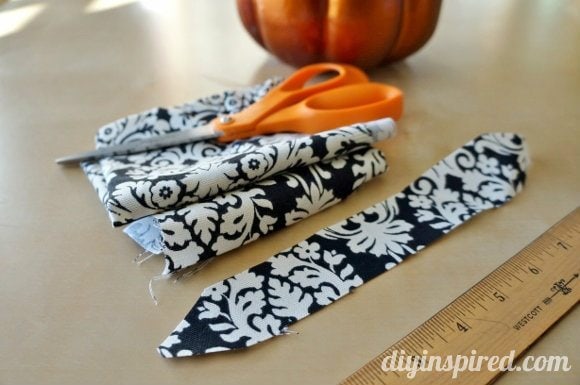
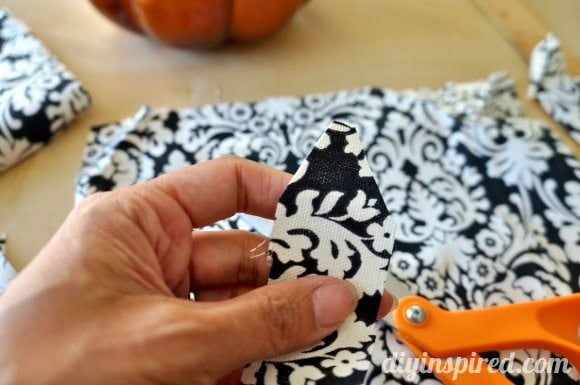
Next, it is easiest to cut both ends into a point as shown. This will make it cleaner looking at the top and bottom of your pumpkin.
You can use any type of Mod Podge you prefer, for example, glitter, glossy or matte.
Generously apply Mod Podge directly onto the pumpkin, lay down a fabric strip, and then generously apply a second top layer of Mod Podge. Using your paint brush, smooth out your fabric against the pumpkin. Apply more Mod Podge as needed.
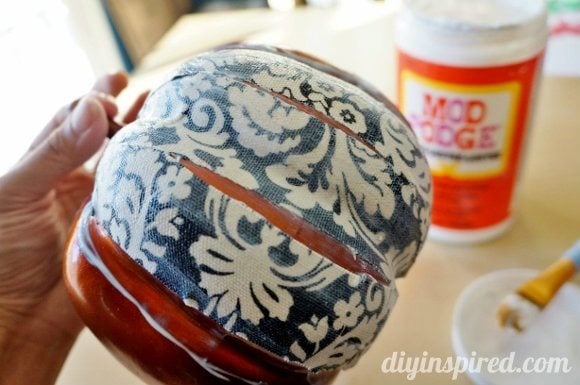
Continue adding each strip until your pumpkin is covered. Allow the pumpkin to dry completely. Use a plastic plate or cooling rack to set your pumpkin on while it dries.
Pro Tip: Place any metal or plastic cookie cutter on top of a paper plate and then set the wet pumpkin on top. This will help so that the pumpkin does not get stuck to your work surface.
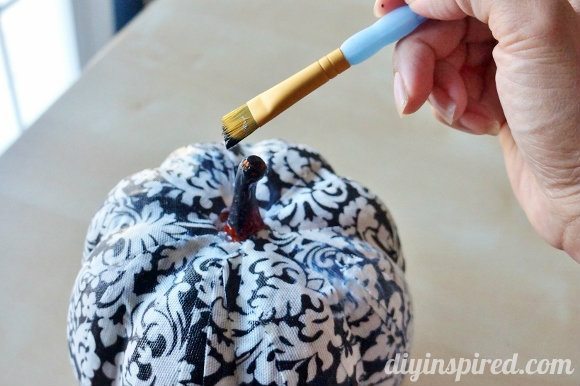
Once the pumpkin is dry, paint the stem in the desired color to match your fabric. Any acrylic craft paint works well.
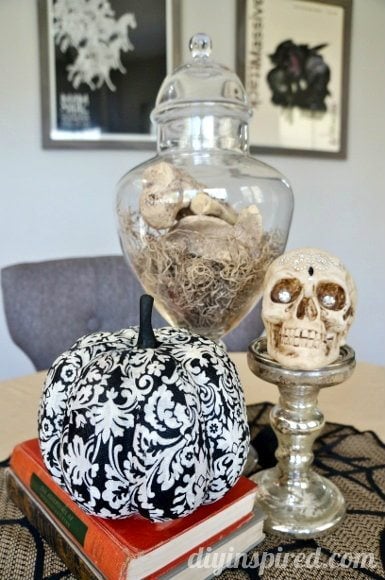
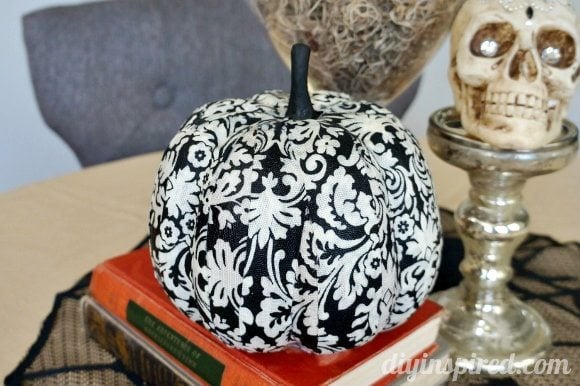
Here are a couple after photos. Add some bones, antique books, and rhinestone skulls to help spook up the space.
More DIY Pumpkin Projects:
Here are a few more fun and easy Halloween DIY ideas. Be sure to check out our YouTube videos, Instagram Reels, and TikToks for the most updated crafts.
- Upcycled Metal Pumpkin Tutorial
- Spooky Stagecoach Pumpkin
- Easy Gold, Black, and White Pumpkins DIY
- Fall Pumpkin Centerpiece
- BOO Pumpkin Halloween Decoration
10/13

too cute too cute! Will be making some of these!
Thanks Angie! It’s SUPER easy! I want to make another one 🙂
I love how that turned out, the fabric is wonderful!
Thank you Kaysi! I have a thing for black and white these days!
That looks great and SO easy. Right up my alley. 🙂
It was!! Thanks, Angela! I hope you try it.
I love how simple this is, definitely looks like something I could do. Thanks for the idea.
Thanks, Britni!! You are very welcome!
I LOVE this Dinah! I think this is something even I can do 🙂
I am definitely making one of these. PLUS…thanks for the coupon!
I really like this easy ideal
Stopping over from Hit Me With Your Blank Shot. Oh my word, I love these! I also love that this is something my toddler can do!
Melanie
http://www.theseblankwalls.com
Thank you, Melanie!
What a great idea, Dinah! I love the whole vignette!
Thank you for sharing this week at Brag About It link party on VMG206 (Mondays at Midnight). I plan to feature you next week!
~ Megin of VMG206
Woo hoo! Thank you so much, Megin! And thank you for having me!
How fun was that!!
Love the pattern.
Here from HomeMatters.
Thank you, Melinda!
Hi Dinah…….Love your Decoupage Pumpkin idea. So pretty. Thanks for sharing at INSPIRE ME MONDAY link party. I am pinning and will be featuring your Decoupage Fabric Pumpkin at INSPIRE ME MONDAY’S link party. I hope you come by and share again.
Woo hoo!! Thank you so much and thank you for having me. I will definitely be sharing again. 🙂
Very chic and sophisticated! I love that print.
Thank you, Kathleen!
My orange pumpkin showed thru the white of my fabric. Any suggestions
Hi Cheryl! I would suggest using a heavier fabric for light colors.
You could also paint your pumpkin white (or whatever color is the dominant fabric color) ahead of time.
Great idea!