• Project Gallery
  • DIY
    • Recycled DIY
    • Upcycled DIY
    • Repurposed DIY
    • Refurbished DIY
    • DIY Furniture
    • Repurposed Furniture
    • Thrift Store Transformations
  • Crafts
    • Wood Crafts
    • Paper Crafts
    • Photo Crafts
    • Kids Craft Ideas
    • Doll Crafts
    • Felt Crafts
    • Stenciling
    • Gift Wrapping
    • Printables
  • Party
    • Birthday Party
    • Baby Shower
    • Bridal Shower
    • Wedding
    • Team Sports
    • Sweets and Treats
    • Cocktail Corner
  • Holidays
    • Valentine’s Day
    • St. Patrick’s Day
    • Easter
    • Earth Day
    • Teacher Appreciation
    • Mother’s Day
    • Father’s Day
    • Fourth of July
    • Back to School
    • Halloween
    • Halloween Costumes
    • Thanksgiving
    • Elf on the Shelf
    • Christmas
    • New Years
  • Home & Garden
    • Storage & Organization
    • Cleaning Tips
    • Gardening
    • Makeovers
    • Kid Stuff Makeovers
    • DIY Tips & Tricks
    • DIY Artwork
    • Curb Appeal
  • Health & Beauty
    • Health & Wellness
    • Bath & Body
  • Nav Social Menu

    • Facebook
    • Instagram
    • Pinterest
    • Twitter
    • YouTube

DIY Inspired

Repurpose, Reinvent

  • About
  • Contact
  • Advertising
  • Featured
  • Disclosure

DIY Party Ideas

Spray Painted Glittered Milk Glasses

This article, Spray Painted Glittered Milk Glasses is sponsored by Bounty. All opinions are 100% my own.

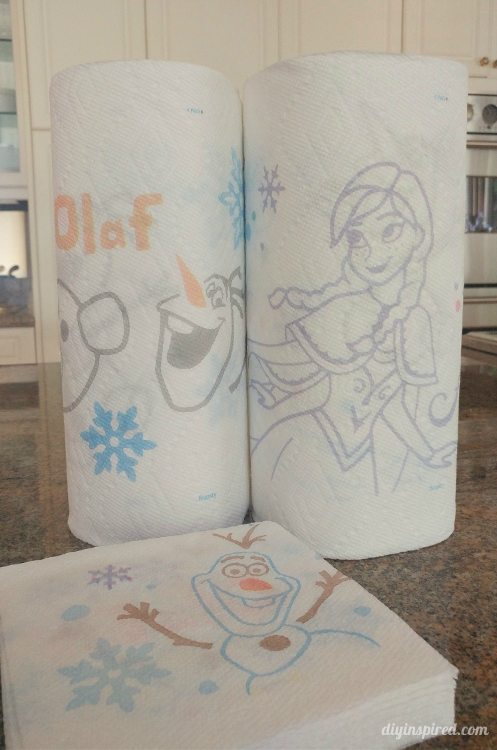
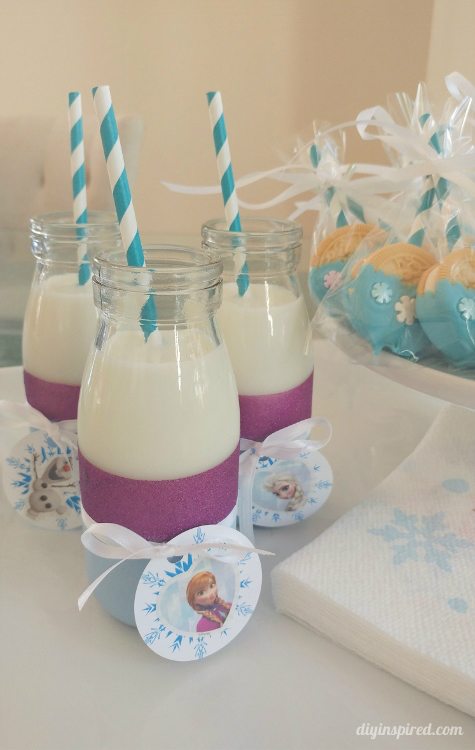
In honor of the limited-edition NEW Bounty Prints Featuring Disney Frozen, I thought I’d help celebrate the arrival by making these simple spray painted glittered milk glasses for a Disney Frozen themed party. The NEW Bounty Prints Featuring Disney Frozen come in Paper Towels and Quilted Napkins. Aren’t they fun? They are a must-have to help with party and craft clean up.

bounty-prints-featuring-disney-frozen

You only need a few items to make these Disney Frozen inspired glasses.
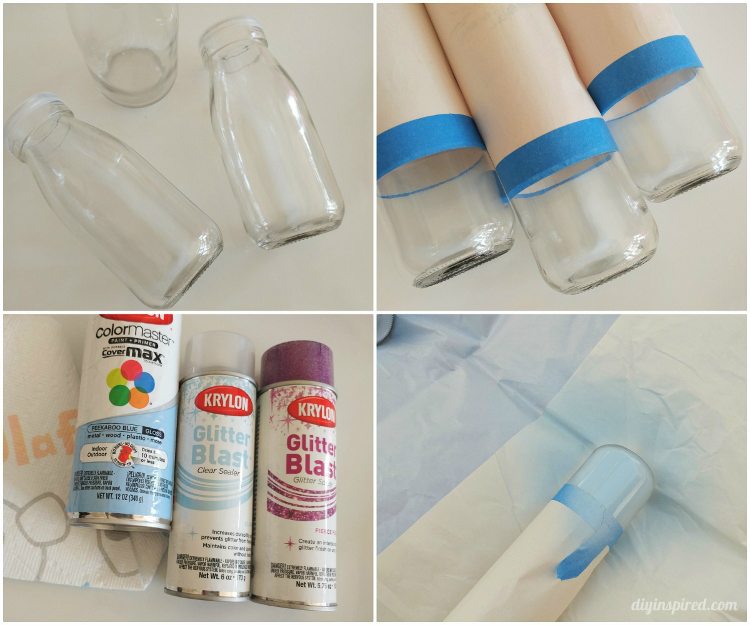
Materials:

  • Milk glasses
  • Newspaper
  • Painter’s tape
  • Light blue spray paint
  • Purple glitter spray paint
  • Glitter spray paint sealer
  • Scissors
  • Ribbon

Instructions:

Cover the milk glass halfway with newspaper and painter’s tape.  Be sure that the mouth of the glass is covered so that you are spray painting the bottom. Press the painter’s tape firmly around the glass to prevent paint bleeding. Spray paint the glasses in a well-ventilated area. Allow the spray paint to dry for 24 hours. Waiting a full 24 hours will help prevent the spray paint from coming off.

spray-painted-disney-frozen-inspired-milk-glasses

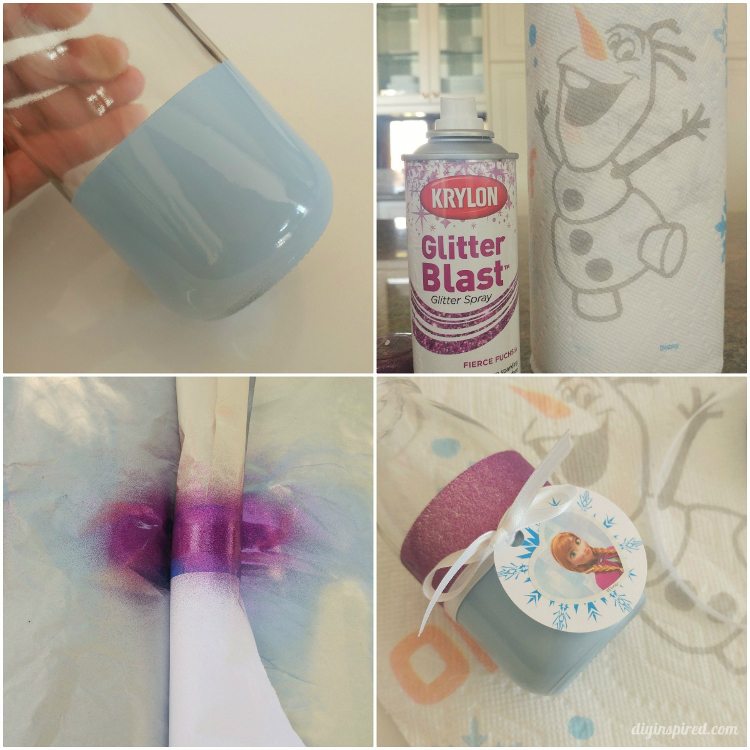
Once the spray paint is completely dry, cover both ends of the glass with tape and newspaper.  Again, pressing firmly on the tape to prevent paint bleeding. Spray the opening with glitter spray paint in a well-ventilated area.  Keep a damp Bounty Paper Towel nearby to keep your fingers clean.  Allow it to dry for about 20 minutes. Remove the tape and newspaper. Embellish the bottles with ribbon and a tag.

diy-disney-frozen-party-milk-glasses

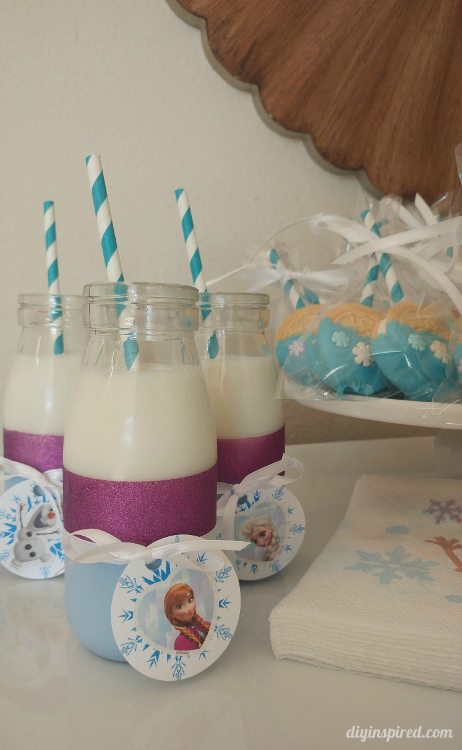
These bottles are perfect when serving party treats; alongside with Bounty Prints Featuring Disney Frozen Quilted Napkins your party table.  You can even give them away as party favors to guests when they leave. Use Bounty Paper Towels to clean them before you send them home.

disney-frozen-party-milk-glasses-with-glitter

A must-have for family fun, Bounty is more absorbent so it helps quickly pick up messes after the party festivities. Get some paper towels and Quilted Napkins for your next party! Don’t let messes stay frozen in time. Pick them up quickly!

disney-frozen-painted-glitter-milk-glasses-diy

  • Share
  • Twitter


3 Comments

Join our Community of Crafters!

Stay updated and never miss a thing!

Disclosure and Privacy Policy
Previous Post: « 19 Brilliant Paper Towel Kitchen Hacks for Thanksgiving
Next Post: How to Cover Pumpkins in Fabric »

Reader Interactions

Comments

  1. Jolene says

    November 18, 2016 at 6:45 am

    I love these ! They look great ! Your tuto

    Reply
  2. Jolene says

    November 18, 2016 at 6:48 am

    Your tutorial makes them look so easy to make.

    Reply
    • Dinah Wulf says

      November 18, 2016 at 6:54 am

      Thank you so much!! It takes a little time, allowing the first coat to dry. I think it might be better to do the glitter spray paint first.

      Reply

Leave a Reply Cancel reply

Your email address will not be published. Required fields are marked *

This site uses Akismet to reduce spam. Learn how your comment data is processed.

Primary Sidebar

Welcome!

DIY Inspired Profile Picture 2015Thank you for visiting! I'm Dinah and I am a full time Mother, Blogger and Writer. I'm honored to be named one of Mashable's 10 Mom Blogs Full of Inspiring Advice. {Read more about me here}

Join our Community of Crafters!

Stay updated and never miss a thing!

Disclosure and Privacy Policy

Stay updated and never miss a thing!

Footer

You might also love these

Recycled Jar Utensil Holder Printables

10 Mason Jar Craft Ideas

Stenciled Coat Rack for a Kid's Room

Clever Coat Hangers

Handmade Holiday Gifts for Friends

DIY Recycled Water Bottle Beads

Easy Nursery Decor Idea

Sleep Under the Stars DIY Star Wall Art

Fall Wreath in a Basket

Hanging Fall Wreath DIY

Copyright © 2021 · Divine theme by Restored 316

Copyright © 2005–2021 DIY Inspired. Installed and customized by TCN Design Studio

We use cookies to ensure that we give you the best experience on our website. If you continue to use this site we will assume that you are happy with it.OkRead more