DIY Cogsworth Costume
DIY Cogsworth Costume from Beauty and the Beast
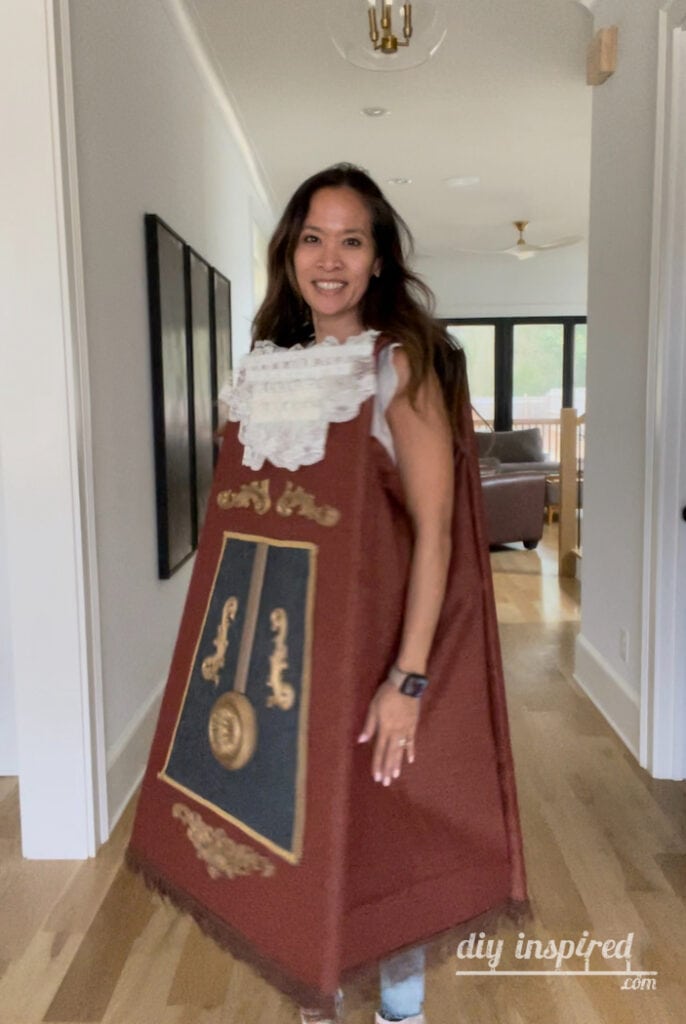
This DIY Cogsworth Costume was intended for a 7th grader, however as shown, also fits an adult size small and 5’6” tall. The links below are links to the products I used. Some of them are Amazon Affiliate links. If you click on those links and purchase an item, we receive a commission at no extra cost to you. Thank you in advance for your support!
Before we begin watch Part 1 and Part 2 of these quick Instagram Reels. These video clips are short, however may give you a better idea of how to create this costume.
Making the Cardboard Frame
Materials:
- 2 Large Heavy Duty Cardboard Boxes for Moving
- Yardstick

- Box Cutter
- Cutting Mat
- Pencil
- Hot Glue and Glue Gun


Instructions:
- With a box cutter, cut out the four largest rectangles of the 2 boxes.
- Mark five inches in at the top of one rectangle. Use a straight edge to draw a line from the 5” mark to the bottom corner. Repeat on the other side. Cut along both lines to form Cogsworth’s body.
- Repeat on the other three rectangles using the first one as a template.
- Next, use the leftover cardboard and glue it onto one of the four body pieces. Glue a second body piece on top. This will reinforce the cardboard to make the costume sturdy.
- Repeat using the leftover cardboard and the other two body pieces. Now you will have the front and back of Cogsworth.
Covering the Cardboard with Fabric
Materials:
- 3 Yards of Fabric
- Scissors
- Hot Glue and Glue Gun
Pro Tip: Look in the Clearance Section at fabric stores for any trim or fabric that would work for Cogsworth. All fabric and most trim shown here was purchased in Hobby Lobby’s Clearance Section.
Instructions:
- Lay the front of the body onto the fabric.
- Cut the fabric leaving about 5-6 inches around all four sides.
- Fold and glue all four sides, pulling the fabric taut.
- Repeat for the back of the costume.
Adding the Embellishments
Materials:
- Lace Trim
- Gold Braided Trim
- Fringe Trim
- Dark Felt
- Cardboard Scraps
- Gold Scrapbook Paper
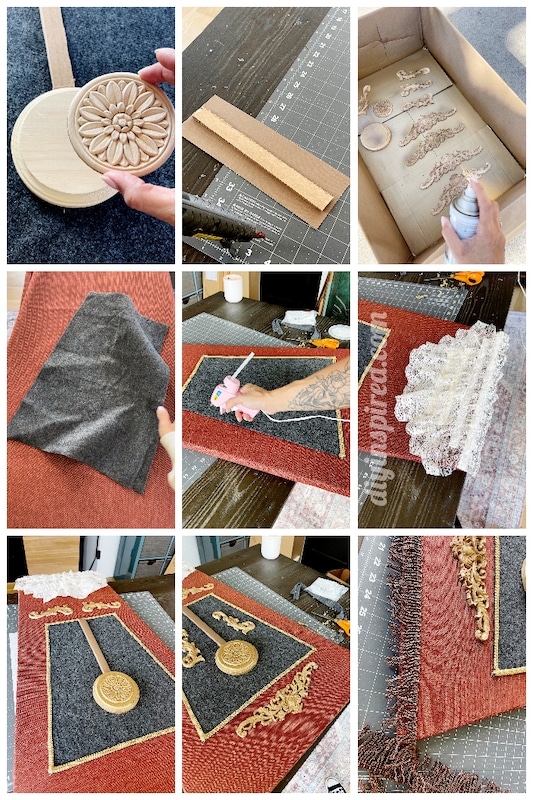
- Wood Round
- Rosette Wood Applique
- Decorative Wood Appliques
- Gold Spray Paint
Note: The embellishments can vary using different materials.
Instructions:
- Spray paint all wooden rounds and appliques gold.
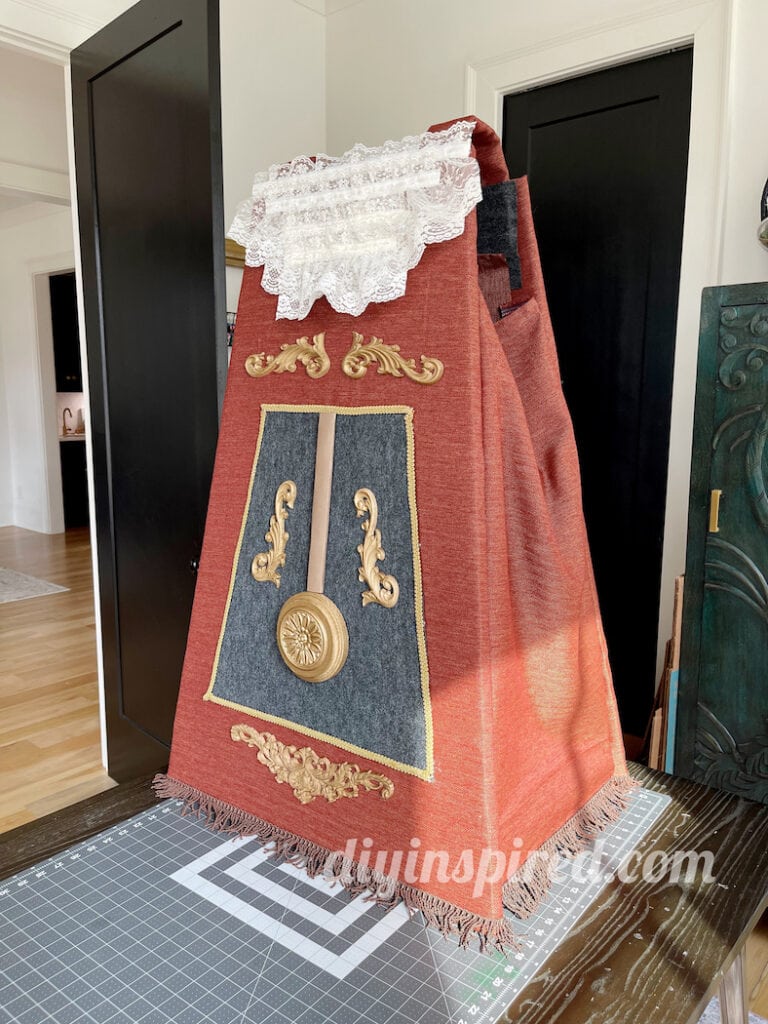
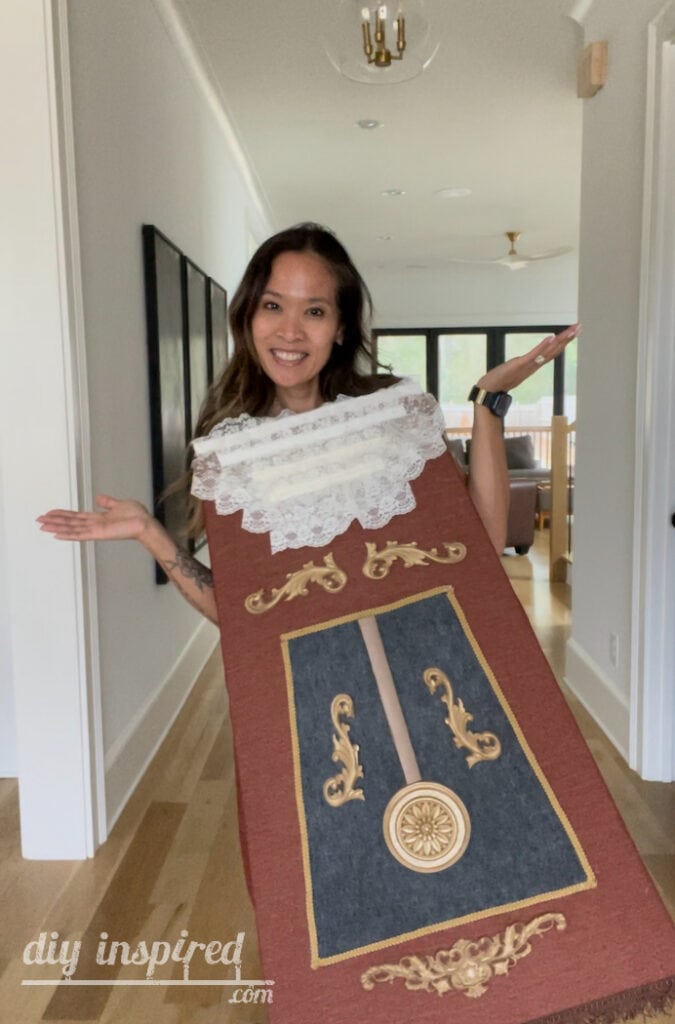
- For the lace jabot, cut four pieces of lace trim, with each piece gradually getting shorter. Glue them on the front top (neck) from longest to shortest.
- Using dark fabric or felt, cut out the clock window. Use the gold braided trim to line it, attaching it with hot glue.
- Cut out a strip of cardboard for the pendulum. Cover it with gold scrapbook paper and glue it to the top middle of the window. Glue the wood round and rosette applique on top.
- Glue the decorative wood appliques anywhere you see fit.
- If desired, glue fringe trim on the bottom of the front and back of the costume.
Making the Shoulder Pads
Materials:
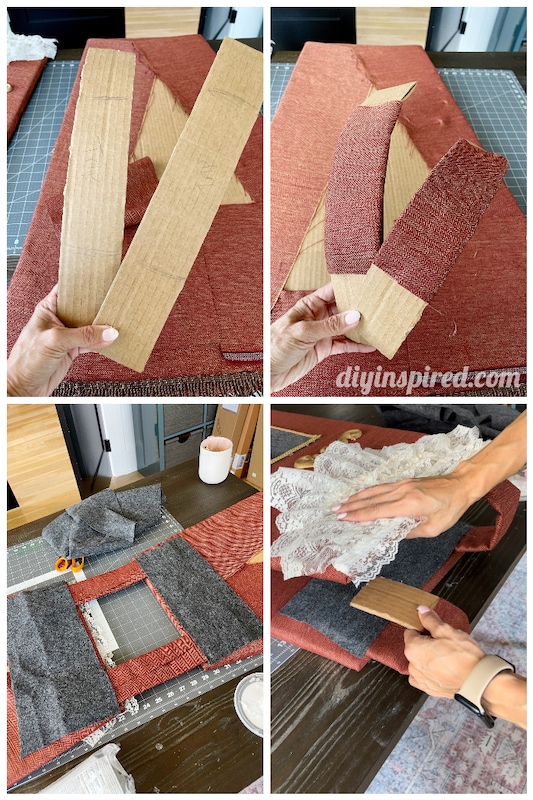
- Cardboard strips
- Fabric Scraps
- Felt
- Scissors
- Hot Glue and Glue Gun
Instructions:
- Cut two strips of cardboard approximately 14” X 2.5”.
- Measure your model and mark. Cover the inside of the marked areas with fabric as shown.
- Glue them to the tops to create shoulder pads. Use felt to reinforce the strap.
Adding the Sides
Materials:
- Fabric
- Fringe Trim
- Scissors
- Hot Glue and Glue Gun

Instructions:
- Cut two rectangular pieces of fabric. Width will depend on your model.
- Glue the top down about 1” for a finished look. Glue fringe trim onto the bottom.
- Using something to prop the costume up (as shown), glue the sides, attaching the front and back of the costume. Be sure to leave room for the arms at the top.
Here is the finished look. Photos of the complete Cogsworth Costume with headpiece coming soon!