DIY Stitch Costume for Adults
DIY Stitch Costume for Adults with Headband Ears
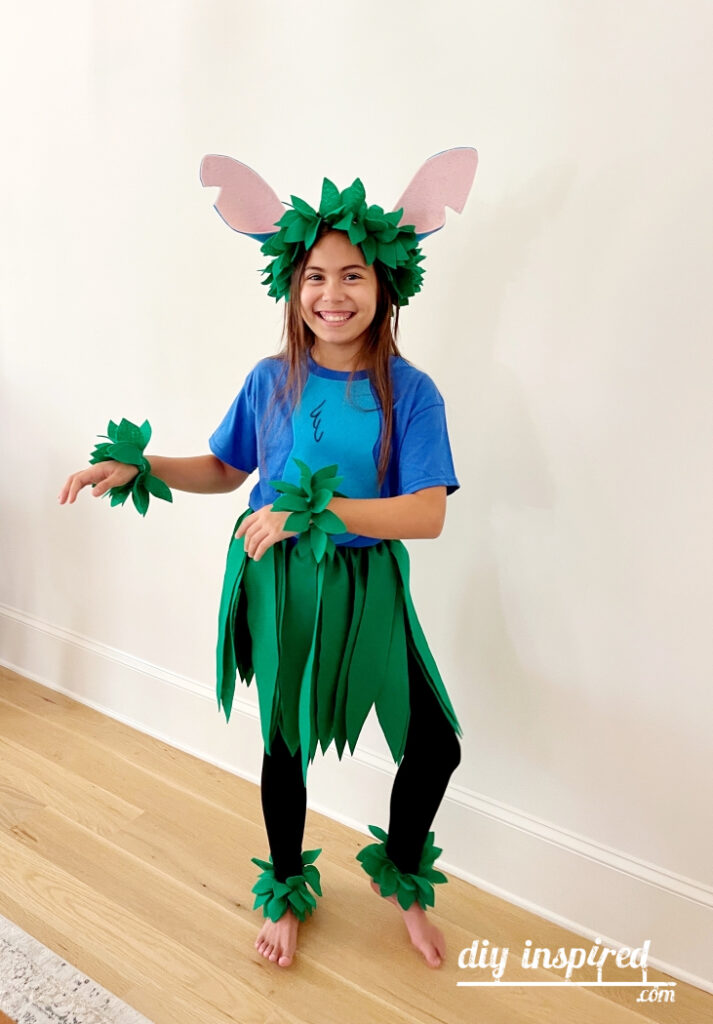
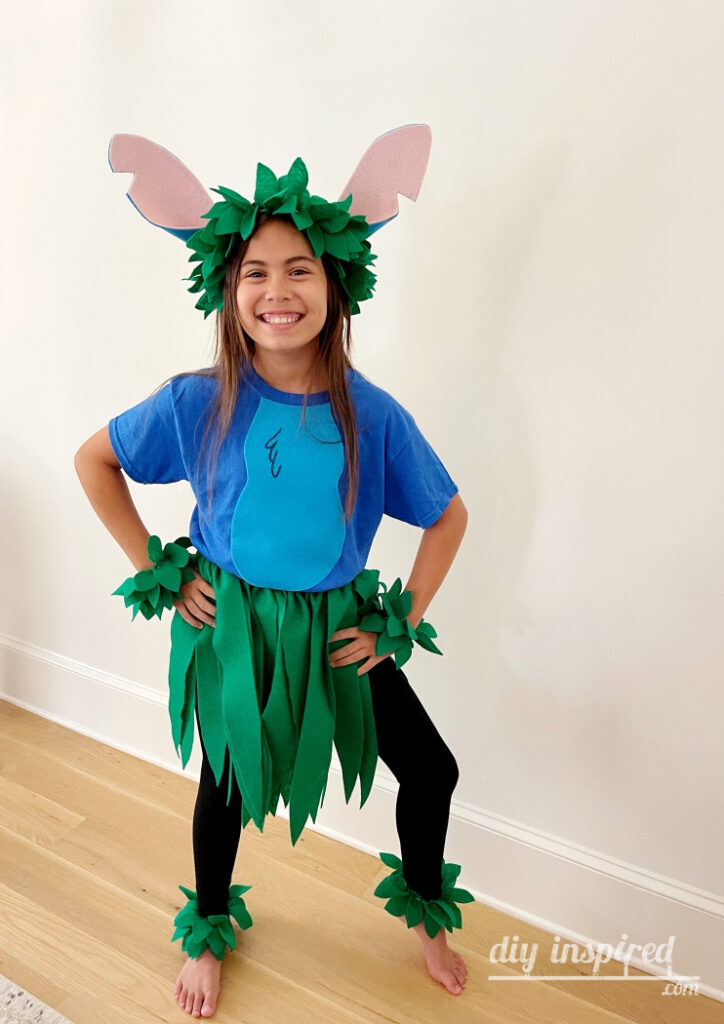
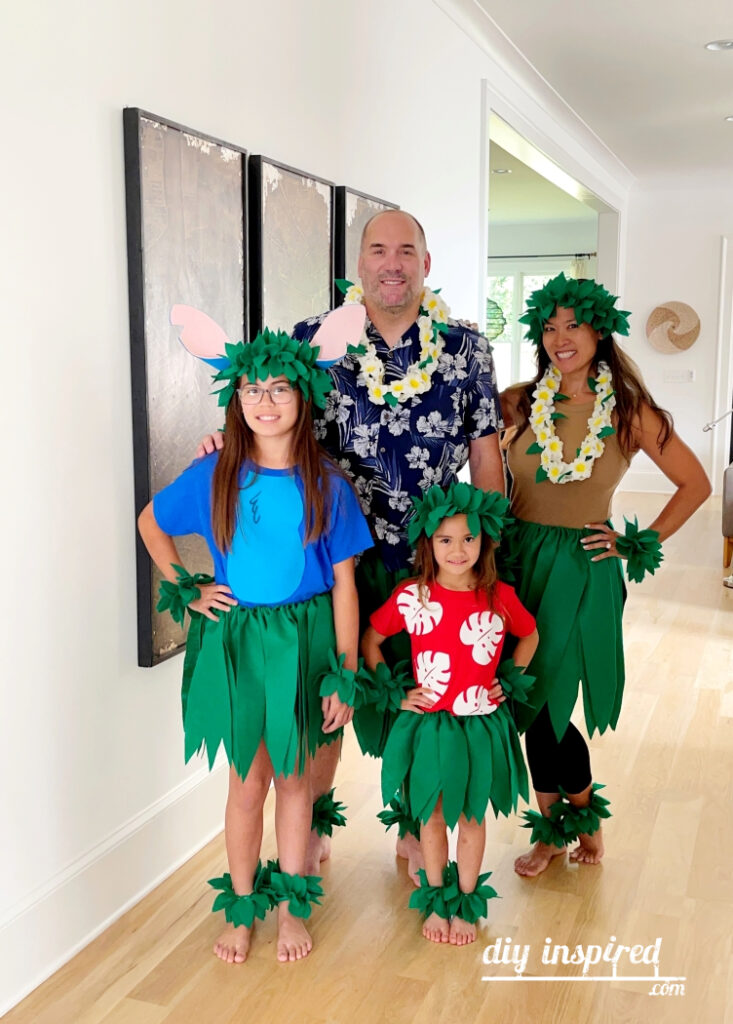
This year for our family Halloween costumes our theme is Lilo and Stitch. My not-so-little eleven-year-old is almost as tall as I am. Today, I’m going to share her costume; and how to make this DIY Stitch costume for adults inspired by the Disney movie, Lilo and Stitch.
Watch the Video
Below is the YouTube video for the costumes for the entire family. I wanted to do a separate post for Stitch because of the detail. Nonetheless, you can watch the video below to see how to make the ears, shirt, skirt, and leaf accessories. Keep scrolling for detailed instructions and materials lists.
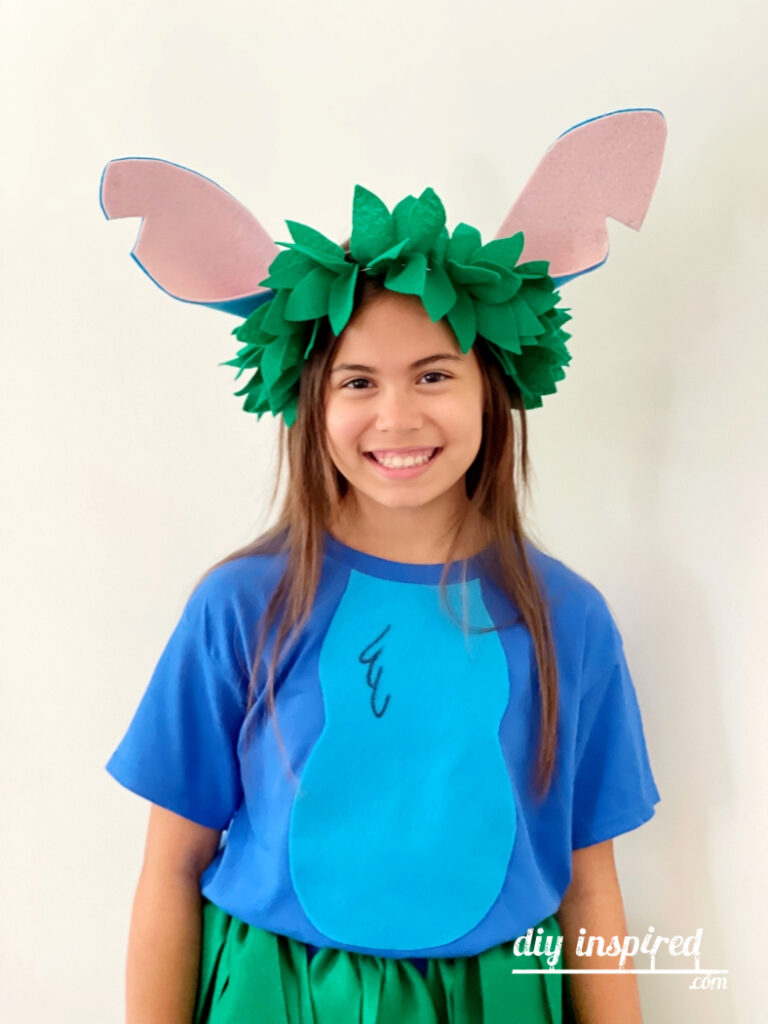
DIY Stitch Shirt
Let’s start with the shirt. Here is what you’ll need.
Materials:
- Blue T Shirt
- Blue Felt Sheet
- Black Sharpie
- Scissors
- Marker
- Hot Glue and Glue Gun
Instructions:
- Lay the shirt out flat and place the blue piece of felt under the neck.
- Draw Stitch’s belly in the shape of a snowman. Use the neck as a guide to cut the curved part of the neck where it meets the belly. Use scissors to cut out the belly from the felt sheet.
- Draw Stitch’s fur with a black Sharpie. Use online photos as a reference.
- Glue the belly onto the shirt with glue.
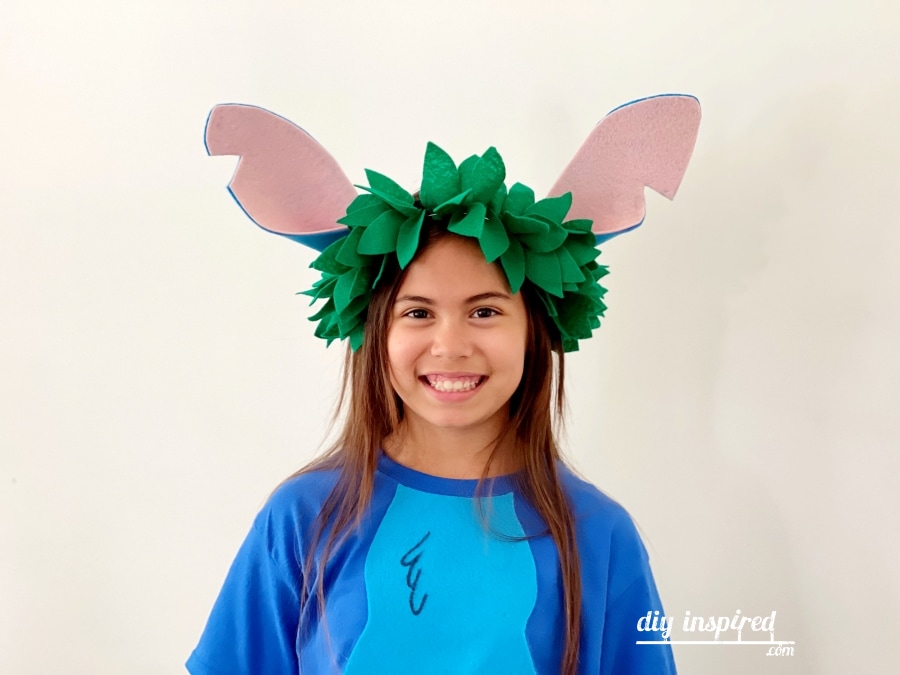
DIY Stitch Ears Headband
This headband only cost about $3.00 to make. I used a headband from a four pack from the Dollar Store. The felt was purchased individually for only $.49 each. It will be easiest to refer to the YouTube video above to see how to make the headband, however there are also detailed instructions below.
Materials:
- Thin Blue Headband
- Blue Felt
- Pink Stiff Felt
- Scissors
- Pencil
- Hot Glue and Glue Gun
Instructions:
- Cut both blue and pink felt pieces into 4” X 8.5”. Lay the pink one on top of the blue piece and lay them side by side.
- Dog ear the two inside bottom corners to create a flap to wrap around the headband. Crease it making a triangle and only cut off the pink triangle.
- Holding the dog ear in with one hand, draw the outline of the ear with the other and cut it out. Repeat on the other ear. Don’t forget to cut out Stitch’s ear notches.
- Carefully align both pieces and glue them together. Fold in the dog ear and glue that piece.
- Glue the leftover blue flap around the headband with hot glue.
Felt Leaves Accessories
To make the leaf headpiece, wristlets, and anklets I hand cut each leaf with the help of my mother-in-law. We did this while we watched TV together.
Since I made these for the whole family, used 1.5” yards to make:
- 8 Wristlets
- 8 Anklets
- 3 Head Pieces
Materials:
- Green Felt
- Scissors
- 1mm Elastic
- Punch or Skewer (to poke holes)
- White Glue
Instructions:
Note that the lengths and number of leaves varied. I had to constantly check on each person to make sure they were long enough.
- Cut out 3” wide stripes of felt (the leaves are 3” long). Cut out the leaves letting one end go into a point. We cut two layers at a time.
- Using a skewer or punch, poke two holes along the flat side.
- Place a small dab of white glue on the ends of the elastic and allow it to dry. This will make is easier for you to insert and weave into the leaf holes.
- Sew each leaf onto the elastic one by one. Once you reach the desired length, knot the two ends together.
DIY Felt “Grass” Skirt
Measurements for the skirt vary. You will need to measure from the waist to the knee to get the leaf length. I used about 4.5 yards of felt for all four skirts. Here are the leaf measurements I used:
- Adult Male, size large: 4” X 24” – 41 leaves
- Adult Female, size small: 4” X 24” – 28 leaves
- Tween/Teen, size small: 3” X 18” – 33 leaves
- Toddler, size small: 3” X 12” – 28 leaves
Materials:
- Green Felt
- Elastic
- Safety Pin
- Scissors
- Rotary Cutter
- Straight Edge/Yard Stick
- Skewer
Instructions:
- Cut felt leaves as measured. Cut one end into a point and poke 4-6 holes along the flat end with a skewer.
- Place a safety pin on the edge of the elastic to make it easier for you to weave through the felt.
- Add each leaf one by one until you have the desired size. Secure the end with a knot.
Putting It All Together
I had my daughter wear black leggings. She tucked the shirt into the skirt and bloused it out. Place the headpiece around the head first, and then put the headband on after.
After I took these pictures, I ended up trimming her skirt a little to make it shorter as seen in the family photo below. Be sure to check out the rest of the family’s costumes! I hope you like our DIY Stitch Costume for Adults!
For more ideas, check out our past family Halloween costumes!

This is wonderful! I’m going to try it for my daughter.
You all look great!
Thank you so much!
This is a great idea for a DIY stitch costume! I would love to make one for myself!