DIY Farmhouse Torched Window Décor
How to Make and Patina a Farmhouse Window for Your Home Decor
This article, DIY Farmhouse Torched Window Décor is sponsored by Bernzomatic. All opinions are 100% my own.
I have another awesome Torch Bearer project to share with you today. In case you missed them, here are a few of my favorite Bernzomatic Torch Bearer projects from the past.
- DIY Wedding Bouquet Photo Charms
- DIY Alcohol Ink Coasters
- Resin Mosaic Tray with Recycled CDs and DVDs
- DIY Repurposed Spoon Hooks
- DIY Penny Table
In this post, you will learn:
- How to Build a Wood Frame from Scratch
- How to Patina Unfinished Wood
- Tips and Tricks for Working with Acrylic
First, let’s watch the video tutorial.
Watch the Video
Here is how to make the farmhouse torched window décor from start to finish. If you have questions, the complete instructions are below. If you still have questions, feel free to leave me a comment.
What You’ll Need
Time: 2-3 Hours
Materials:
The materials list below is suggested. The type of wood and size is up to you. The measurements provided are the ones I used for the window you see in this tutorial. Consider repurposing old frames or scrap wood.
- 2 – .75” X 1.5” X 34” Pieces of Poplar Wood
- 1 – 31” .05” Square Dowel
- 6 – 9” .05” Square Dowels
- Wood Glue
- Nail Brads
- .093” X 20” X 32” Acrylic Sheet
- .50” Screws
Equipment:
- Nail Gun
- Saw
- Bernzomatic TS8000
- Bernzomatic MAP-PRO
- Drill
- Drill Bit
- Sandpaper
How to Build a Wood Frame from Scratch
Keep in mind that you can use any type of unfinished wood you would like and make it any size you wish.
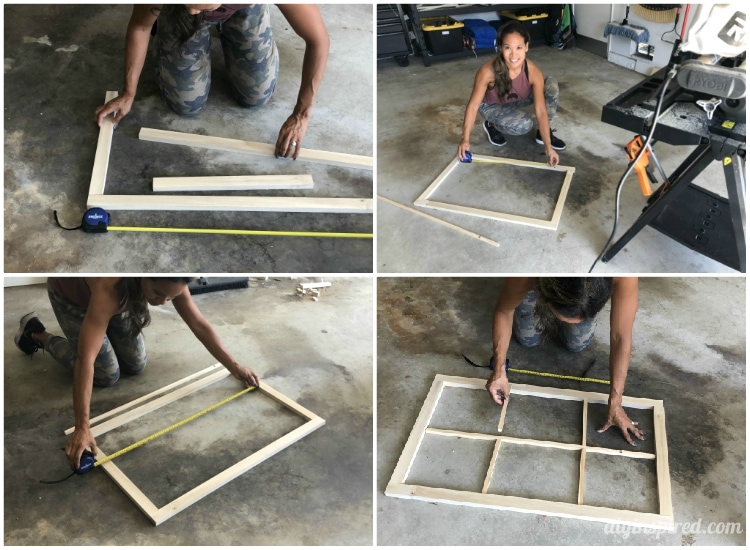
There are basically three steps.
- Measure all your pieces including the outer frame and inner panel pieces and cut them to size.
- Mark your measurements in the wood any lay out the pieces. Glue them together with wood glue.
- Nail it all together. If you are using a nail gun, it’s easiest to nail when the frame is on a worktable or nail downward if the glue on your frame is dry and it is sturdy enough to hold upright.
How to Patina Unfinished Wood
The Bernzomatic TS8000 is ideal for this project because it works fast and efficiently. It’s a high intensity torch with a convenient trigger start.
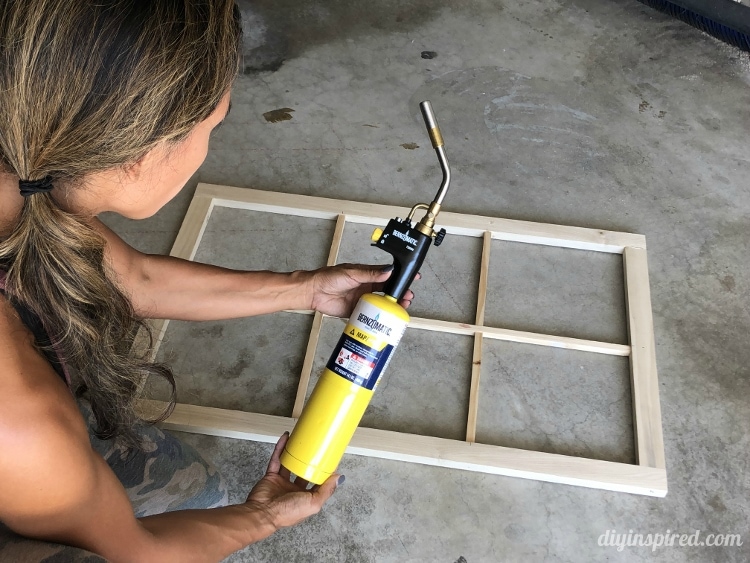

You can also adjust the flame as needed by simply turning a knob. Be sure to work in a well-ventilated area or outside.
- Protect your hands with gloves. Turn on the torch and turn up the flame. Push the trigger button.
- Gently wave the flame in a smooth and even motion and burn the wood. Be sure to get each side, front, and back.
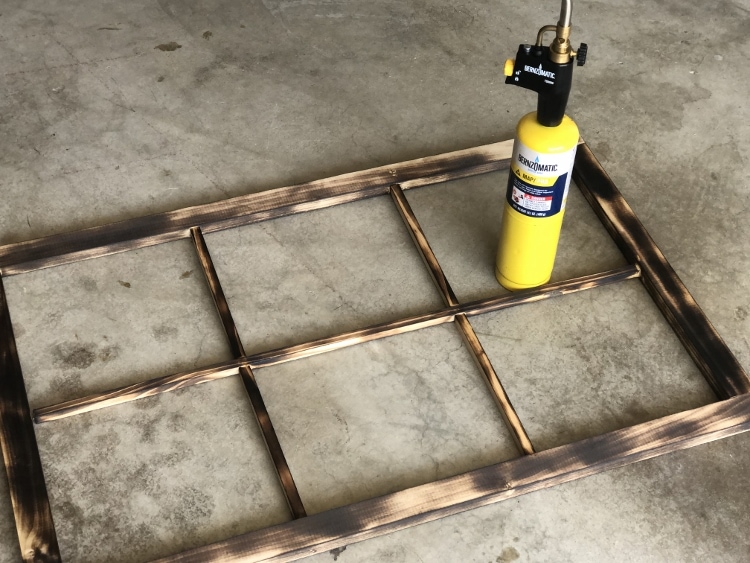
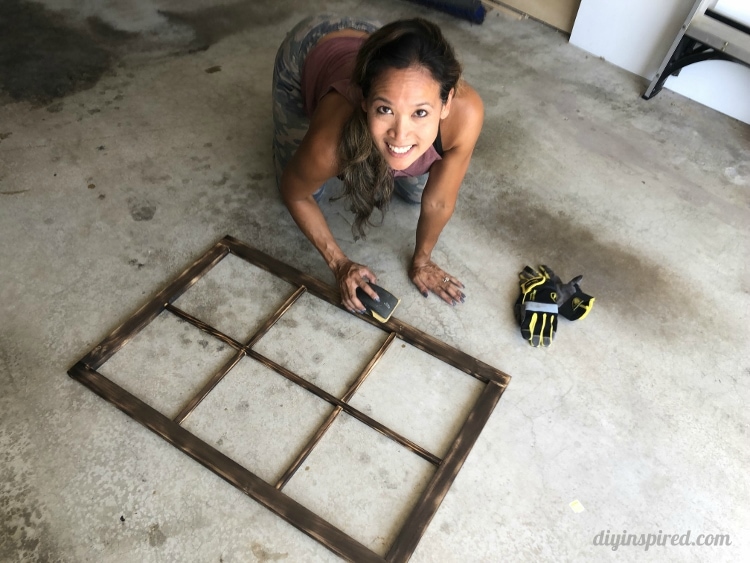
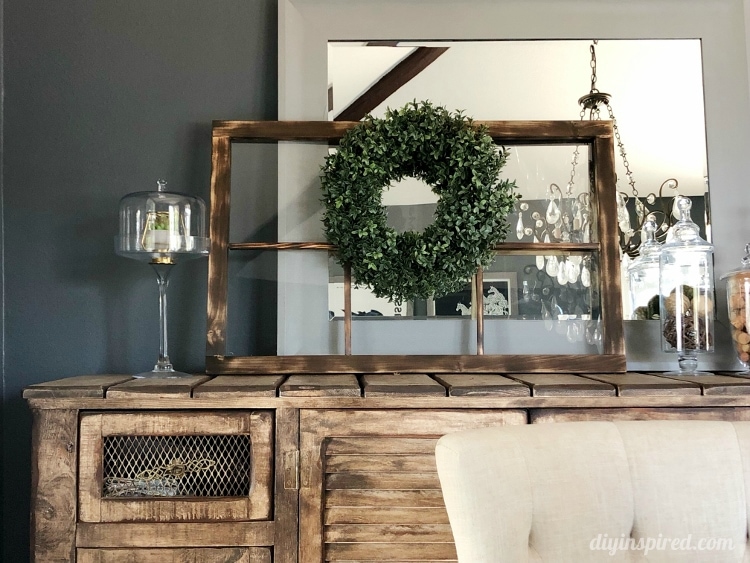
- Once you patina the entire frame, use sandpaper to achieve the desired final look. I started with 120 grit and then moved to a courser grit.
- If desired, place a topcoat of acrylic glaze or polyurethane. I left this one as is.
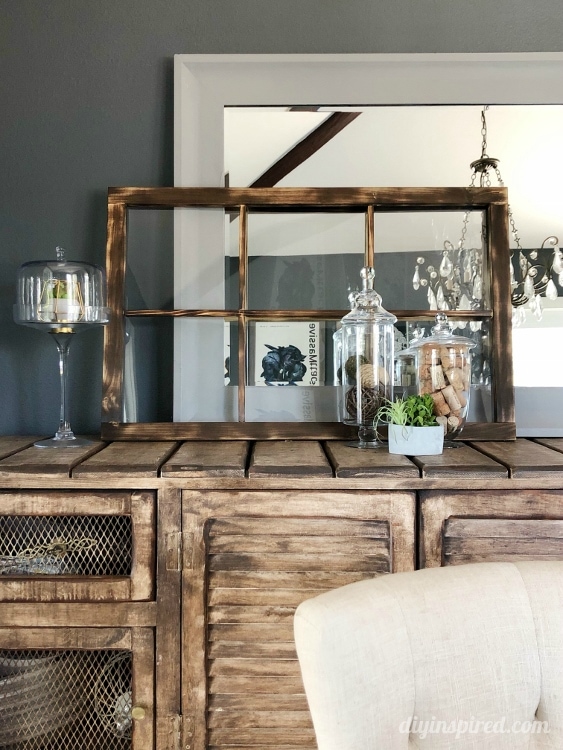
You can stop here, or if desired, add an acrylic sheet for a finished look.
Tips and Tricks for Working with Acrylic
I choose to use acrylic instead of glass because it is:
- sturdier than glass.
- lighter weight than glass.
- a better option for me since I have kids running around the house!
I placed the sheet on the back of the wood window frame and used a marker to mark the holes.
There are three things to consider when working with acrylic because you do not want it to crack.
- Protect your work surface with a scrap piece of wood so you can drill the screw holes.
- Start with a smaller drill bit and work your way up to the desired thickness of your screw.
- Go slowly when screwing in the screw and be careful not to screw it in too far.
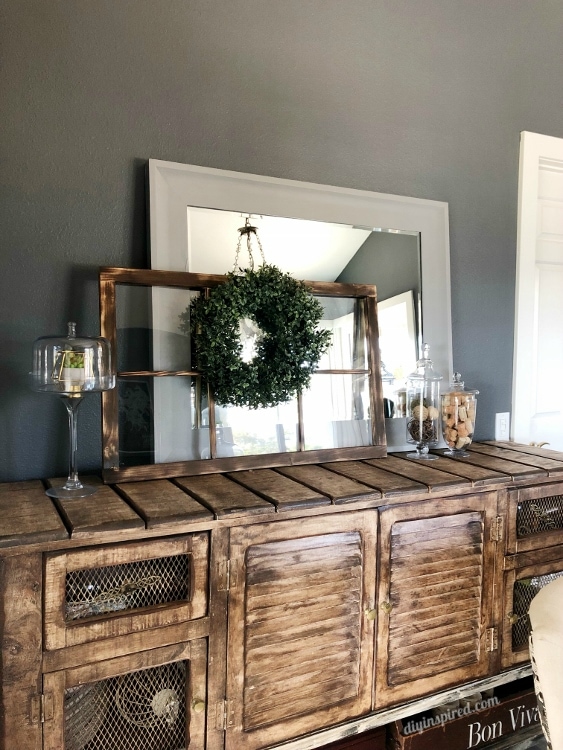
This farmhouse torched window décor can be used in your home throughout the year. Place a wreath on top or place family photos behind it. Use it horizontally or vertically; or hang it on a wall or place it a top a table or mantel.

Thank you for sharing this especially the tips and trick that you’ve written above. Very informative! I’m going to do this while staying at home.