DIY Penny Table
How to Make an Upcycled DIY Penny Table with Resin
This article, DIY Penny Table is sponsored by Bernzomatic. All opinions are 100% my own.
Time: Weekend Project
Materials:
- Metal Table (affiliate link)
- Pennies
- Coating and Casting Kit
- Plastic Cup
- 5 oz. Bernzomatic Butane
- Bernzomatic ST2200T
Watch the Video Tutorial
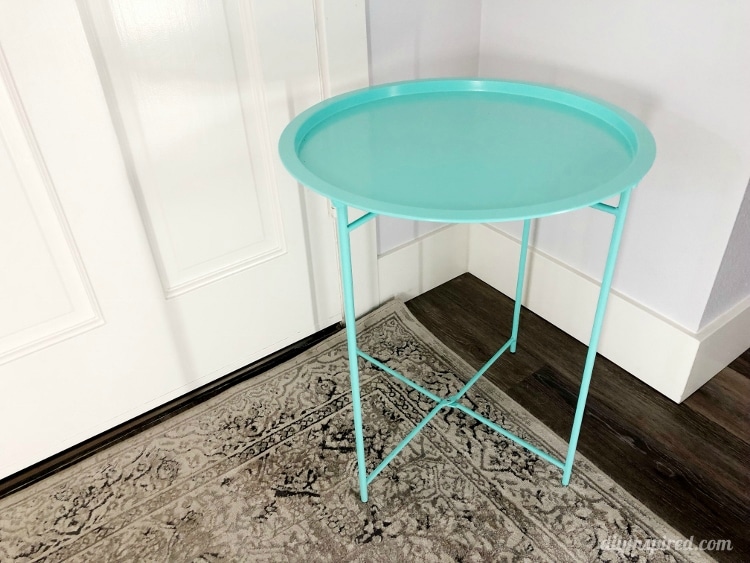
I found the perfect table for this project. Here is the BEFORE photo.
Shining the Pennies
For this project I used a little over 400 pennies. Most were old and dirty and needed a good shine. I go into depth in 7 Ways to Shine Pennies on how to polish old pennies. For this project, the best way to this is the cleaning vinegar and salt method.
To do this you will need:
- Small Bowl
- Paper Towels
- Cleaning Vinegar
- Salt
- Spoon
First, place about a tablespoon of salt into the bowl and add the cleaning vinegar. Next, mix the solution until the salt is dissolved. Add several pennies. You will see the transformation immediately. Give the bowl a few swirls and watch the pennies brighten. Lastly, remove the pennies a few at a time and lightly polish dry with a paper towel.
I recommended doing about 3 batches of pennies at a time and them starting a new solution for the next three batches and so on.
DIY Tip: Set the dry polished pennies on top of the tray table as you go so you know when to stop.
Arrange the Pennies
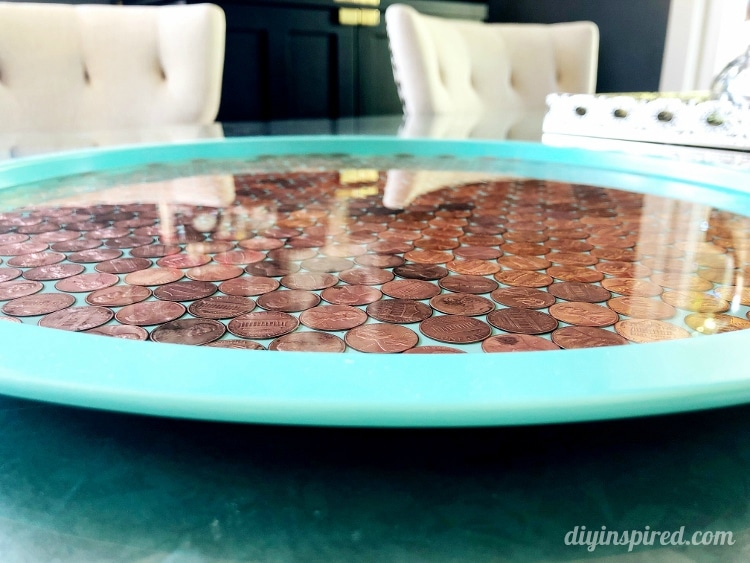
Once all the pennies are polished, you want to arrange them on top of the tray. This can get a little tricky. I found it best to give the tray a tilt and a slight shake to allow the pennies to naturally fall into place. You will have to repeat this process several times to get the right placement.
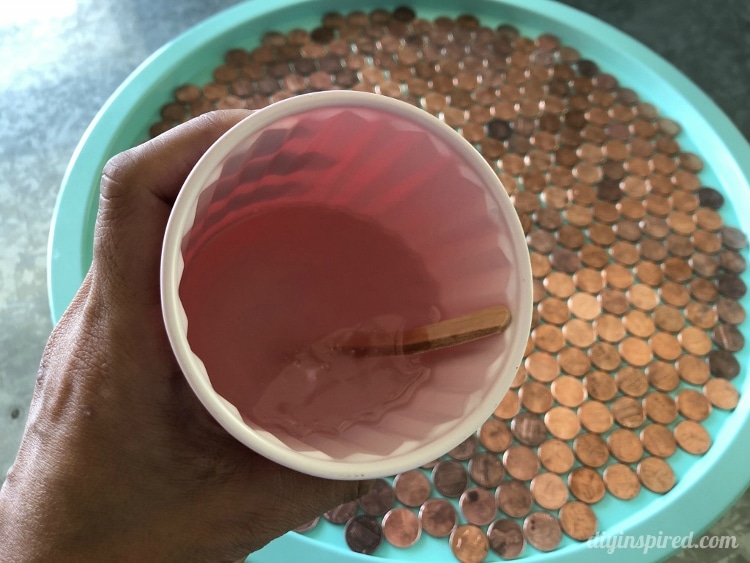
Adding the Resin
For this project, I used a two-part clear coating and casting resin. First measure equal parts. This tray took approximately 120 cc’s. Pour together in a plastic mixing cup and mix slowly for about 1-2 minutes. Next, slowly pour resin on top of the pennies. Gently tilt and shake the tray to spread the resin out evenly to cover the entire tray. If you did not make enough, there is time to mix more and pour.
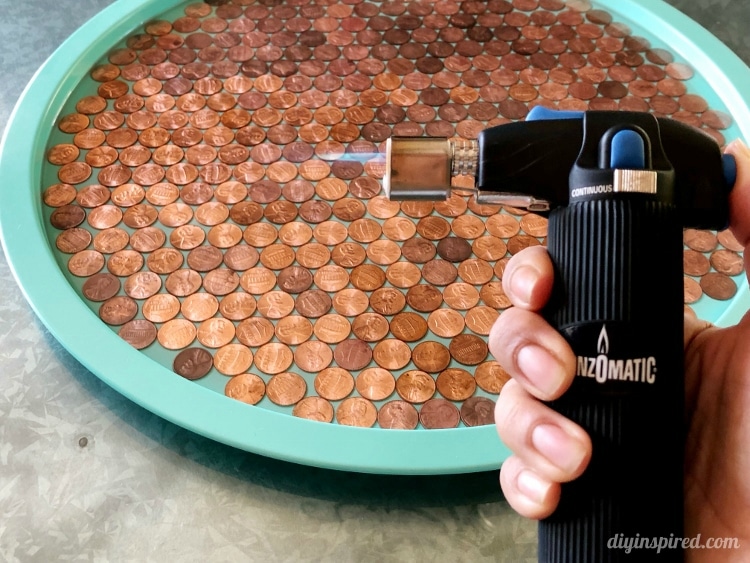
Popping the Air Bubbles
After pouring the resin, allow it to dry for 10 minutes. Meanwhile add Bernzomatic butane to the Bernzomatic ST2200T Micro Torch. Ignite the flame and pop any remaining air bubbles using a slow and even movement. I found that there were more bubbles around the edges of the tray.
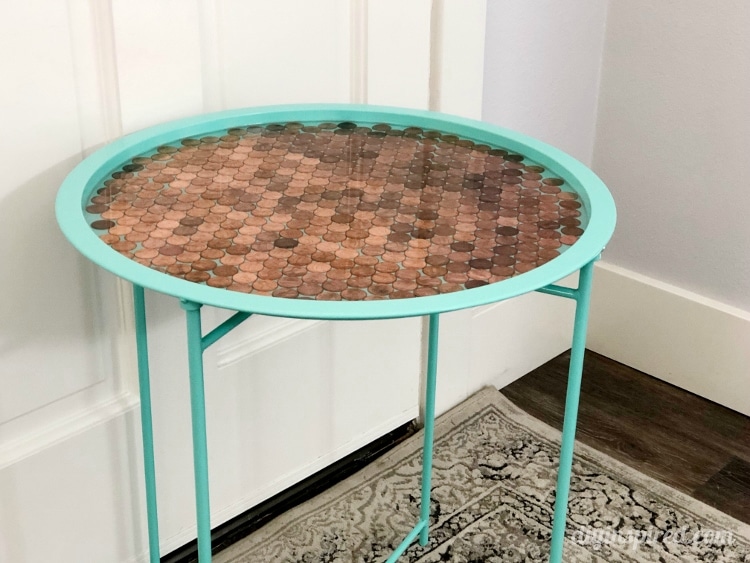
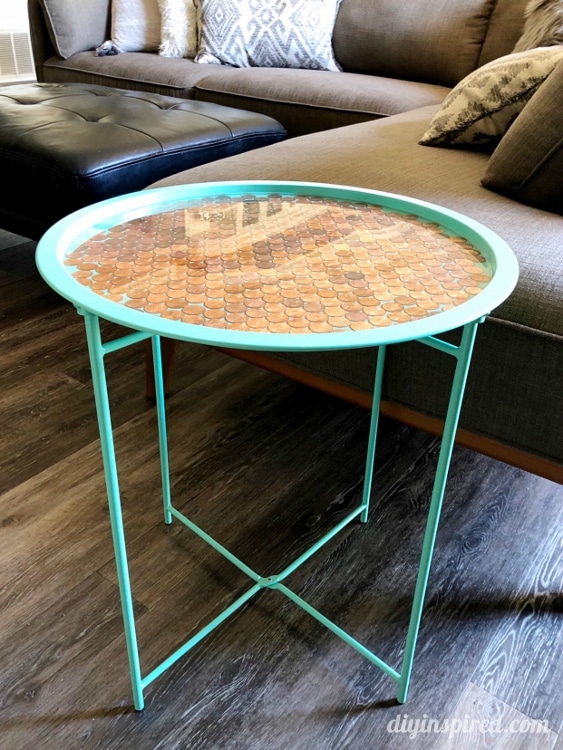
Allow the tray to cure for 18-24 hours. Here is the final project!
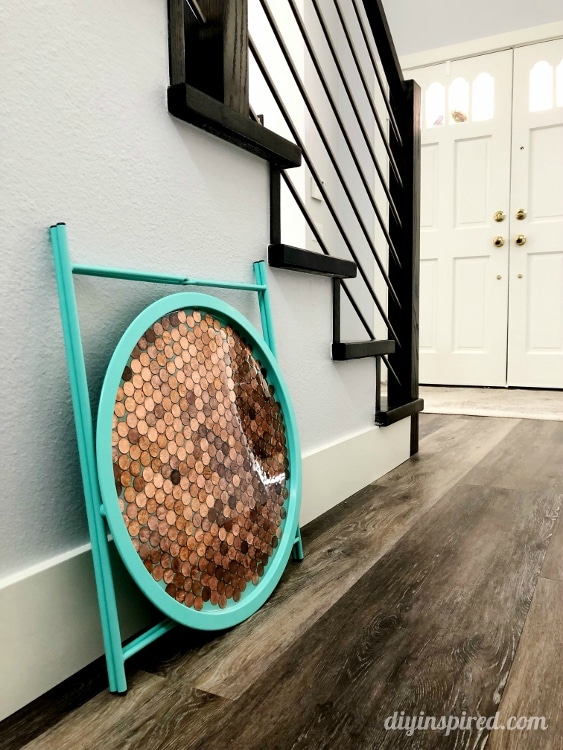
Here is the penny table folded.
You May Also Like
- DIY Alcohol Ink Coasters
- Resin Mosaic Tray with Recycled CDs and DVDs
- DIY Repurposed Spoon Hooks
- DIY Drink Station
Check out this other Bernzomatic Video:
This craft uses the cordless soldering iron. They are so quick and easy to make and they look like you spent a ton of time on them. You can give them as gifts for:
- Hostess Gift
- House Warming Gift
- Mother’s Day Gift
- Birthdays
- Stocking Stuffers
- To anyone who loves to cook!


I personally loved, thank you for sharing. Do you have a DIY penny chair to pair on that? Looking forward to the latest. xo xo