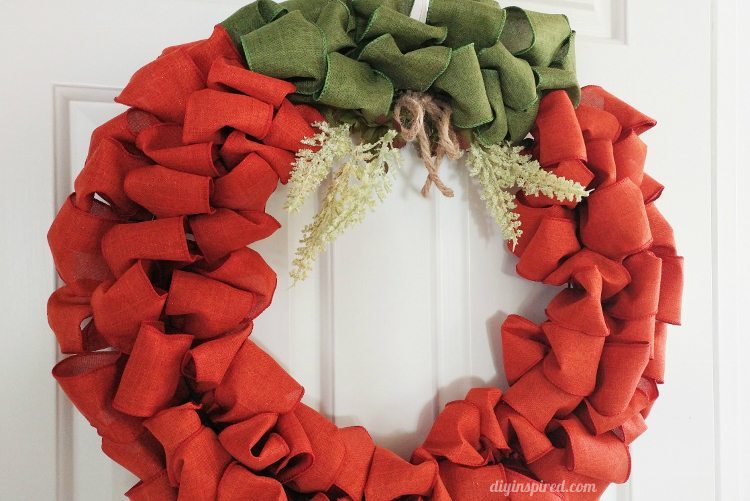
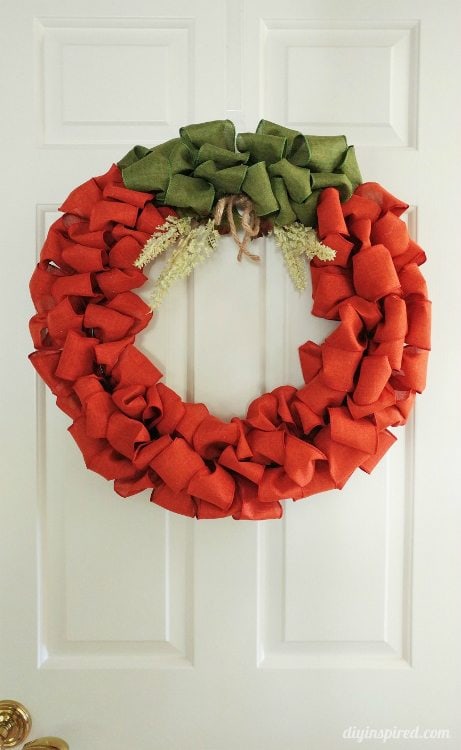
DIY Pumpkin Ribbon Wreath
Easy DIY Pumpkin Ribbon Wreath for Fall
There are a few basic steps for making your own ribbon wreath. Once you have those steps down, you can let your creativity take over and design wreaths for any holiday. This tutorial will show you the basics to make this DIY pumpkin ribbon wreath for your fall décor.
Time: 45 Minutes
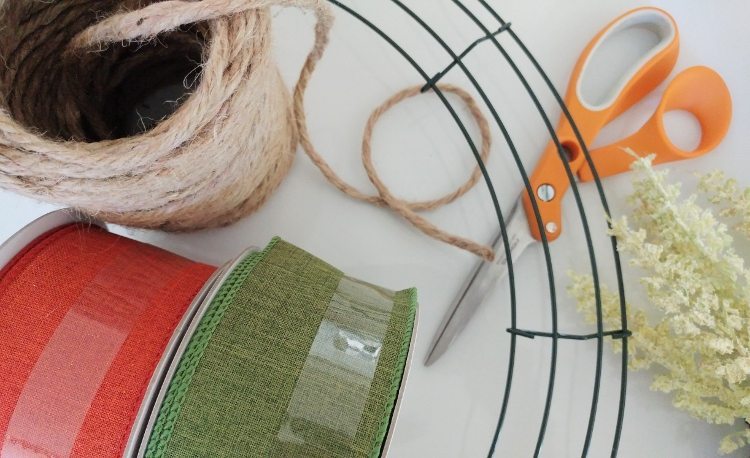
Materials:
- 18” Wire Wreath Frame

- 20 yards of 2.5” Orange Wired Ribbon
- 10 yards of 2.5” Green Ribbon
- 2 Pipe Cleaners
- Scissors
- Rope or Twine
- Floral Embellishments


Instructions:
Step One: Gather your materials. Choose wired ribbon to fit your design style. If desired, you can pick several colors and patterns. Cut the pipe cleaner in 2” pieces. For this basic tutorial, you will need approximately 18-20 yards.
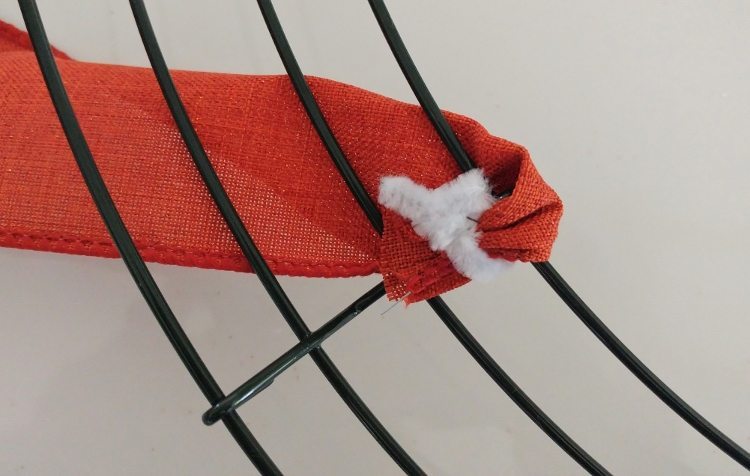
Step Two: Attach the ribbon to the inside ring in one wire section as shown. Depending on the ribbon you choose, you may have to use scissors to cut a small hole to weave the pipe cleaner through. Cut the excess pipe cleaner.
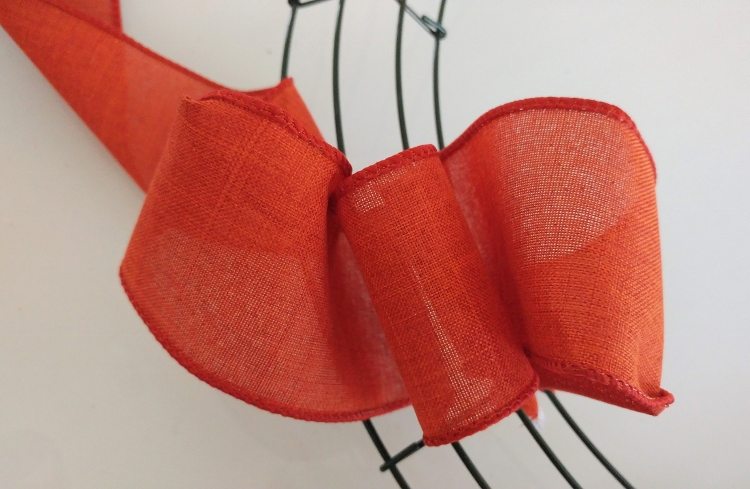
Step Three: Weave a loop of ribbon through the inner wire circle, then the middle, then the outer circle. Repeat moving from the inside circle to the outside circle. Bunch the ribbon as you go. An 18” wreath has nine sections. Bunch four sets in each section. Continue looping and weaving until you are finished with seven of the nine sections.
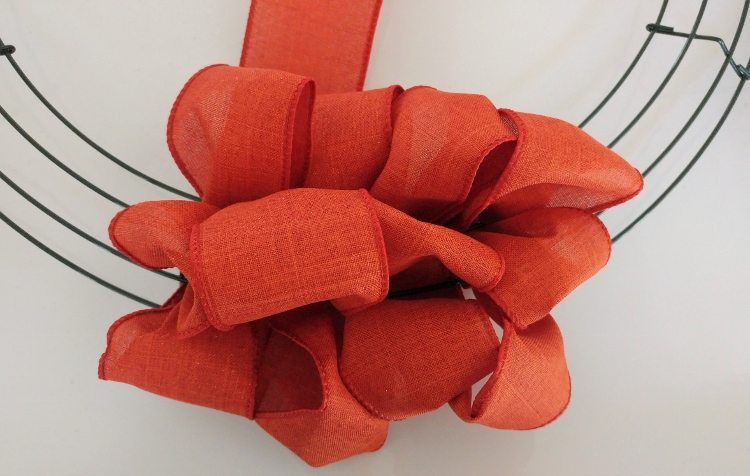
Note: When you run out of the ribbon roll, attach the end of the ribbon to the wire with pipe cleaner. Then, repeat step two.
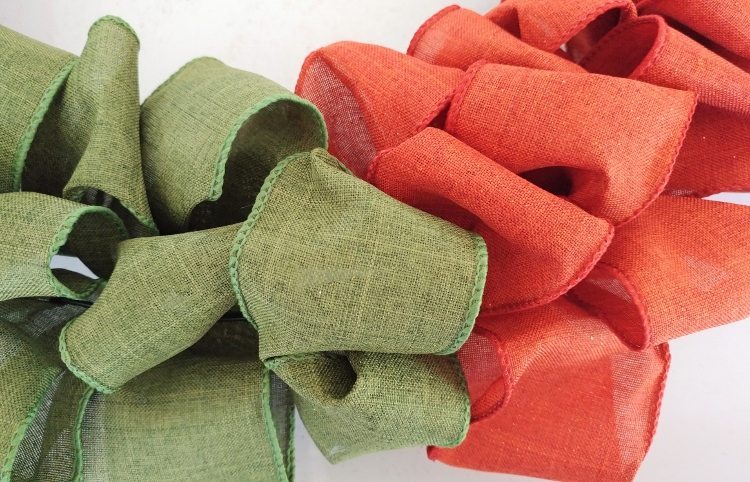
For the last two sections repeat steps 2 and 3 with green ribbon.
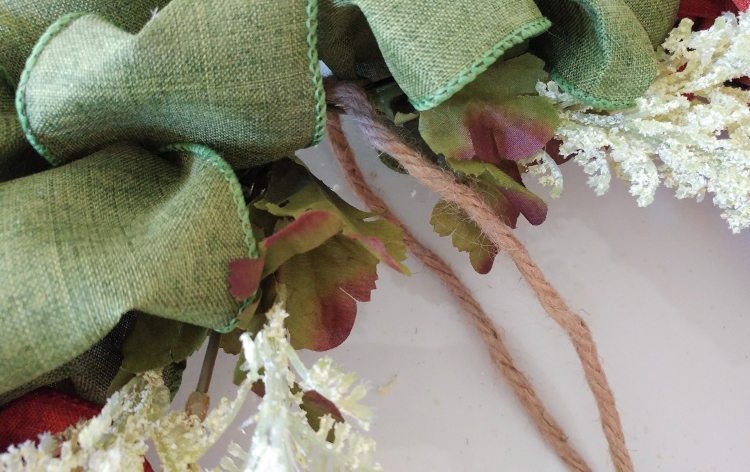
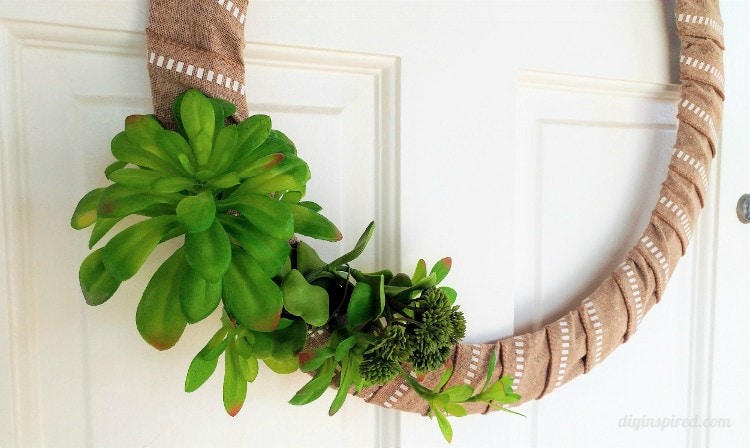
If desired, add a floral embellishment and a twine bow.
Now you have a pumpkin ribbon wreath for fall. Play around with colors and patterns to create your very own unique wreath. Consider gluing on a monogrammed letter or your address numbers and hang it on your front door.


love the beauty of the colors. Perfect for autumn, thanksgiving and oh yes halloween.
What an adorable wreath, it turned out fantastic! I hope you will share it with us at The Crafty Corner link party this week.
Thank you, Antonella! I will check it out!
Gorgeous wreath perfect for fall or even Christmas as well. Even though its a pumpkin wreath the coloring is nice!
Thanks for linking up with Welcome Home Wednesdays! Live every Wednesday at 7AM CT.
liz @ j for joiner
Thank you Liz for having me!!