DIY Scented Teacup Candle
Easy DIY Scented Teacup Candle Made with Beeswax
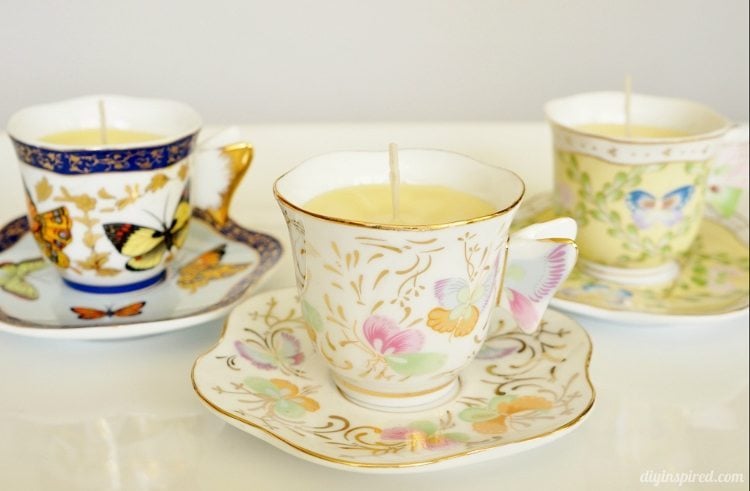
Inspired by her beauty and femininity I made my mom some scented candles in these beautiful vintage teacup and saucers I found while on one of my treasure hunts. These DIY Scented Teacup Candles are easy to make and result in a beautiful handmade gift. If you are looking for a craft to sell, this is a great option as well.
Here’s What You Need
Materials:
The materials list below contain Amazon Affiliate links for recommended products.
- Teacups and Saucer Sets
- Beeswax

- Essential Oils
- Cutting Board
- Knife
- Newspaper
- Saucepan
- Glass Pyrex Measuring Cup
- Oven Mitt
- Kitchen Towel
- Chopsticks or Pencils or Pens (2 per teacup)
- Rubber bands (2 per teacup)
- Candle Wicks
- Scissors


 (2 per teacup)
Finding the Teacups
A while ago, I went on a massive hunt for vintage teacups to decorate a vintage Mad Hatter’s themed baby shower. Because of this, I searched high and low for the best deals. It turns out that I had a lot of success at local thrift stores like Salvation Army or Goodwill. It turns out that antique flea markets also had them, however they were more expensive, even with a little bargaining.
Instructions:
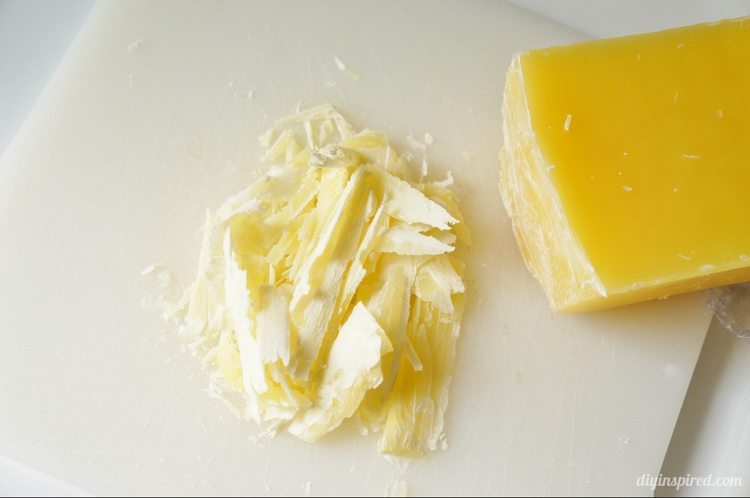
Begin by protecting your work surface with newspaper. On your cutting board, carefully cut your beeswax block into small or thin pieces. I used about 7 ounces of beeswax to fill these three mini teacups. The amount of wax you need will depend on the size of your teacup.
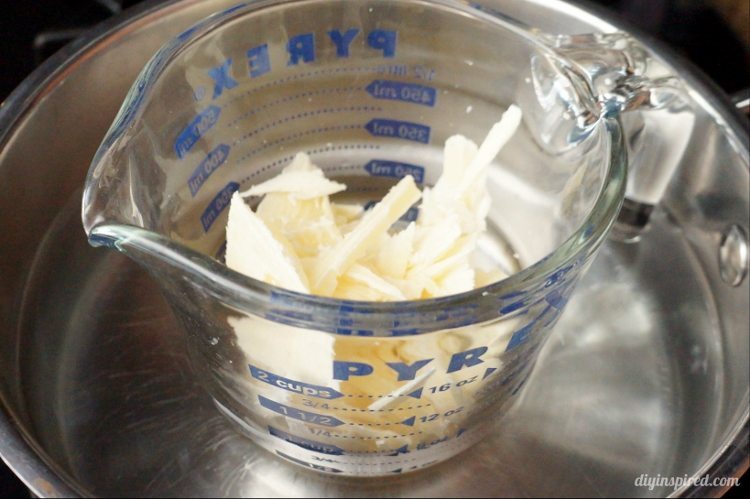
Fill your saucepan halfway with water. Place your wax inside a Pyrex measuring cup and place the cup inside the water. It helps to hook your measuring cup handle onto the side of the saucepan because the measuring cup will move a little when the water starts to boil. Turn the heat on to high and allow the water to boil and the wax to melt. If you like, you can use a thermometer to keep track of the temperature. For beeswax, the temperature should remain in between 145 and 175 degrees Fahrenheit.
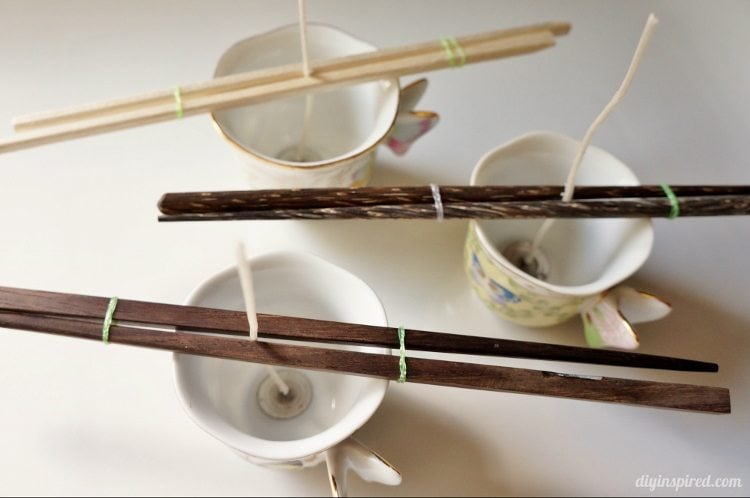
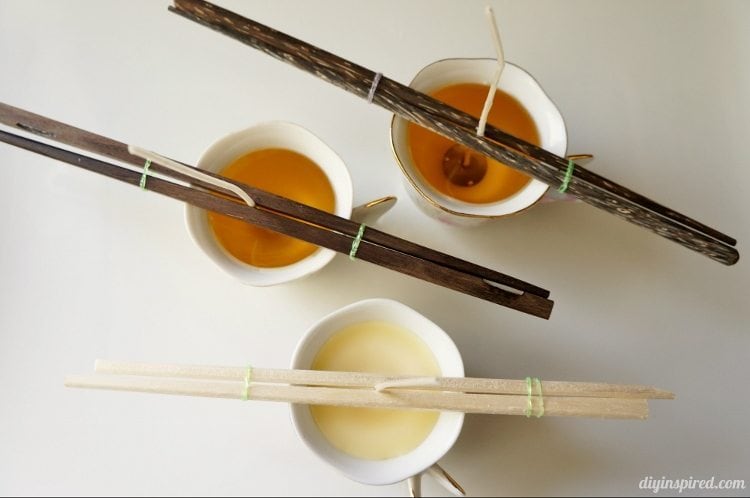
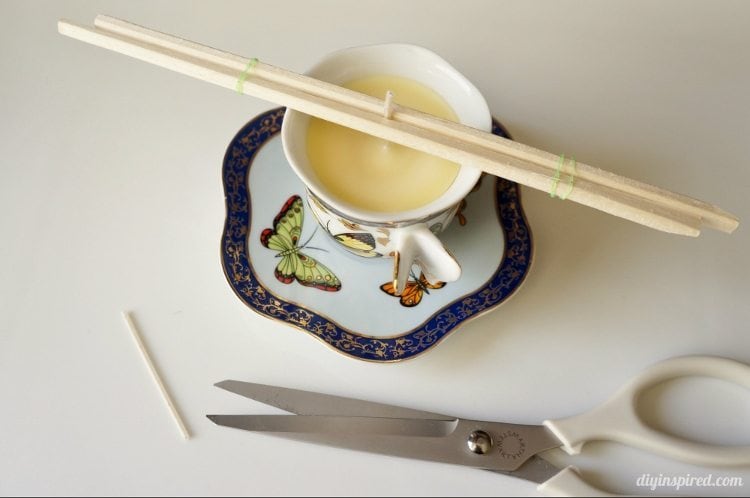
While you are waiting for your wax to melt, prepare your wick. Place the wick in between two chopsticks and secure with two small rubber bands  on each end as shown. I find that small hair bands work well. Make sure the wick is centered.
Once the wax is melted, drop several drops of the essential oil of your choice to scent the candle. Beeswax is the most difficult wax to hold scent, however essential oils work nicely. Use your oven mitt to grab the handle and carefully pour in the wax into the teacup.

Pictured here are two teacups I had just poured, while the third cup has already been cooling for about ten minutes. As you can see it hardens fairly quickly.
Allow the wax to cool for a minimum of 6 hours. Trim the candle wick and remove the chopsticks.
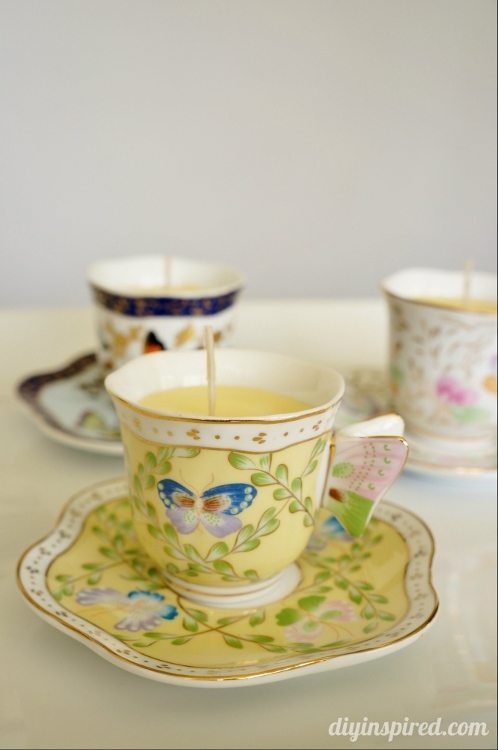
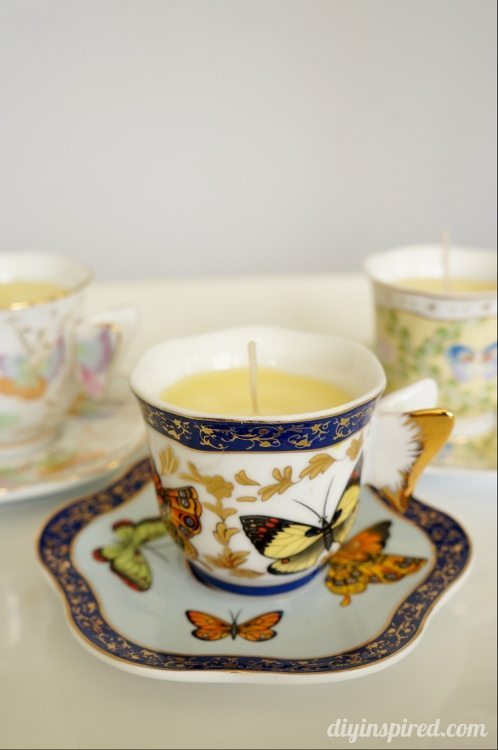
Here are a few after photos. I think they turned out beautifully and I know my mother will love and appreciate them!

Removing the Wax from Glass
To remove the left over wax from your Pyrex measuring cup or from the teacup once the wick ends, pour boiling water into the cup and fill it. Set it aside to cool. Once cooled, you will be able to lift all the left over wax in one swipe! Check out my more detailed tips for how to remove wax from glass as well.
You May Also Like
Before you go, you may also like these simple DIY photo charms I made. Get the full tutorial here. These also make a great personalized gift for a friend or family member.
This post The Title DIY Scented Teacup Candle was originally sponsored by Martha Stewart Living in support of the March of Dimes imbornto campaign in April 2015 and has been updated and improved.

These are adorable! A perfect Mother’s Day idea!
Thank you, Sharon! They were so fun to make!
These turned out SO cute! I love them!
Thanks, Ashley!
This is such a cute idea! Love these and I have the perfect tea cups!
Thank you, KC!
I really like this idea Dinah and love the pretty cups and saucers you used. I have a few mismatched antique ones hiding in a cupboard that I’m definitely going to put on display as candles. Thanks for the inspiration!
I have a few stashed away too! I can’t help buy buy them :/ Thank you so much, Marie!
I love this idea. Today I seen a couple of tea cups that were so pretty at garage sales. Not knowing what I would do with them I didn’t buy them. I’ll be on the look out again now and keep this in mind. Thanks for linking up at the #HomeMattersParty
What a lovely idea – my mum would adore these!
http://crafternooncabaretclub.com
SO cute! These are lovely. Thanks for sharing 🙂
I have been looking for an easy candal tutorial & this is wonderful! Those teacups are beautiful! 🙂
Thank you so much, Jane!
You’re very welcome! 🙂
hi Dinah
i liked your idea but since we cant get bee wax over here what if i get store candle and melt them refill it in cup that it will good idea
thanks