How To Paint Metal – From Drab To Fab
I am so excited to have my friend Tara from A Spectacled Owl today to share her fabulous metal owl makeover! She will show you how to paint metal and turn some candlesticks from drab to fab! Welcome Tara!
I’ve often wondered how to paint metal because I had never done it before. There have been so many times I’ve seen a little statue, candle holder or other tchotchke that is adorable but is either the wrong color for what I am looking for or just a downright ugly color altogether. Ever since I met up with Barbara from Chase The Star and she convinced me that even *I* could spray paint something, all I see are possibilities! My favorite place to look now is the clearance section! Sometimes there are some UGLY things there that just need a little love and a whole lotta paint!
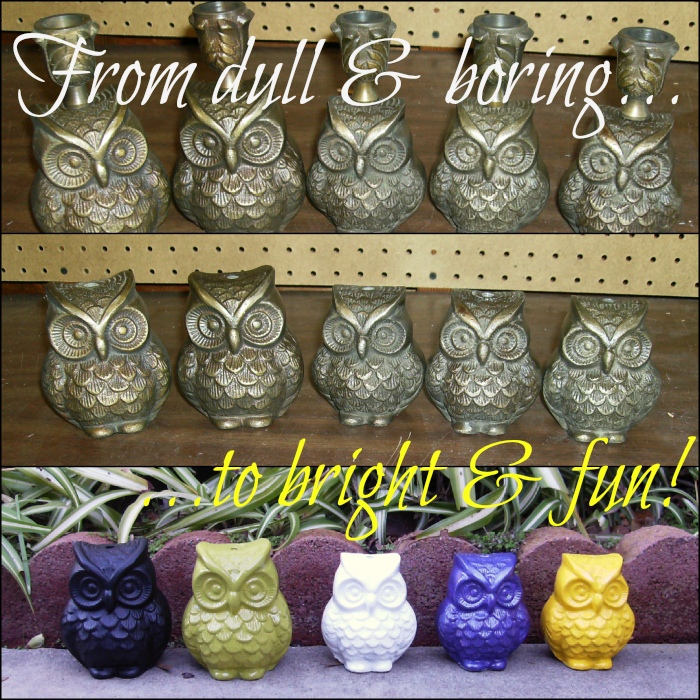
For weeks, my daughter Ashlyn & I had been going into World Market (we’re a tad bit obsessed with the place!) and saw these owl taper candle holders. I loved the owls themselves but I hated the bronzy look to it and I am not a taper candle girl at all. Ashlyn and I went there a week or so ago and I realized that there were more in the clearance section now and they were 75% off! (So, instead of paying $65 for all 5, which I wouldn’t have paid, they were $15 total for all 5!) I took one and tried to see if the taper candle holder part of it was screwed on, which it was, so I knew I could take that part off. We grabbed 2 big ones (for my husband & myself) and 3 little ones (Jared, Ashlyn & Ryan). I brought them home & got to work. Hope you like what I did to them. I am beyond happy with the results!
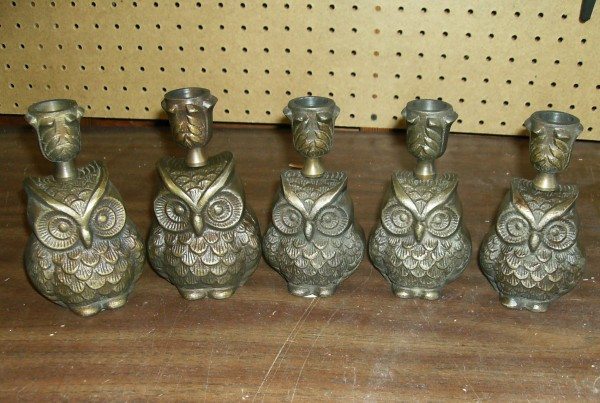
See? Cute owls, just ugly finish & the thing on their heads had to go!
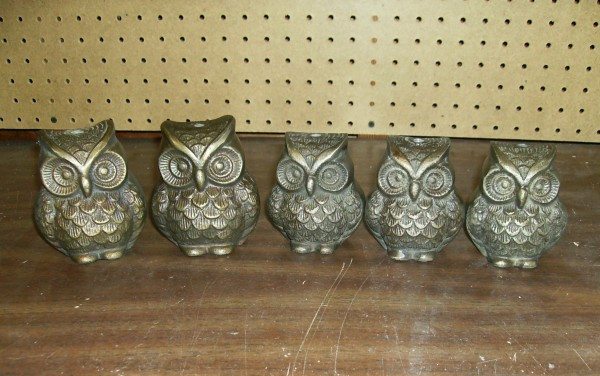
Yay! No more ugly things on their heads! After getting those off, I wiped them down with a paper towel and rubbing alcohol so they were all clean.
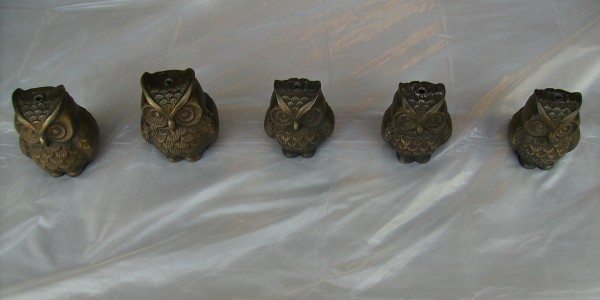
All lined up on plastic, ready to be primed! Yes, they all have holes in their heads now but I’m ok with that!
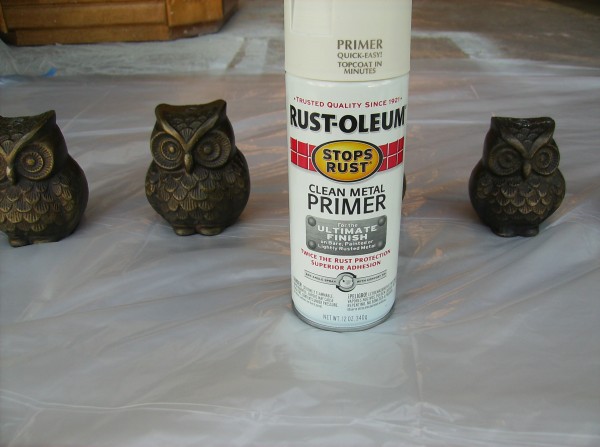
Before painting the metal, you want to use a good primer  so that the paint will stick & not run. The woman at Home Depot recommended this primer when I went to buy some spray paint for another project. I really liked the way it came out smooth & I loved the coverage.

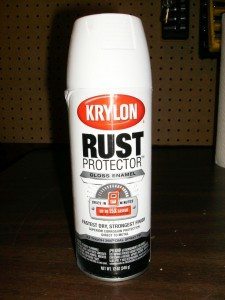
This is after one coat. Primer went on really well. I let it dry about 15 minutes in between coats, 3 coats total. After all the coats were on, I let the owls completely dry overnight and then went to work spray painting them. Each owl got a different color, the favorite color of the family member each represented (Flat black for my husband, a nice green for me, white for my oldest son Jared, violet for Ashlyn & yellow for Ryan). After the white owl dried, I did a coat of Krylon’s Rust Protector Gloss Enamel, a nice glossy white finish.
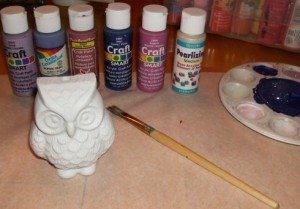
Ashlyn wanted hers to be a dark purple so I decided to break out the ginormous box of crafts paints I have and find a shade. I used Craft Smart Acrylic paint in Violet & added DecoArt Pearlizing Medium to give the paint some shimmer. After painting, I took this one out to the garage to dry with the rest of the owl family (I’m sorry there aren’t other pictures of my spray painting the owls. Those pictures accidentally got deleted *sniff*)
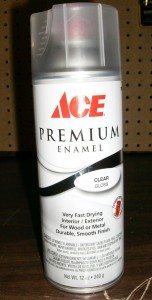
After letting all the owls dry overnight, I sprayed the green, yellow & purple owls with Ace Hardware’s Premium Enamel Gloss in Clear. I left the owl that was painted flat black because my husband really liked the look of it. After leaving the owls for a couple hours to make sure everything was dry, they were ready for their first photo shoot! I loved how these came out & can’t wait to find other ugly things to paint & make beautiful!


Awww, Dinah! Thank you so much for featuring my painted owls! I just love them <3