Love You More Wood Sign DIY
This article is sponsored by Bernzomatic. All opinions are 100% my own.
Easy Wood Sign DIY Instructions for a Handmade Valentine’s Day Gift
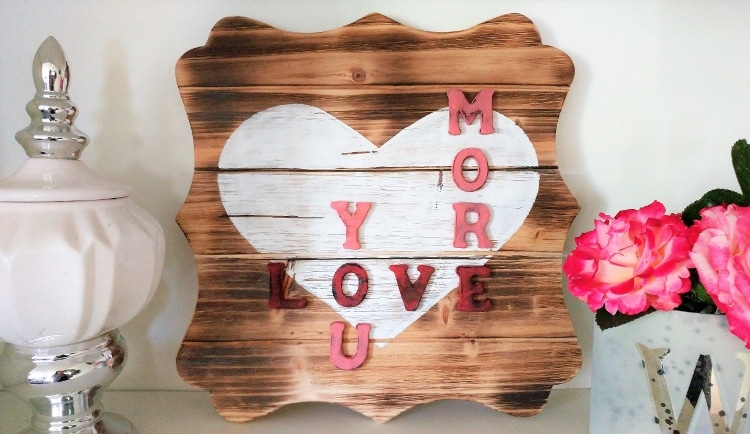
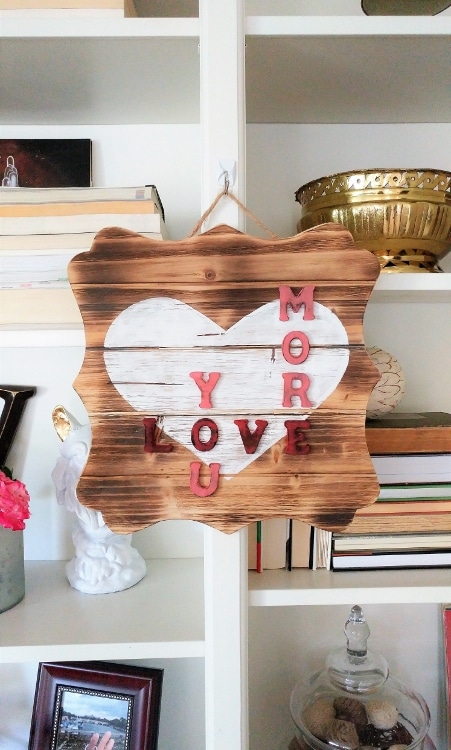
This fun DIY project was inspired by two things: 1) a recent project I did as a Bernzomatic Torch Bearer on how to make wood burned place card holders, and 2) some upcycled Scrabble art I have done in the past. Wood burning is a simple way to add a distressed look to wood, which was perfect for this “Love You More” Valentine’s Day sign. This handmade sign makes a great gift for a friend or loved one for Valentine’s Day.
For this one, I decided to use the Bernzomatic TS4000 torch and propane. Here is how I made it.
Time: 40 Minutes to One Hour
Materials:
- Bernzomatic TS4000
- Bernzomatic Propane
- Work Gloves and Safety Glasses
- Wood Plaque
- Wood Letters
- Sand Paper
- 1 Piece of Paper
- Pencil and Eraser
- Scissors
- Foam Paint Brush
- Paint
- Hot Glue and Glue Gun
Watch the Video Instructions:
Instructions:
Burning the Wood Plaque
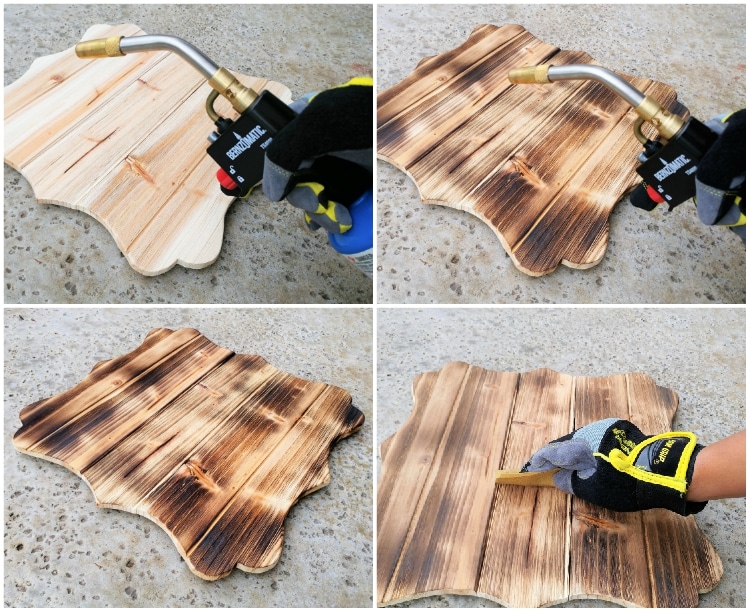
Make sure that you are in a well-ventilated area. I like to work outdoors or in the garage when using a torch. Attach the propane tank and turn on the TS4000 by turning the knob. In a steady back and forth motion, burn the wood moving the torch along the brain of the wood. Gently sand the surface of the plaque and clean off any debris.
Note these few safety tips:
- Do not work near children and pets.
- Turn off the torch and disconnect the propane cylinder when not in use.
- Never leave the torch unattended.
Making the Letters
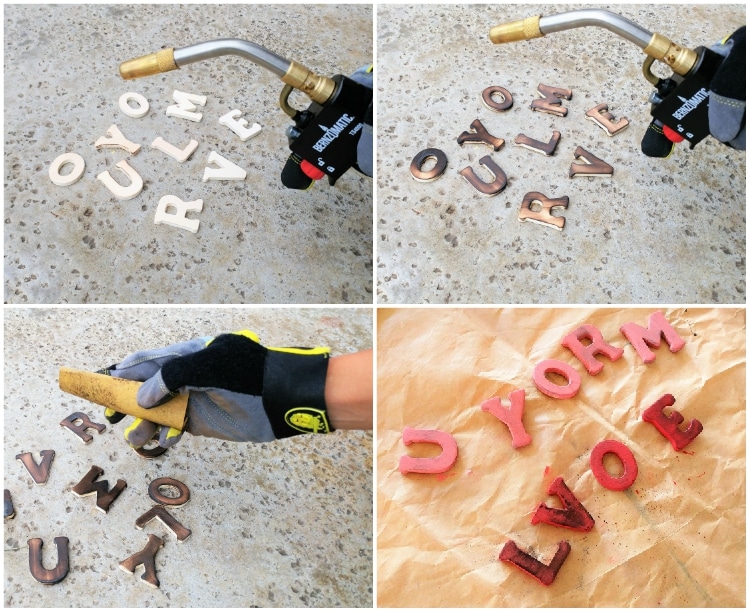
Use the same technique to burn the front of the wood letters. Skip the sanding for now and paint the front and sides of the letters in the desired color. Allow them to dry completely. Next, lightly sand the letters to give them a distressed look. The burned wood will show through to give it a nice dark color. Set them aside.
Painting the Heart
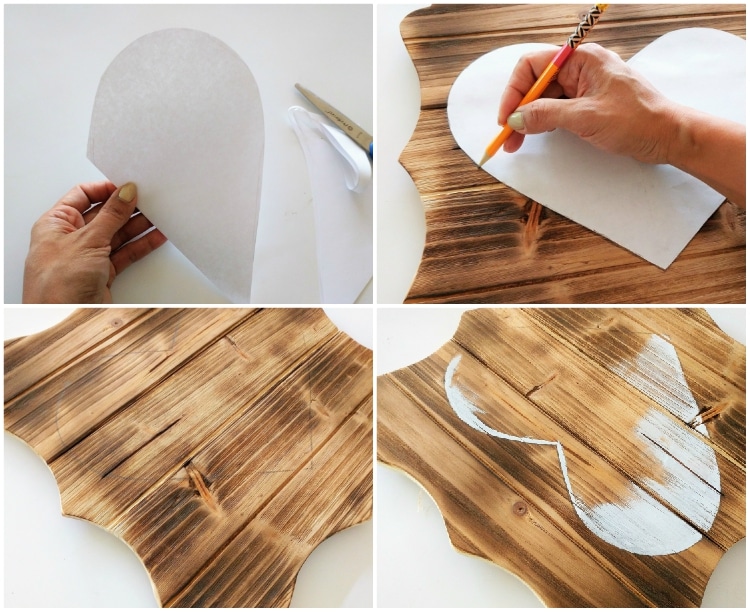
I am not confident to free hand a heart on wood, so I cheated a little! Picture yourself back in elementary school and make a heart with plain white paper by folding it in half, drawing half the heart and cutting it out. Lay it on top of the wood sign in the center. Trace the heart with a pencil and remove the paper.
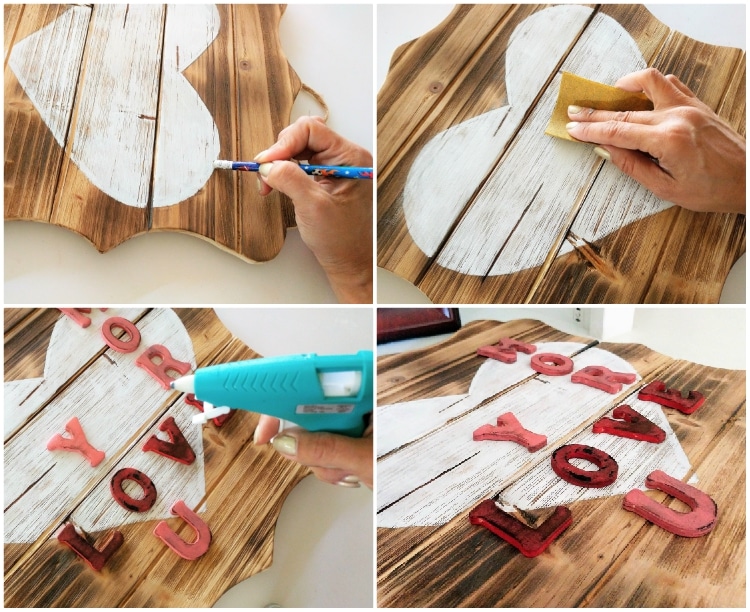
I found that a foam brush works nicely because of the straight edge which allowed me to paint straight lines along the heart. Paint the heart and allow it to dry. Gently sand the heart and brush away and debris. Using an eraser, erase any pencil lines.
Putting it All Together
Lay out the painted letters and center out the design as you wish. Once you are happy with the placement, use hot glue or wood glue to attach them. If you are using hot glue, be careful because it dries quickly on wood.
There you have it… a personalized sign to give to your husband or wife, sister, or best friend on Valentine’s Day! Play around with colors and shapes. You can use any words you want like a special saying that you and your partner have, or even the first name of each family member or friend.
Thank you to Bernzomatic for sponsoring this post. I can’t wait to share my next Torch Bearer project with you! Stay tuned!
In case you missed it, check out my wood burned place card holders. They are perfect for your next dinner party and double as a party favor.
Like it? Pin it!

