DIY Lunar Moon Wall Art
Easy DIY Lunar Moon Wall Art by Laci Jane DIY
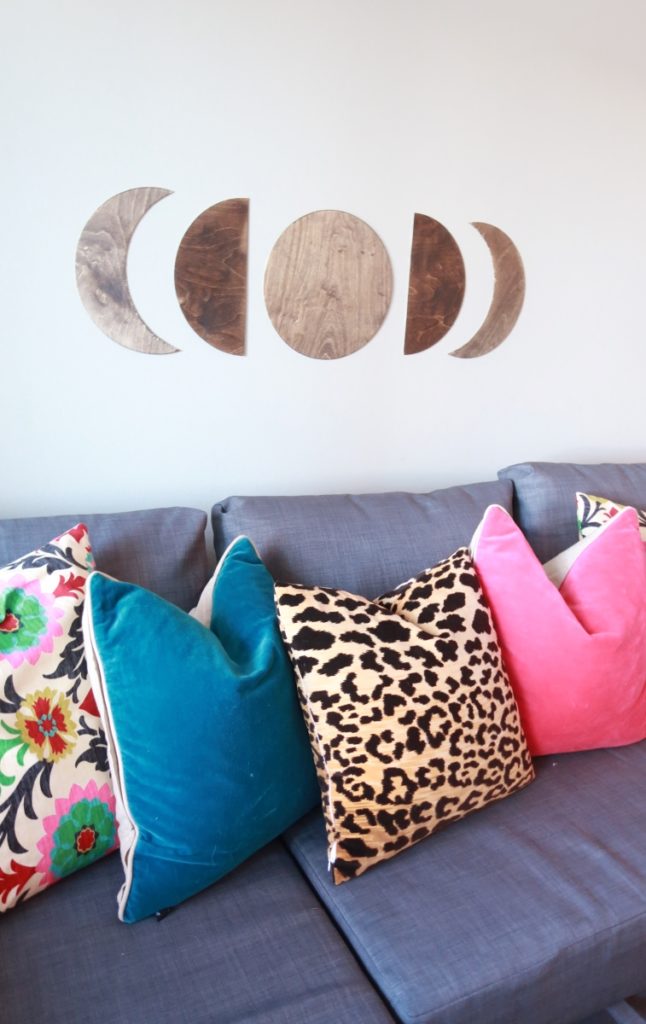
Hello Friends! I’m so happy to be partnering with Dinah again on another series of DIY’S! Today I’m going to show you how to make this West Elm inspired DIY lunar moon wall art. It’s an easy project. I know I say that a lot, (love cheap and easy DIY’S) and this one shouldn’t take you more than 20 minutes to complete.
This project was very spur of the moment. I was going through my stuff prepping for a garage sale when I came across these wooden circles. Not recalling for what, I remember buying them a long time ago. I hesitated to put them in the garage sale and then I had an idea! I could see make a DIY lunar phase wall art project with them! So, I made this on a whim and wanted to share it with you. I really like how they look in my new apartment, although I don’t know if I will keep it here permanently or not (I may put them above my bed).
Watch the DIY Lunar Art Video
Here’s What You Need
Time: 20 Minutes
MATERIALS:
This list contains affiliate links for recommended products.
Pack of Circles
Jigsaw (super cheap!)
Miter Saw
(you may even be able to use a box cutter, the circles aren’t too thick)
DIRECTIONS:
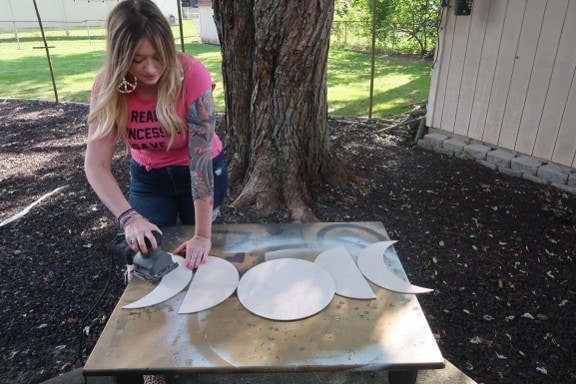
- The first thing you need to do is stencil and cut your circles into moons. To do this, I used one whole circle as my stencil. I traced the crescent moon onto two whole circles.
- Then, I used a ruler for the straight line. Keep in mind you can do whatever phase of the moon you prefer.
- After stenciling and cutting out your moons (you can do whatever gradient you want), you’re going to want to lightly sand the edges down.
- I cut the crescent moons with a jigsaw, but you may even be able to use a box cutter because the wood circles are not very thick. I use a miter saw to cut the straight lines of the moon.
- After you have your moons cut to the gradient you like, you will need to lightly sand the wood pieces to get rid of the shavings and create a smooth surface.
Final Touches on Your DIY Lunar Moon Wall Art
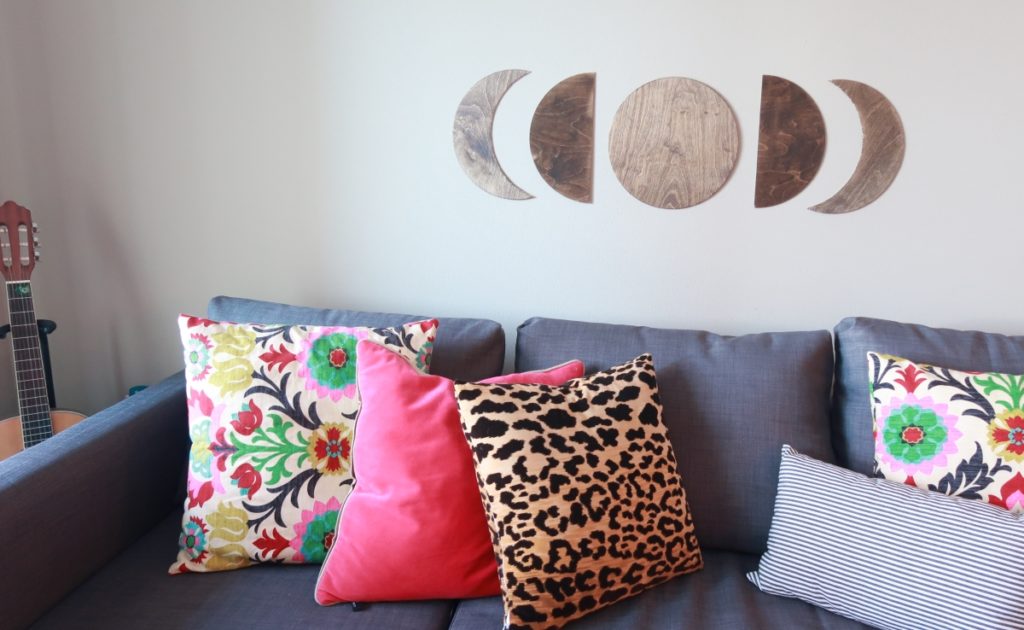
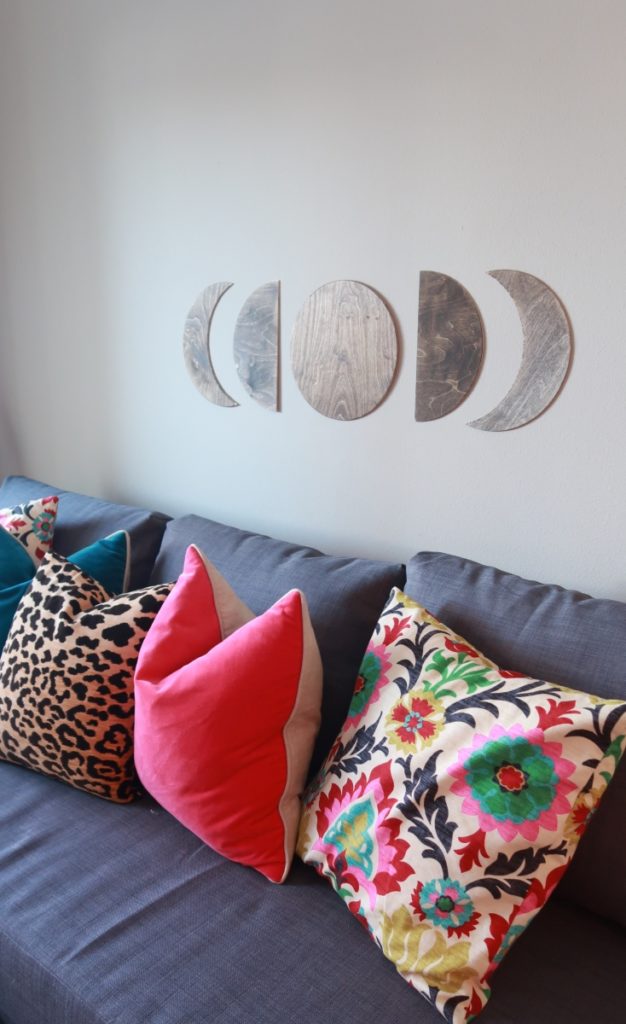
You can leave yours unstained or paint them any color you want. You could even use mod podge and fabric, glitter, or acrylic paint. I ended up staining mine in Minwax stain in dark walnut because it matches my kitchen cabinets. There are so many things you can do to personalize this project even further. You could drill holes in the top and hang them vertically with some twine or ribbon. You could glue the moons onto a wood plank or canvas; the options really are limitless. I used sticky putty and hung them on my wall because they are lightweight, and I didn’t want to put holes in the wall just yet.
Getting something big and more proportionate for the wall behind the couch because we have 9′ ceilings would be nice, but I just haven’t figured out what I want to put her permanently. I do love the way this DIY lunar moon wall art looks above the couch, though. What do you guys think?
More from Laci Jane
- DIY WALL SCONCES
- DIY CRYSTAL MOON SHELF
- REPURPOSED CHICKEN WIRE EARRING HOLDER
- DIY COAT RACK PHOTO LEDGE
- DOLLAR TREE DIY MIRROR
Before you go, here’s another video Laci did with a great filing cabinet transformation!