How to Make Wood Burned Signs
This article, How to Make Wood Burned Signs, is sponsored by Bernzomatic. All opinions are 100% my own.
How to Make Wood Burned Signs Using a Torch
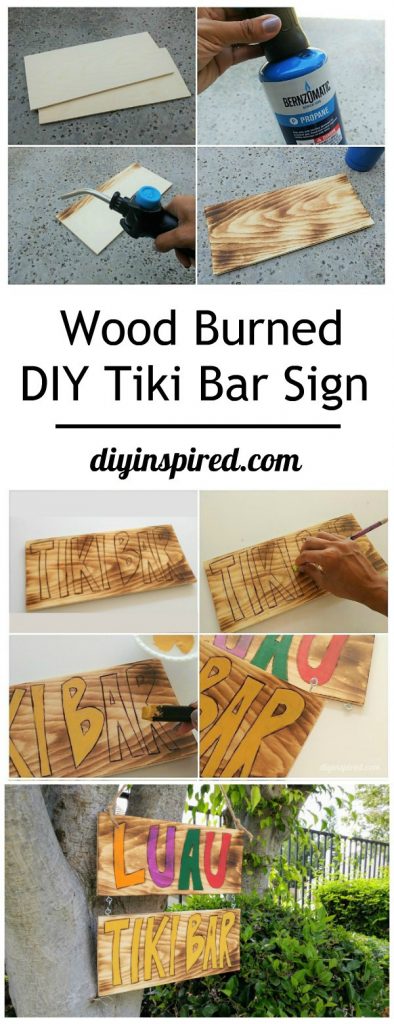
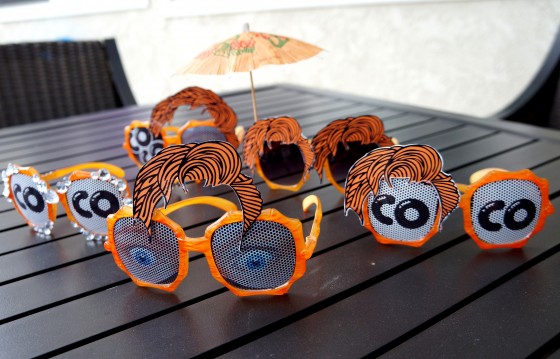
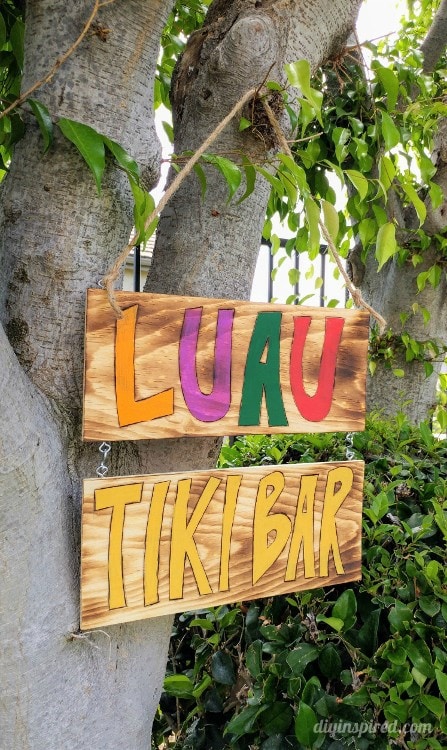
My daughter’s Hawaiian luau birthday party is right around the corner. Since I love making my own party decorations, I thought I’d try to make some signs. I bought some unfinished pine wood for next to nothing and transformed them into aged wood Luau and Tiki Bar signs. Here is my tutorial for how to make wood burned signs.
Time: One Hour
Materials:
- Unfinished Wood
- Bernzomatic TS3500 Multi-Use Torch
- Bernzomatic Propane Cylinder
- Pencil
- Wood Burning Tool (optional)
- Paint
- Paintbrush
- Eye Hooks
- S Hooks
- Pliers
- Twine
Watch the YouTube Video:
BEFORE YOU START THIS PROJECT
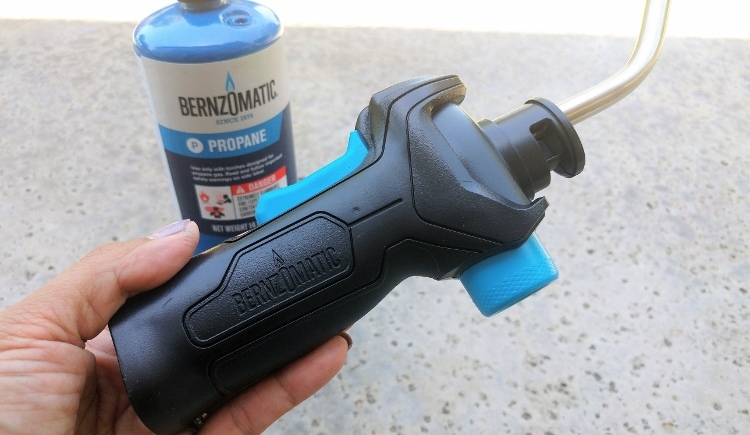
Tips for using the Bernzomatic TS3500 Multi-Use Torch and Bernzomatic Propane Cylinder:
- Before attaching the propane tank to the torch, make sure the torch is in the off position.
- When attaching the propane tank, make sure you are holding it upright.
- Once the propane cylinder is attached, turn on the torch all the way, then adjust your setting.
- Remove the propane tank when the torch is not in use.
- Be sure to follow and read the safety instructions on the Bernzomatic propane tank when attaching the torch.
Instructions for Making the Signs:
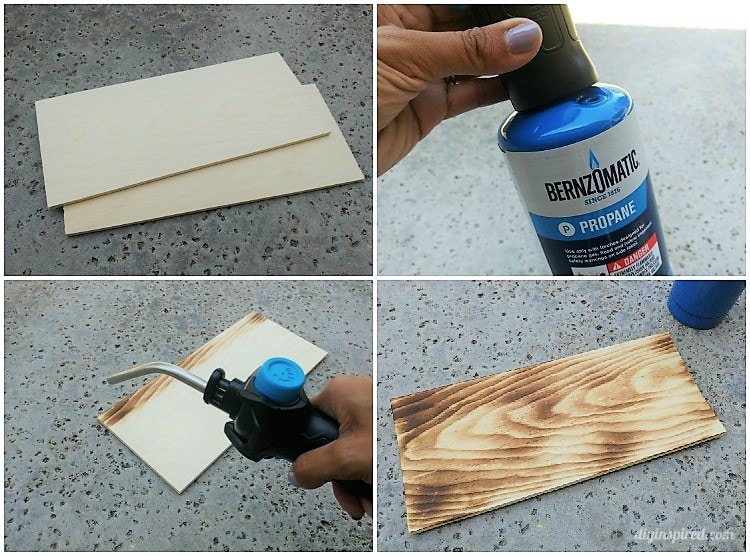
Turn the torch on with the trigger start ignition. Use the torch flame to burn the unfinished wood plank in slow and even strokes along the wood grain. It is very easy to use and you can adjust the flame. Do not place the torch too close or the wood may catch on fire. Repeat this on both side of the wood plank. Note that depending on the thickness of the wood, the plank may warp a little.
Draw the words onto your sign. You can use stencils; however, I chose to freehand the lettering for these signs. I used a wood burning tool to go over the letters using a universal point. Next, I erased any left-over pencil marks. I used craft paint to paint the letters inside the burn lines to make the letters pop.
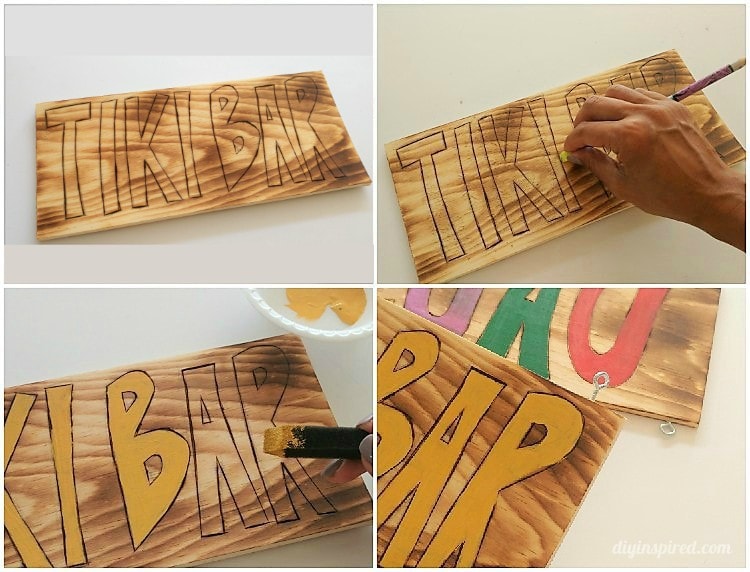
Note: If you do not have a wood burning tool, another option is to paint the letters and then outline them with a black permanent marker.
To hang the signs and attach them together, I screwed in small eye hooks and attached with S hooks. I used pliers to pinch the S hooks together. Finally, I tied twine at the top.
That’s it! I hope you try it out! If you are interested in creating aged wood projects on your own, this Bernzomatic video is a great resource as well. The multi-use torch is useful for a variety of household projects including light soldering, thawing, melting, and heating. Oh! It’s also perfect for lighting tiki torches too! I can’t wait to show you the rest of the luau! If you’re interested in purchasing a torch of your own, visit this page.
You May Also Like:
- How to Make Hawaiian Minions Out of Cardboard
- Hawaiian Minion Craft Idea
- Minion Luau Party Favor with Printable
Like it? Pin it!