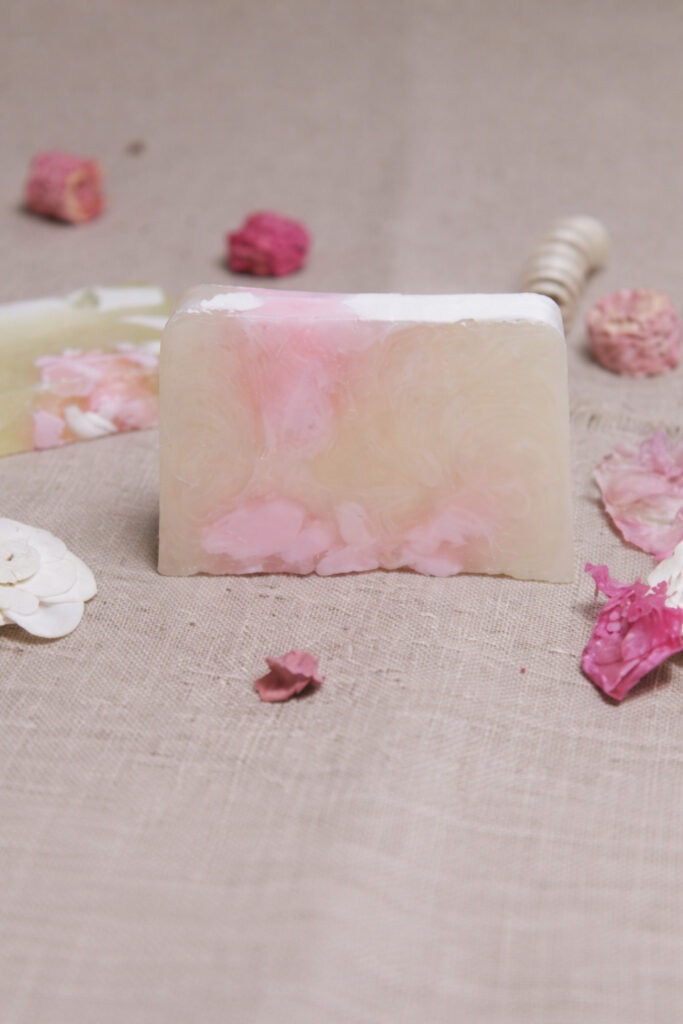
Making Rose Soap
Tips and Instructions for Making Rose Soap

For generations, roses have symbolized love, passion, and romance, earning their place as the signature bloom of Valentine’s Day. Their timeless beauty has been celebrated across art, film, and storytelling—sometimes as a classic emblem of affection, and other times with deeper, more symbolic meaning. With such a rich history and an unmistakably beautiful scent, it’s no surprise that roses have found their way into skincare.
Rose-infused soap captures that same sense of elegance, turning an everyday routine into a small moment of indulgence. Long associated with luxury and self-care, a rose bath evokes both softness and nourishment for the skin.
What was once considered a specialty or boutique item is now easily within reach—because making your own rose soap at home is simpler than ever.
INGREDIENTS:
This list contains recommended products from Amazon.
1 bar clear glycerine soap
2 tsp. chopped rose petals
1 tsp. powdered milk
3-4 drops rose fragrance oil
2-3 drops vanilla fragrance oil (optional)
ROSE SOAP PROCEDURE:
- Using an old cheese grater, shred the glycerine soap bar. Create a double boiler by placing a Pyrex bowl on top of a pot of water and bring the water to a boil. Put the shreds in the bowl and melt the bar. Once totally melted, remove the bowl from the heat.
- Using a wooden spoon or hand held electric mixer, begin mixing the liquid soap. As you stir, add the powdered milk. Stir till you have an even consistency.
- Add half of the petals to the mixture and stir.
- Next, drop in the fragrance oil and stir the soap again.
- Place some petals at the bottom of your soap mold. Then pour your soap into the molds and sprinkle a few more petals on top.
- Let the soap harden in their molds. Once hard, pop them out and use your soap!
This rose soap recipe is very easy to follow, and the end product will make a great gift for family and friends, as well as a wonderful soap to put in guest bathrooms and powder rooms. You can also choose to use it all yourself! Just make sure that you store the bars in airtight containers, such as zip lock bags, till you’re ready to use the next bar.
NOTE: The vanilla fragrance will soften the soap fragrance and give the soap a vanilla undertone. Be prepared for some of the petals to turn black due to the heat of the mixture.
Choosing Soap Molds
When choosing soap molds for DIY soap making, it’s best to prioritize flexibility, durability, and ease of use. Silicone molds are a popular choice because they’re non-stick, making it easy to release finished bars without damaging their shape or design. Consider the size and style you want—individual cavity molds are great for beginners, while loaf molds allow you to cut custom-sized bars. Also, look for molds that are sturdy enough to hold their shape when filled and heat-resistant if you’re working with melt-and-pour or hot process soap. Investing in quality molds upfront can make the entire soap-making process smoother and more enjoyable.
More Cool Beauty DIY Ideas
- Natural Home Remedies for Cold and Flu
- How to Make Your Own Lip Balm
- Worry Free Handmade Soap & Skincare
- How To Make Your Own Shampoo
- DIY Herbal Spa Satchel
Originally By: Sandy Simmons of Super Soap Making Secrets, updated
02/12

This would make a beautiful Mother’s Day gift or wedding favor! I love it!