Refurbished Garage Sale Night Stands
DIY Refurbished Garage Sale Night Stands Twice Madeover
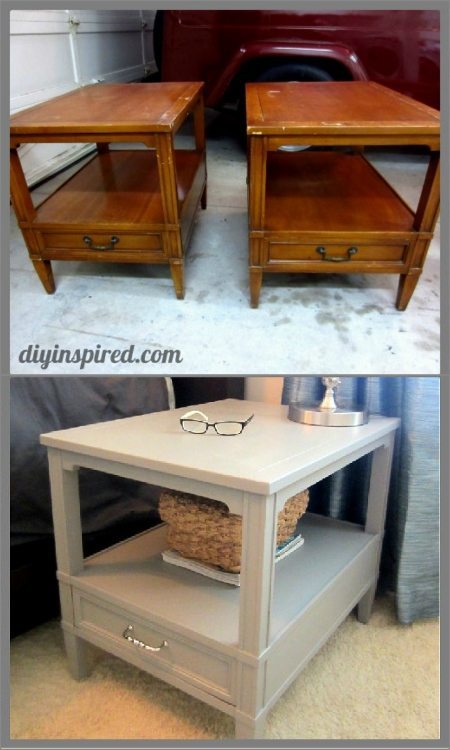
On the same garage sale trip I found my wooden bench almost ten years ago, I found these two night stands for… you’ll never believe this… $5.00 each!!! They resulted in these Refurbished Garage Sale Night Stands made over two times. What?? I know! All I knew was that it had:
- great bones and would be a good trash to treasure project
- it didn’t smell
- there were no major scratches or dents
- and the lady was coo coo
Just kidding about that last part but I seriously couldn’t believe that I walked away with three great pieces for $15.00. Anywho, here is how I made my refurbished garage sale night stands.
Watch the Video
First, watch the YouTube video on the most recent makeover.
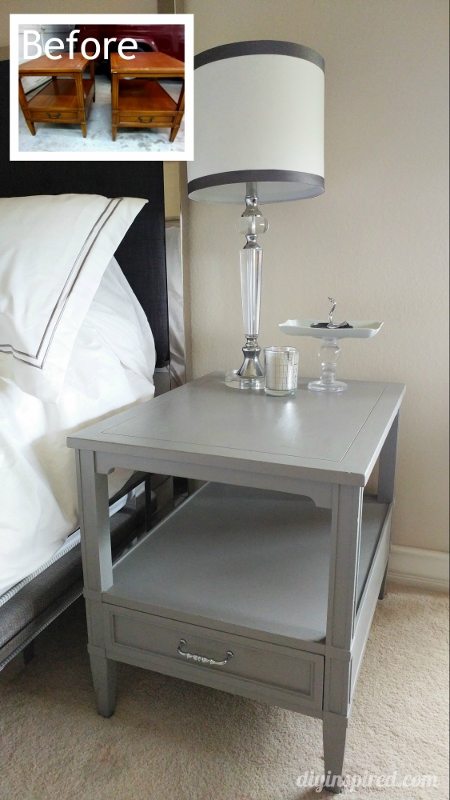
Makeover #1: Gray and Silver Night Stands

Easy DIY Refurbished Garage Sale Night Stands Instructions
Time: About an Hour
Here is what you’ll need:
The materials list below contains some affiliate links of recommended products I use.
- Thrift store or garage sale night stands in need of some love
- Sander
 (I used both block and electric, but just block is fine)
 - Paint
- Paint brush
- Hardware (optional)
- Screwdriver
- Clean cloth
- Time
- Read this to find out if you need primer
- Acrylic Glaze
 (I used both block and electric, but just block is fine)


- The first thing I did was removed the hardware and sanded it. I used a hand block sander for hard to reach areas, and used an electrical sander for the larger areas like the top and the shelf.
- Next, I cleaned the sucker. It obviously had not been cleaned in a long time, perhaps left lonely and unattended in a garage. There were caked on gooey stains, but nothing that couldn’t be easily removed.
- Once they were clean and dry, I painted them with the left over paint I had from re-painting my guest room. I used two coats. You can add a coat of polyurethane or clear acrylic spray. You can buy cans of the spray at any craft store or hardware store in the paint section.
- Lastly, I had to order the new handles online because the average size these days is either 3” or 4”. These were 3.5”. If you’d rather not order new handles online, you can always putty the holes and drill new ones before you paint. I screwed in my new hardware when they arrived in the mail.
Makeover #2: White and Gold Night Stands
The gray night stands lasted about 8 years and then I wanted to give them a little update.
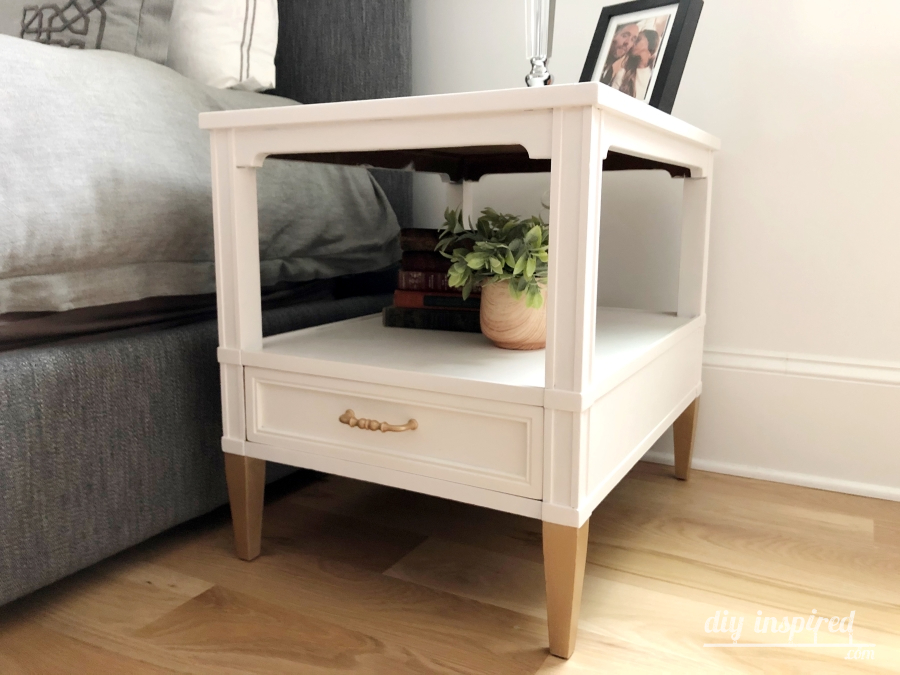
Here are a few differences.
- The handles were painted with Gold Rust-oleum Metallic in Brilliant Metal Finish.
- The dressers were painted in Sherwin Williams Infinity Paint in the color IBIS White.
- For the top coat I used Minwax Fast-Drying Polyurethane in Clear Satin.
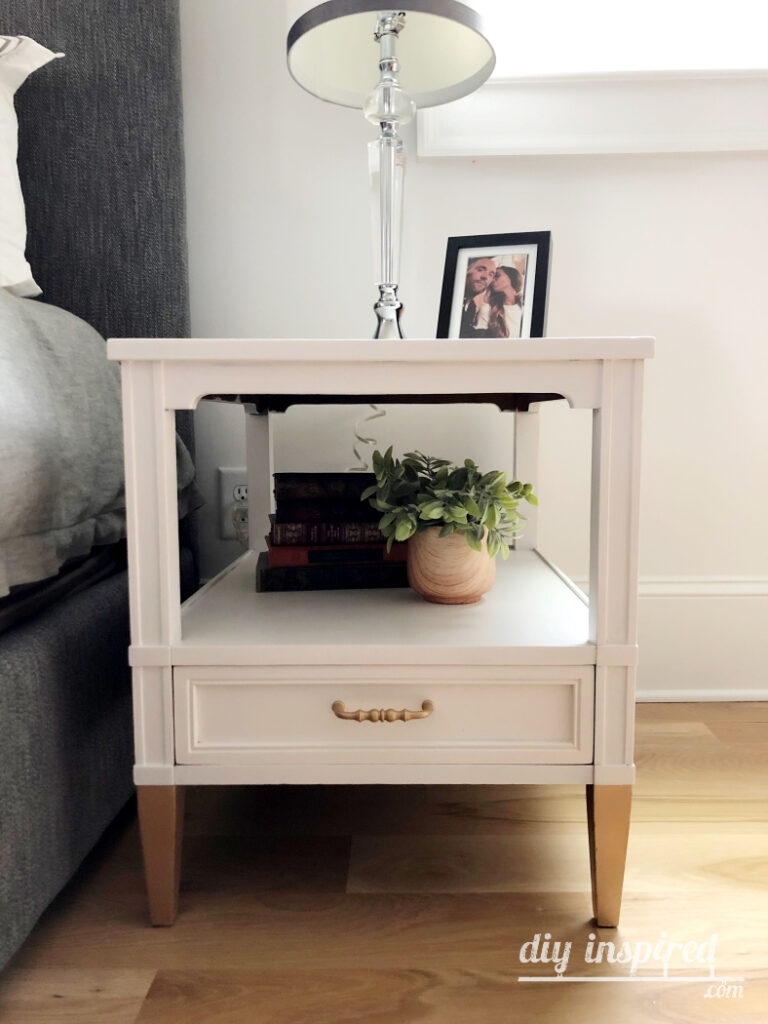
Here is another photo.
Ways to Save
To save money, consider buying hardware secondhand at:
- Habitat for Humanity Restore (one of my faves)
- Local Thrift Stores
- Swap Meets
- Garage Sales
- Estate Sales
- or at Hobby Lobby (don’t forget your coupon)
Depending on the situation, sometimes it is cheaper to buy an entire piece of second hand furniture just for the hardware. You can always repurpose the rest.
Check out my trash to treasure guide for why you should buy furniture secondhand. It also includes a list of trash to treasure tips and project ideas.
The Easiest Way to Paint Knobs and Handles
Got Knobs? Here is an easy spray painting hack for updating knobs you already have:
Like it? Pin it!
I would love it if you shared this project on Pinterest! Thank you in advance.
You May Also Like
Update: I originally shared this post on November 20, 2012. I STILL have these night stands today in my master bedroom!


Great job on these! I can’t believe they were $5. I never find deals that good on furniture! I really like the color you chose too. Love your site!
They were such a good deal I couldn’t believe it either! Thank you!
I’ve been wanting new end tables but didn’t want to pay a fortune for the ones I liked. Thanks to your article I know how to make my old ones look like the ones I wanted. Thanks so much!
Oh that’s great!! Send me a picture if you can! 🙂
I discovered your site today and I can’t stop reading all your posts! I especially love this nightstand redo. The paint color and silver pull are perfect. All the best.
Diana
Thank you SO much Diana! That really means a lot to me!
Love the nite stands. I’m in desperate need of them so I will be on the hunt. Love the style of yours. Very nice.
Thank you, Valerie! I’m so glad you like them. I couldn’t believe what a deal I got on them!
Just came across your site and I love the night stand makeover. What colour did you paint them, it’s gorgeous!
Thank you so much, Nyasha! I really should have written the paint type and color at the time but I can’t remember! I’m so sorry!
Beautiful! Absolutely love the color! Thanks for sharing!
Thank you so much, Nancy!
I was wondering how the nightstands were holding up since you never mentioned the priming step. I don’t mind sanding but the priming
Hi Barbara! They are still holding up great and are still in our master bedroom. No scratches and survived a move and two kids… ha! The paint I used had primer already in it. It costs a little more but it’s worth saving that step.
These look fantastic and have inspired me to paint a small table I bought today. I just wondered, what did you do with the inside of the drawers, did you paint them or just leave them?
Thanks, Liz! I left them. Send me a picture! I’d love to see your table!
Beautiful results. Thanks for sharing. How generous of that lady. She made your day.
She was! Thank you, Ann!
Love this! I am starting a coffee table and wondered if you sealed the top after painting to protect it? If so, what would you recommend?
Hi Karen! You know I didn’t when I first painted it, but then doing it months after. I used Krylon’s spray on glaze. It was easy and not messy. Here is my affiliate link: https://amzn.to/2FqxUsF