Garage Sale Bench Makeover
Trash to Treasure Project: Garage Sale Bench Makeover

Here is my story about the best trash to treasure garage sale bench makeover ever. Two weekends ago I got a call from my best friend. It went something like this:
- Jen: I just dropped Tiff off at school and am stopping at this garage sale.
- Me: Ooooh is it any good?
- Jen: Let me call you back.
<vibrate vibrate> (I never have my ringer on anymore these days)
- Me: Well?
- Jen: She’s moving and needs to sell everything this weekend. She said she’d give you a good deal!
- Me: I’m putting on my shoes! Text me the address!
In 5 minutes, we were out the door and my daughter was in her car seat. It was the best garage sale I’d been to in a while. A lot of stuff for cheap! I walked away with two side tables and a bench for $15 total!! I didn’t even have to haggle. Yeah, I thought she was nuts too but I didn’t argue.
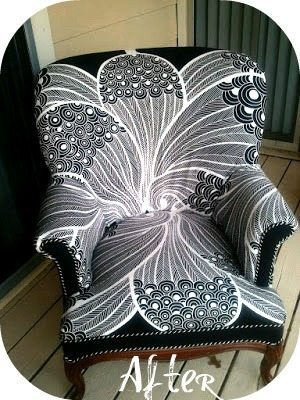
I had no idea what color to do so I posted it on my Facebook page. I got a ton of great feedback but for some reason I still couldn’t choose. All I knew was that I wanted to add a cushion and upholster it on top. I decided to go to the fabric store and stare at all the upholstery fabrics until one jumped out at me and I found this fabulous print that happen to match.
Side note: Please let me tell you that if you have a toddler, going to the fabric store to pick out something that is not yet decided is no easy feat. The entire time I was there my daughter was running up and down the aisles, throwing yarn in the air and yelling out the wrong colors. Put her in the cart you say? Yeah right…
Also, because I am SO CHEAP I went back to the store 3 times on three different days, so that I could use a coupon for each item I bought. What? It saved me $15! It was totally worth it. I already had all the other supplies I needed from past projects so technically, this entire makeover cost me $20.00 including the bench! Woot woot!
Before I go on, here are the materials you need:


I first attempted to clean the bench and started wiping it down. But the second a giant spider ran out and attacked me I decided to take this sucker outside and hose it off. With the highest stream setting on my nozzle, I hosed it down and let it air dry outside.
After the bench dried, I spray painted it red. I loved the original color and it matched my fabric, so I touched it up with some red spray paint with primer.
Be sure to check out my article for when and how to use primer for DIY painting projects and furniture makeovers.
")
Meanwhile, using a ruler, pencil, and the best scissors ever, I cut some high density craft foam to fit over the top of my bench.
")
")
I also cut and measured my fabric.
")
I laid the foam on top of the center of my fabric and laid the bench on top upside down once it was dry.
")
")
Using a stable gun and heavy duty staples, I began pulling the fabric taught and stapling it to the bench. The corners were a bit tricky, but with a little maneuvering and folding, I was able to make the sides look neat.
")
")
")
")
Here are a couple after photos.
")
")
That’s it! I’m pretty proud of my $20 garage sale bench makeover that will go perfectly in my guest room at the foot of the bed! The best part is that I saw a smaller plain wood bench in a catalog for $149.00!
For more repurposing ideas and trash to treasure ideas, check out this fun round-up of garage sale and thrift store transformations! There are over two dozen original projects I have done including housewares and furniture transformations.
Check out my trash to treasure guide for why you should buy furniture secondhand. It also includes a list of trash to treasure tips and project ideas.
Super cute!! I love it!! Great job.
Thank you, Loren!!!
Love it! What a steal. Can’t wait to go and look for another project.
I know!! OK not this Friday but next!
That really turned out lovely. Very nice!
Thank you so much, Dree! 🙂
I love the fabric choice.
Watch out! Woman with staple gun in the vicinity! LOL
I need one of those for my daycare kids to use when taking off boots, coats, etc…. Right now I’m using a popcorn canister. Love it! The little 3 yr old I watch and i are already planning to visit garage sales this summer – everyone here in Omaha though is SOOOO outrageous with their prices it’s hard to find a good deal – but occasionally it can be done. =D Smiles!
Hi Tina! The popcorn canister is a great idea! I know, I got lucky on the price. I think I just happen to catch her at a good time! Thank you for stopping by and commenting!
I love this post!! I have dreams of making over furniture but I am in much craftier in my head than I think my hands really are! Maybe I will have to bribe you to come and coach me through some things for our new house. 🙂 I think your blog is really going to help inspire me to finish decorating!
You are so sweet! I’m in!!! It was SO great meeting you today.
Love it! Such a fun fabric!
Thank you, Audra! I fell in love with it too!
Hi, Dinah ~ I’m visiting from the DIY Inspired Link Party. I love this project! And $20? Wow, I’m impressed (by the great price, but also by the fact that you went back to the store 3 times with your daughter in tow)! I love that you just stapled the fabric to the bench rather than sewing a cover. I’ll be on the look out for a bench at the garage sales I hit. Thanks for sharing!
Super cute and very inventive! What a great idea to redo a garage sale find. Thanks for sharing your makeover at Inspire Me Mondays!
Thank you, Brandi!