DIY Minecraft Costume Instructions
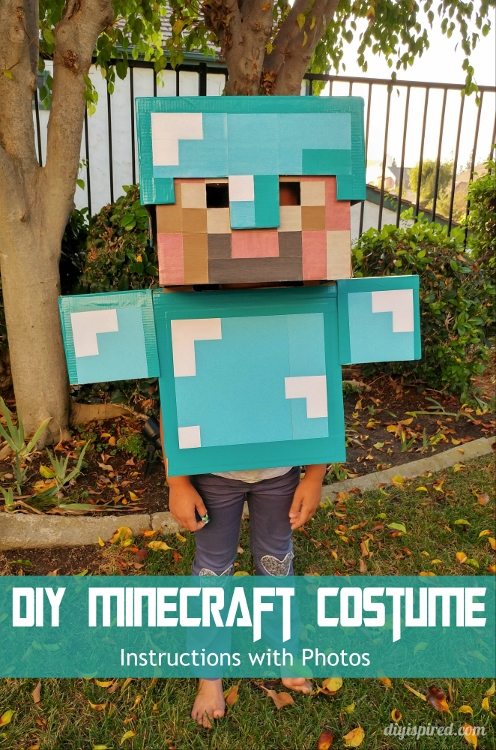
My best friend asked me to make a Diamond Steve Minecraft costume for her son. I didn’t hesitate to say yes, even without knowing who the heck Diamond Steve was. I googled him and went to work. This costume isn’t perfect, but I made it the best I knew how. Here are my DIY Minecraft costume instructions.
Notes: I will break the instructions down in three parts, head, helmet, and armor. Also, the basis for the pixel squares is 1.5” X 1.5” for the whole costume.
Time: Weekend Project
Materials:
- 11 X 11 X 11 Cardboard shipping box
- Medium cardboard moving box
- Roll of blue duct tape
- Colored paper (hues of blue and tan, brown, and white)
- Paper Cutter
- Yardstick
- Ruler
- Box cutter or craft knife
- White glue or Mod Podge
- Foam brush
- Foam
Instructions for Head
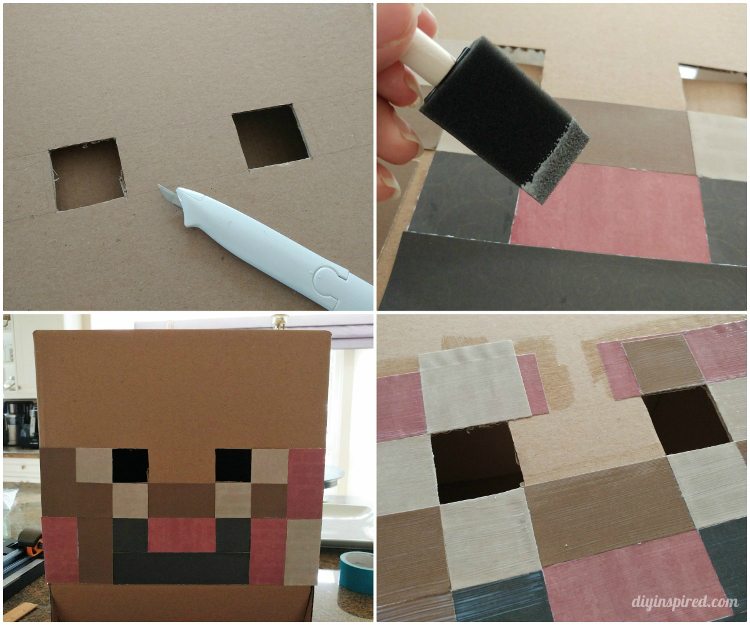
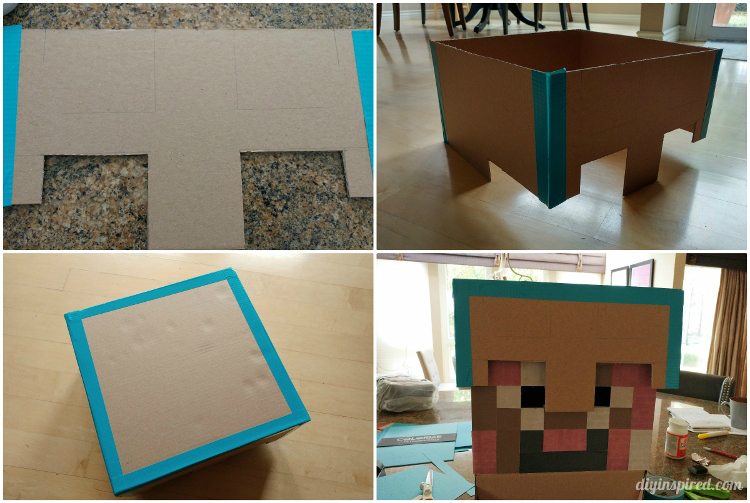
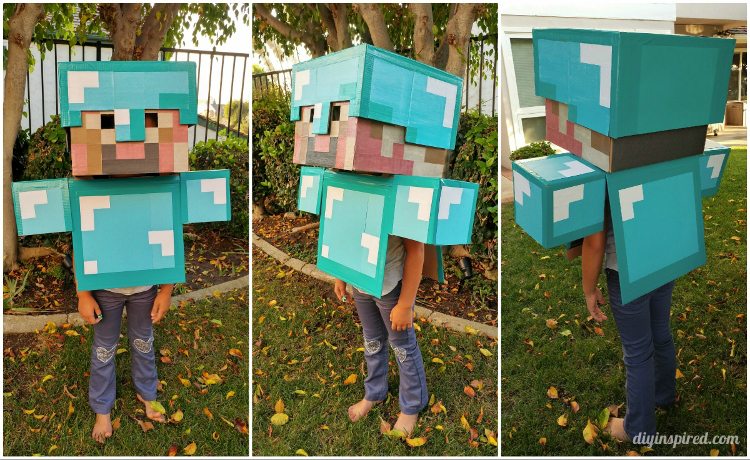
I used an 11 X 11 X 11 cardboard shipping box for the head. Put the box together leaving the one end open. Cut off one flap; this will be the side with the face. Tuck the remaining three flaps inside. I played around with the face. A paper cutter is the simplest way to cut 1.5” squares. The black mouth is on the first and second row from the bottom and eyes are the 4th row from the bottom. I measured and cut 1.5” X 1.5” squares for the eyes (3 rows in from each side), again following my 1.5” guide. I left a 1.5” by 3” space in the middle of the eyes because it will be covered by the helmet. Once I laid out the placement of each square, I glued them on using Mod Podge and a foam brush. Lastly, I brushed a coat of Mod Podge over the entire face. For the sides of the face you can see the pattern I did in the AFTER photos below of the face and helmet.
Instructions for the Helmet
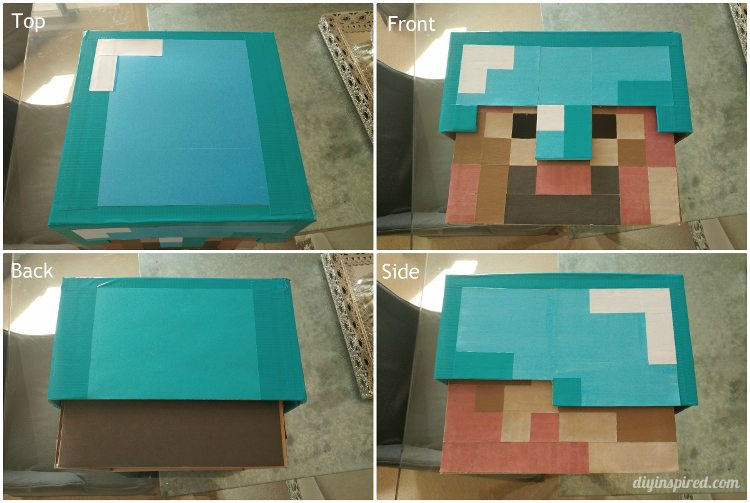
The helmet front started as a 13” X 7.5” piece and I shaped it as shown, again using the 1.5” guide. For example, the part in between the eyes is 3” wide. The sides of the helmet also started out as 13” X 7.5” pieces. For the sides I cut a 6” X 1.5” grove from the bottom fronts. The back is 13” X 7.5” as well. I used duct to tape the four sides together. I cut a 13” square for the top and duct taped it on.
I used a light colored blue paper as the base of the helmet, then added random dark blue and white “pixels”, once again following the 1.5” square rule.
For the inside of the helmet, you will need to place foam inside to pad the head. You may need to cut the inside of the foam to shape the child’s head. I actually used (don’t laugh) a cheese head (yes for the Greenbay Packers… my in-laws live in Wisconsin) hat inside as the cushion.
To attach the helmet to the head apply a generous amount of glue with your foam brush to the top of the head and align the helmet on top. Allow it to dry overnight.
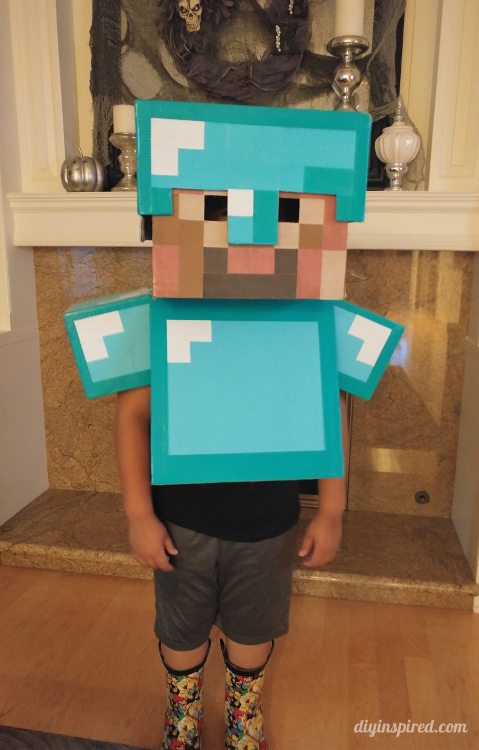
Here are the AFTER photos of the head and helmet.
Instructions for the Armor
For the armor, I measured my friend’s son. For reference his measurements were 15.5” shoulder to shoulder, 11.5” neck to belly button, and his head was 21.75”.
I made the shoulders first. I cut four 6” X 12” pieces. Fold each piece in half. Duct tape two together forming shoulder pads as shown. The armor is 13” X 32.5”. The front and back of the armor should be 13” long, therefore fold it accordingly. I cut the hole in the middle a few times until it was able to fit over his head.
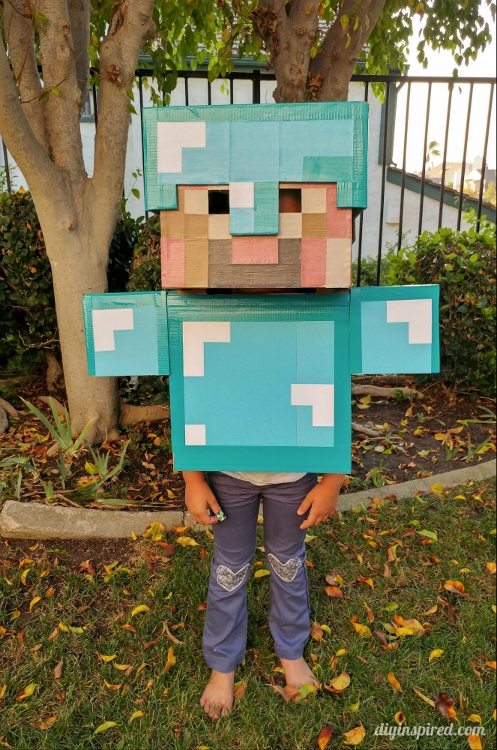
Attach the shoulders to each side of the armor with duct tape. I used the light blue paper to cover the armor using the blue duct tape as trim. I added white “pixels” on all sides. You can see the patterns I used in these AFTER photos.
Note: My daughter is modeling this for me. My friend’s son is a little older and bigger than she is.
That’s it! I hope you try it out! Be sure to check out some other costumes I have made!
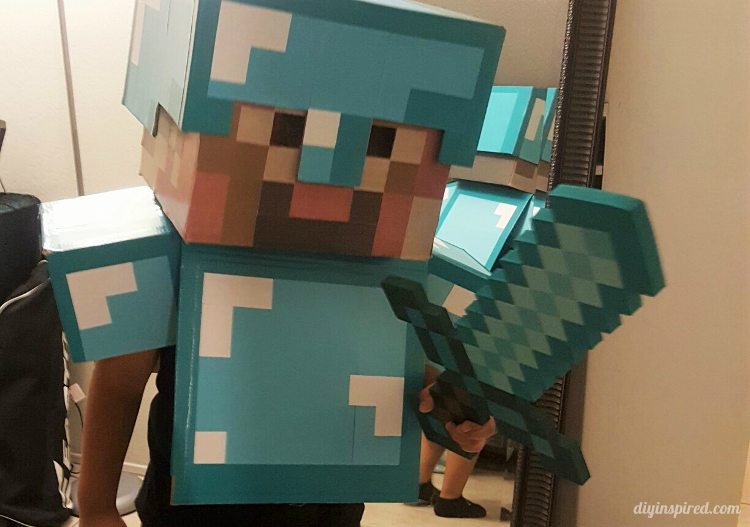
Update!! Here are some pictures of my friend’s son wearing the costume. His sword matched perfectly too!
Like it? Pin it!

