• Project Gallery
  • DIY
    • Recycled DIY
    • Upcycled DIY
    • Repurposed DIY
    • Refurbished DIY
    • DIY Furniture
    • Repurposed Furniture
    • Thrift Store Transformations
  • Crafts
    • Wood Crafts
    • Paper Crafts
    • Photo Crafts
    • Kids Craft Ideas
    • Doll Crafts
    • Felt Crafts
    • Stenciling
    • Gift Wrapping
    • Printables
  • Party
    • Birthday Party
    • Baby Shower
    • Bridal Shower
    • Wedding
    • Team Sports
    • Sweets and Treats
    • Cocktail Corner
  • Holidays
    • St. Patrick’s Day
    • Easter
    • Earth Day
    • Teacher Appreciation
    • Mother’s Day
    • Father’s Day
    • Fourth of July
    • Back to School
    • Halloween
    • Halloween Costumes
    • Thanksgiving
    • Elf on the Shelf
    • Christmas
    • New Years
    • Valentine’s Day
  • Home & Garden
    • Storage & Organization
    • Cleaning Tips
    • Gardening
    • Makeovers
    • Kid Stuff Makeovers
    • DIY Tips & Tricks
    • DIY Artwork
    • Curb Appeal
  • Health & Beauty
    • Health & Wellness
    • Bath & Body
  • Nav Social Menu

    • Facebook
    • Instagram
    • Pinterest
    • Twitter
    • YouTube

DIY Inspired

Repurpose, Reinvent

  • About
  • Contact
  • Advertising
  • Featured
  • Disclosure

Kid Stuff Makeovers Trash To Treasure

Play Kitchen Hutch from Thrift Store Finds

Trash to Treasure: Play Kitchen Hutch from Thrift Store Finds

I had made a little play kitchen hutch for my daughter before, as well as refurbished an old Disney princess table I got for free. Along with a Pottery Barn stove I got on Craigslist, my daughter plays with this little play kitchen almost every single day. This is why I couldn’t resist making another play kitchen hutch from thrift store finds I got the other day at Goodwill.


DIY Play Kitchen Hutch From Thrift Store Makeover

Materials:

  • Great thrift store finds!
  • Sander
  • Krylon Primer and Paint
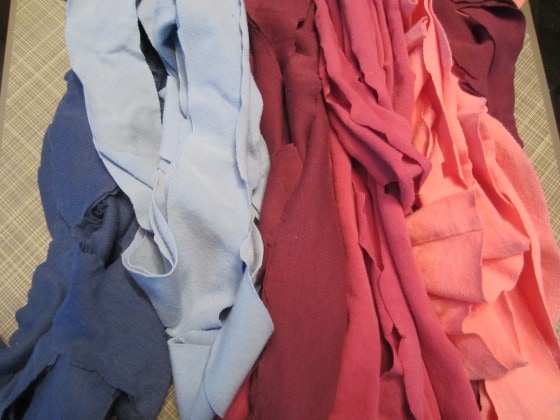
  • Fabric
  • Scissors
  • Rotary Cutter and Cutting Mat
  • Iron and ironing board
  • Spray starch
  • Strong Spray Adhesive
  • Wood glue
  • Hammer and nails

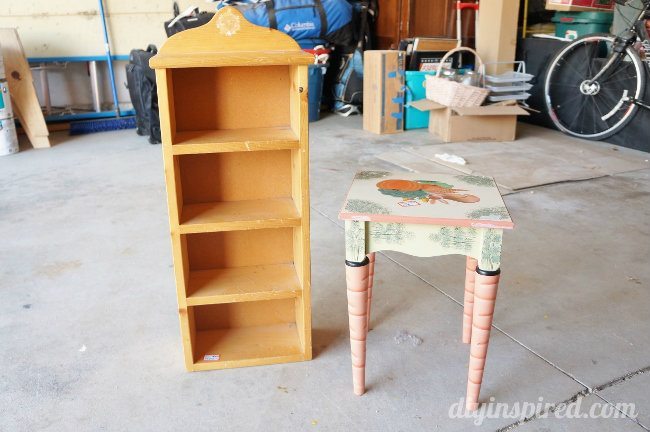
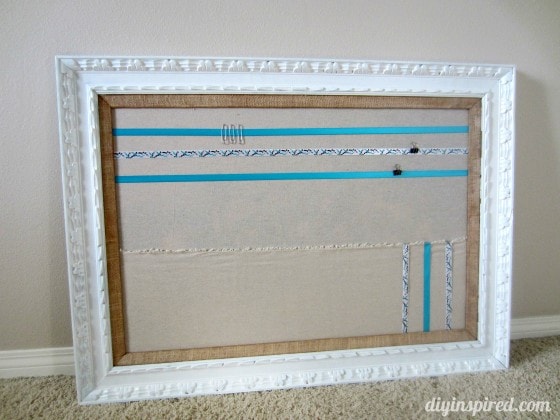
Here is the little table and wood shelving I found.  I got both of them for $9.50 total. Great deal, right? There were a few nicks and scratches but nothing too bad.

Play Hutch From Thrift Store Finds

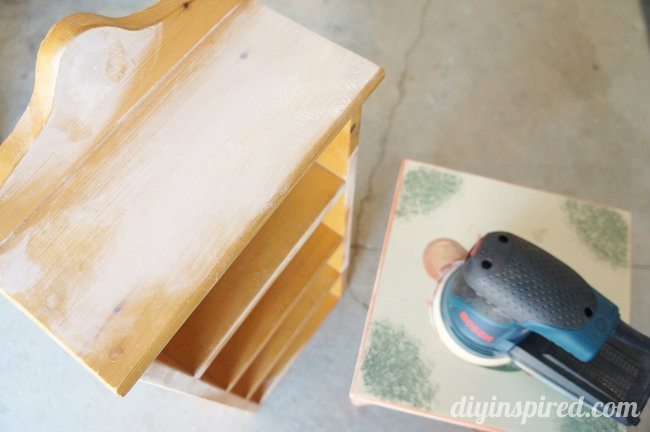
I spot sanded a few areas to smooth out some blemishes.

Play Hutch Thrift Store Makeover

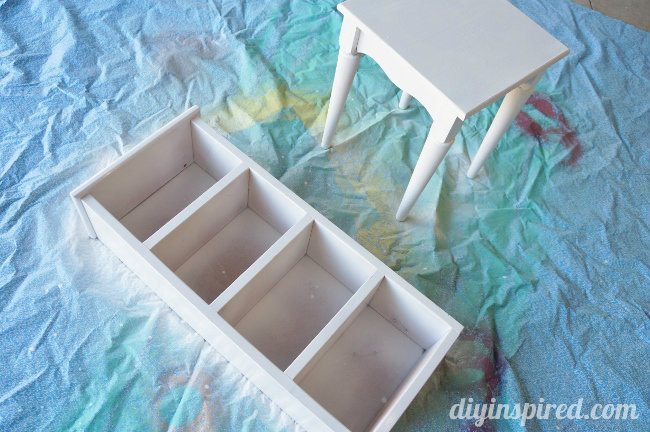
After I cleaned it off from dust, I primed both pieces first and then painted it white. A two in one paint and primer is the quickest, but I used what I had, which was a spray primer and white Krylon spray paint. 

Be sure to check out my article for when and how to use primer for DIY painting projects and furniture makeovers.


DIY Play Kitchen From Thrift Store Finds

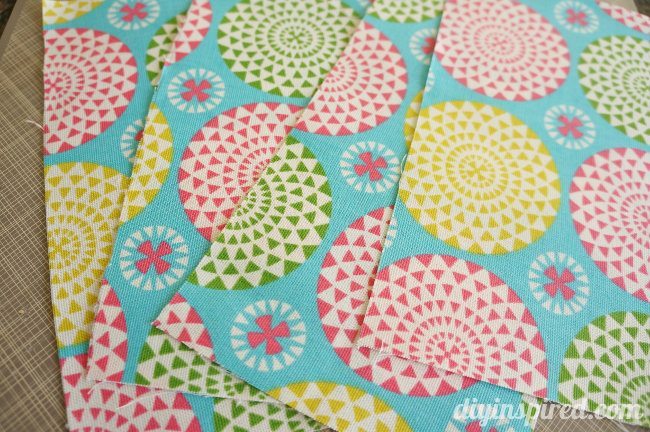
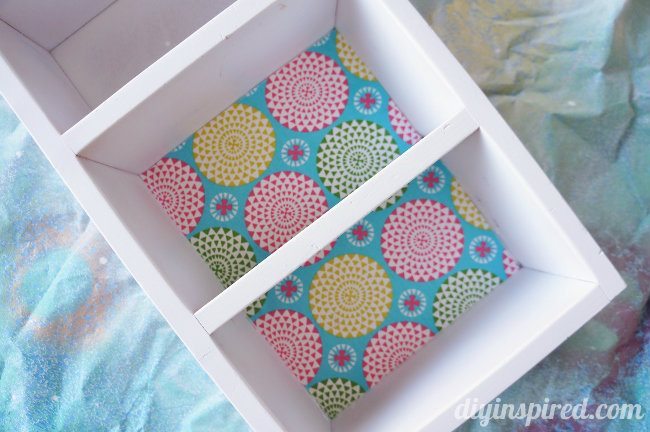
I bought the same fabric that I use to line Mia’s other play kitchen hutch I made. I used a rotary cutter to measure and cut the pieces. Next I sprayed them with a little spray starch and ironed them flat.  This makes it easier to insert later.

Play Hutch DIY

Next, once the paint was dry, I used a spray adhesive on both the shelf backing and the back of the fabric and smoothed it right into place.

Repurposed Play Hutch From Thrift Store Finds

Lastly, I used a maximum strength wood glue to attach the two pieces together.  I let it dry overnight and then I reinforced it with nails.

Upcycled Play Kitchen From Thrift Store Finds

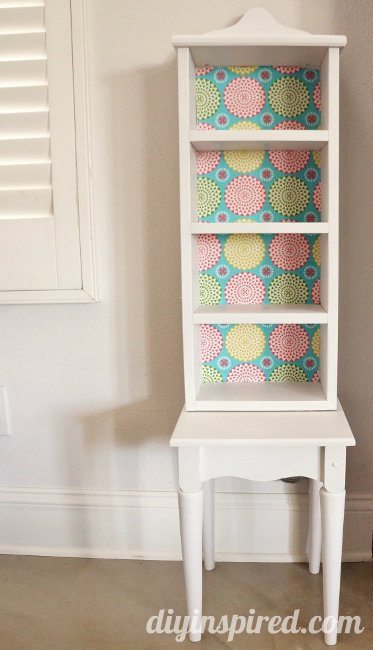
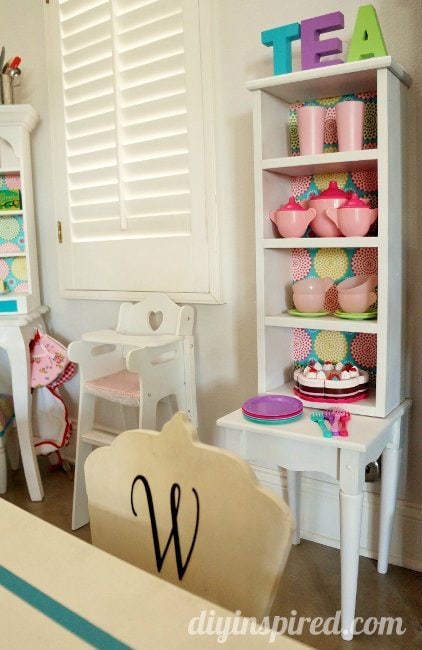
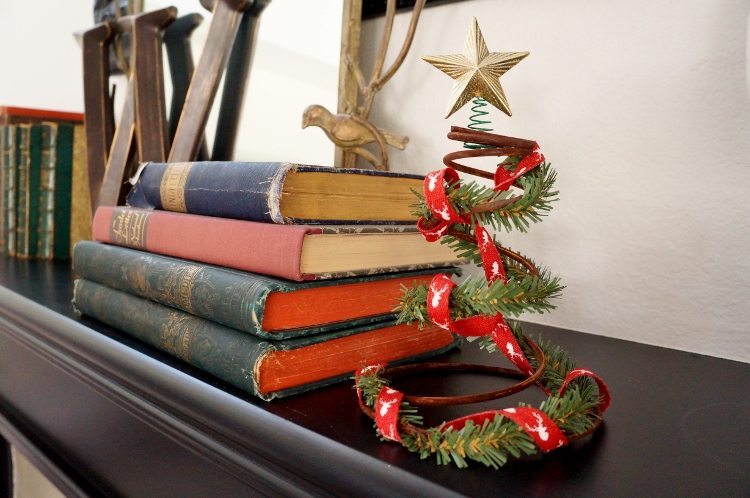
Here are a few after photos.

Play Kitchen Hutch From Thrift Store Finds

Play Kitchen Hutch DIY

DIY Play Kitchen Hutch From Thrift Store Makeover

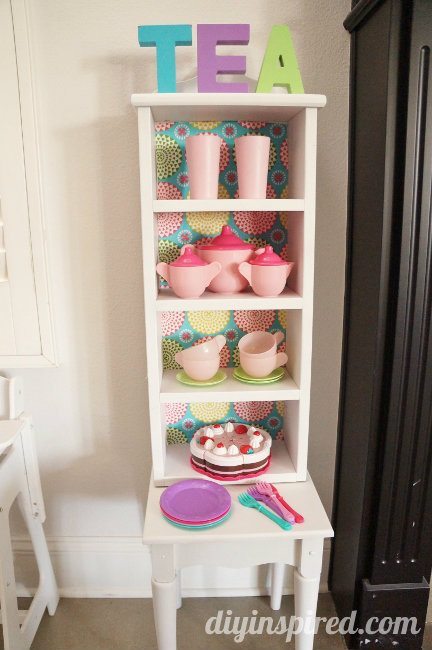
If you like this post, check out some of my other project transformations, Thrift Store Finds to Makeover for Your Kids!

  • Share
  • Twitter


26 Comments

Join our Community of Crafters!

Stay updated and never miss a thing!

Disclosure and Privacy Policy
Previous Post: « DIY Furniture Makeovers Anyone Can Do
Next Post: Mason Jar Gift Idea with Printable »

Reader Interactions

Comments

  1. Sarah Marchant says

    October 24, 2014 at 7:11 am

    Love that kitchen play set! So cute!

    Reply
  2. Diana says

    October 24, 2014 at 12:25 pm

    Ah, what an adorable playroom! I love how you transformed the two pieces!!

    Reply
  3. Ginnie says

    October 24, 2014 at 3:21 pm

    This is so adorable! How fun and cheerful!

    Reply
  4. Dinah Wulf says

    October 24, 2014 at 4:00 pm

    Thank you so much, Sarah, Diana, and Ginnie!!!

    Reply
  5. jenny@birdsandsoap says

    October 24, 2014 at 11:34 pm

    Cute! what a fun piece, perfect for that tea set!

    Reply
  6. Jennifer says

    February 16, 2015 at 12:48 pm

    So precious! This piece ties the entire room together so beautifully, and the colors are so nice and sassy!

    Reply
    • Dinah Wulf says

      February 16, 2015 at 3:13 pm

      Thank you, Jennifer!

      Reply
  7. Suzie@homemaker-mom says

    February 16, 2015 at 4:22 pm

    O my girl this is lovely!! Saw this on Motivate me Monday

    Reply
    • Dinah Wulf says

      February 17, 2015 at 8:05 am

      Oh yay! So glad you saw it there! Thanks, Suzie!

      Reply
  8. Gilly @ Colour Saturated Life says

    February 16, 2015 at 6:55 pm

    Love this! And it just looks so adorable! Wish my daughter wasn’t too old for this kind of thing or I would make one!

    Reply
    • Dinah Wulf says

      February 17, 2015 at 8:06 am

      Thanks you Gilly! I will be so sad when she grows out of it! We have a large playhouse in the backyard. It’ll be moved there first, and then sold. I don’t even want to think about that! Ha!

      Reply
  9. Heather Grow says

    February 16, 2015 at 7:47 pm

    What a lucky little girl. You have an eye for a bargain. Great upcycling projects. Love all that girly goodness.

    Reply
    • Dinah Wulf says

      February 17, 2015 at 8:06 am

      Thank you so much Heather! I think it’s more of an addiction than an eye! 🙂

      Reply
  10. Angela @ Simply Beautiful By Angela says

    February 19, 2015 at 10:04 am

    You are amazing! You’re daughter is a very lucky little girl 🙂

    Reply
    • Dinah Wulf says

      February 19, 2015 at 2:09 pm

      Awe!! Thank you SO much, Angela!!

      Reply
  11. Angela, blue i style says

    February 20, 2015 at 4:15 pm

    This is seriously adorable!! I’d love to have you come and link up with us at our new link party, The Creative Circle http://blueistyle.blogspot.com/2015/02/TheCreativeCircleWeek3.html

    Reply
    • Dinah Wulf says

      February 22, 2015 at 5:29 pm

      Thank you, Angela!

      Reply
  12. Marti @ SewliciousHomeDecor says

    February 21, 2015 at 9:56 am

    That is just adorable!! 🙂

    Reply
    • Dinah Wulf says

      February 22, 2015 at 5:30 pm

      Thank you, Marti!

      Reply
  13. Shannon {Cozy Country Living} says

    February 24, 2015 at 8:59 am

    This is such a cute idea! What a fun & pretty space! Thanks so much for sharing this at the Project Parade! Hope to see you there again this week:)

    Reply
    • Dinah Wulf says

      February 24, 2015 at 9:02 am

      Thank you, Shannon!!

      Reply
  14. Theresa @DearCreatives says

    February 24, 2015 at 1:30 pm

    Hi Dinah, This is adorable. Might have to keep my eye out for something like this & make one to gift the little ones I know. My kids would of loved this when they were little. My youngest is 13 now. Time flies! Pinned for later.

    Reply
  15. Lorelai @ Life With Lorelai says

    March 1, 2015 at 10:48 am

    Oh my gosh…how awesome is this! I absolutely LOVE this play kitchen. So much fun to be had, and you did a fantastic job in fixing it all up. Amazing! 🙂 Please come share your blog posts over at the Home Matters Linky Party! We’d love to have you for a visit. The Door is OPEN. http://lifewithlorelai.com/2015/02/26/home-matters-linky-party-26/ 🙂

    ~Lorelai
    Life With Lorelai

    Reply
    • Dinah Wulf says

      March 1, 2015 at 11:01 am

      Thank you so much Lorelai!! Will do!

      Reply
  16. Teri@The Freshman Cook says

    March 1, 2015 at 7:57 pm

    How clever and creative! I love all the pieces! You have such a great eye, and I bet your daughter loves these! I would love if you would share this at Celebrate It! blog party. It is all about sharing how you celebrate the everyday!
    http://thefreshmancook.blogspot.com/2015/02/celebrate-it-blog-party-32.html

    Reply
    • Dinah Wulf says

      March 2, 2015 at 9:18 am

      Thank you so much Teri!!

      Reply

Leave a Reply Cancel reply

Your email address will not be published. Required fields are marked *

This site uses Akismet to reduce spam. Learn how your comment data is processed.

Primary Sidebar

Welcome!

DIY Inspired Profile Picture 2015Thank you for visiting! I'm Dinah and I am a full time Mother, Blogger and Writer. I'm honored to be named one of Mashable's 10 Mom Blogs Full of Inspiring Advice. {Read more about me here}

Join our Community of Crafters!

Stay updated and never miss a thing!

Disclosure and Privacy Policy

Stay updated and never miss a thing!

Footer

You might also love these

Easy Felt Flower Barrettes

DIY No Sew Felt Flowers

DIY Felt Tassel Keychains

DIY Felt Tassel Keychains

Awkward Shaped Gifts Wrapping Idea

12 Clever Gift Wrapping Ideas

Easy Gift Idea for Boyfriend

Easy DIY Photo Holder

Paper Flower Gold Hoop Wreath

30 Paper Flower Craft Tutorials

Copyright © 2021 · Divine theme by Restored 316

Copyright © 2005–2021 DIY Inspired. Installed and customized by TCN Design Studio