• Project Gallery
  • DIY
    • Recycled DIY
    • Upcycled DIY
    • Repurposed DIY
    • Refurbished DIY
    • DIY Furniture
    • Repurposed Furniture
    • Thrift Store Transformations
  • Crafts
    • Wood Crafts
    • Paper Crafts
    • Photo Crafts
    • Kids Craft Ideas
    • Doll Crafts
    • Felt Crafts
    • Stenciling
    • Gift Wrapping
    • Printables
  • Party
    • Birthday Party
    • Baby Shower
    • Bridal Shower
    • Wedding
    • Team Sports
    • Sweets and Treats
    • Cocktail Corner
  • Holidays
    • Father’s Day
    • Fourth of July
    • Back to School
    • Halloween
    • Halloween Costumes
    • Thanksgiving
    • Elf on the Shelf
    • Christmas
    • New Years
    • Valentine’s Day
    • St. Patrick’s Day
    • Easter
    • Earth Day
    • Teacher Appreciation
    • Mother’s Day
  • Home & Garden
    • Storage & Organization
    • Cleaning Tips
    • Gardening
    • Makeovers
    • Kid Stuff Makeovers
    • DIY Tips & Tricks
    • DIY Artwork
    • Curb Appeal
  • Health & Beauty
    • Health & Wellness
    • Bath & Body
  • Nav Social Menu

    • Facebook
    • Instagram
    • Pinterest
    • Twitter
    • YouTube

DIY Inspired

Repurpose, Reinvent

  • About
  • Contact
  • Advertising
  • Featured
  • Disclosure

Kid Stuff Makeovers Trash To Treasure

Repurposed Kids Play Kitchen Hutch

Upcycled Thrift Store Play Hutch for Kids

Easy Repurposed Kids Play Kitchen Hutch from Thrift Store Finds

upcycled-kids-play-hutch (1) (371x560)

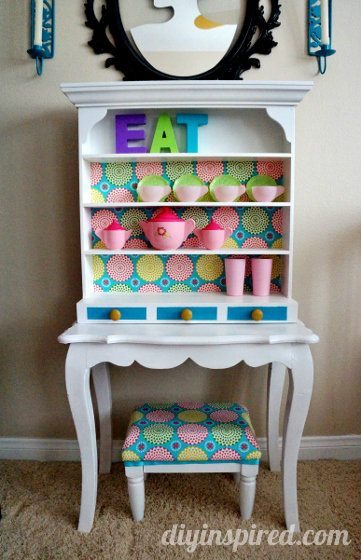
I had yet ANOTHER successful trip to the Goodwill  where I found this old red and white play hutch that I thought was too cute to pass up for $9.99.  I knew I needed to hunt for a second piece to complete this repurposed kids play kitchen hutch I had in my head.  It just so happens that my best friend was storing an old wooden vanity table in my garage… and guess what? She said I could have it…FOR FREE!!! So, here’s what I ended up doing with these two fab pieces.

Materials I used

  • Old kids play hutch and kids table
  • Electric sander
  • Spray paint
  • Drop cloth
  • Fabric
  • Scissors
  • Spray adhesive
  • Ruler
  • Pencil
  • Painter’s tape
  • Paint
  • Wooden knobs (3)
  • E6000

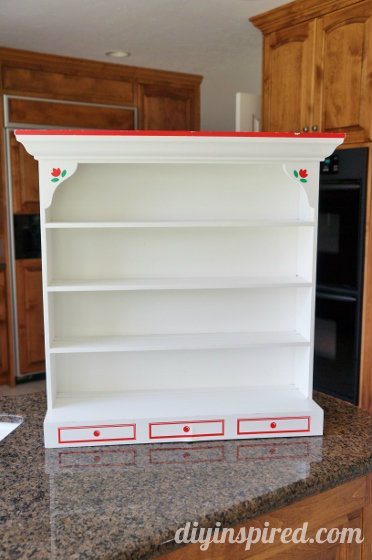
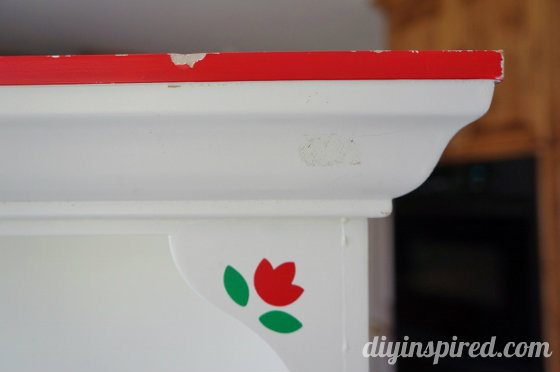
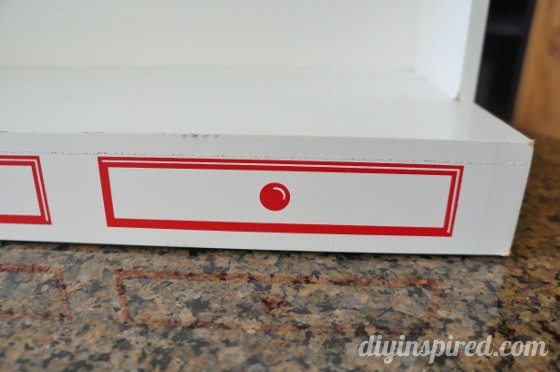
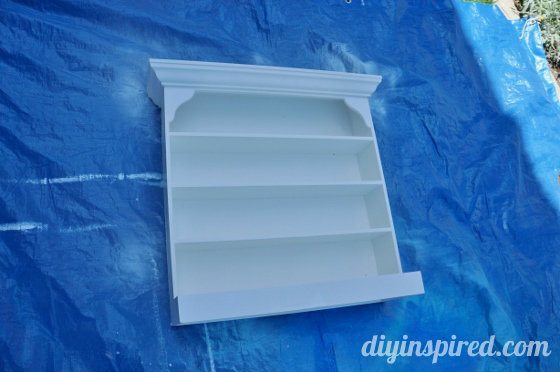
Here is the hutch BEFORE. It had painted drawers and little flowers on it.  It’s a little scratched and warped on the bottom but for ten bucks, I was OK with that!

upcycled-kids-toy-kitchen-hutch (1) (372x560)

upcycled-kids-toy-kitchen-hutch (2) (560x372)

upcycled-kids-toy-kitchen-hutch (3) (560x372)

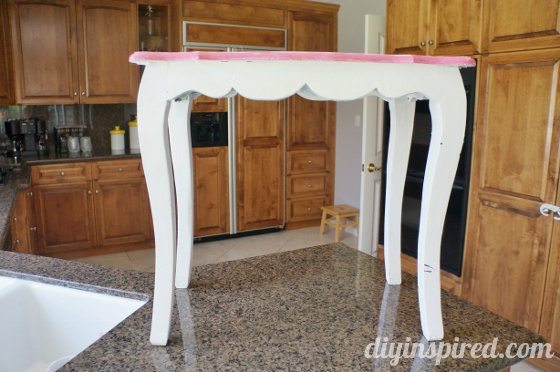
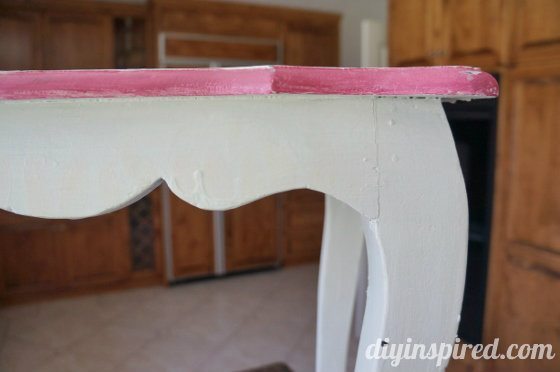
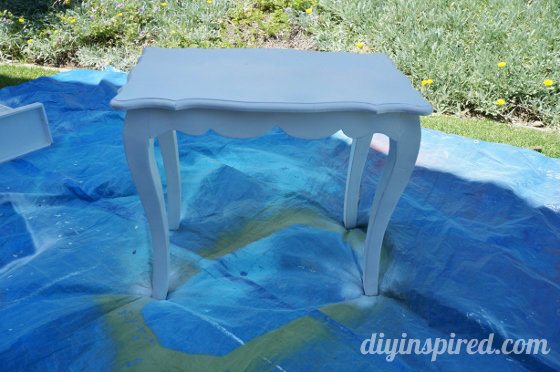
Here is the vanity table BEFORE.  This was caked with paint.

upcycled-kids-toy-kitchen-hutch (4) (560x372)

upcycled-kids-toy-kitchen-hutch (5) (560x372)

Repurposed Kids Play Kitchen Hutch Instructions

Both were pretty beat up so I had to break out the electric sander.  The table had survived two previous makeovers.

upcycled-kids-toy-kitchen-hutch (6) (560x372)

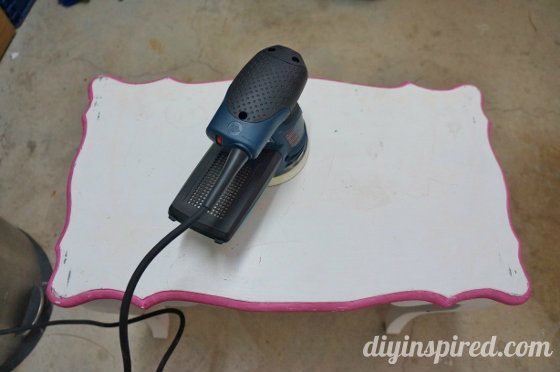
I spray painted both of them white.

upcycled-kids-toy-kitchen-hutch (8) (560x372)

upcycled-kids-toy-kitchen-hutch (7) (560x372)

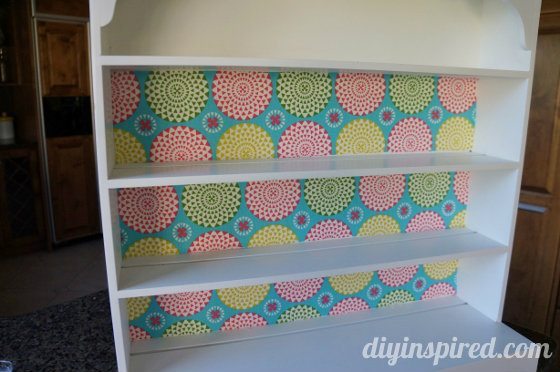
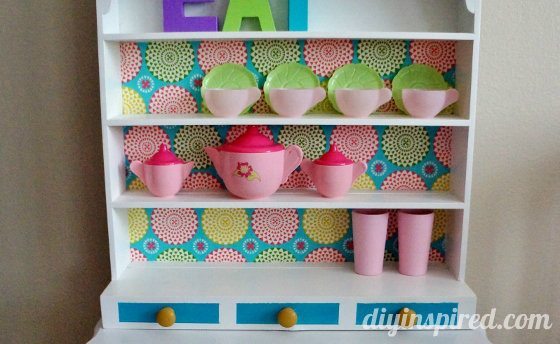
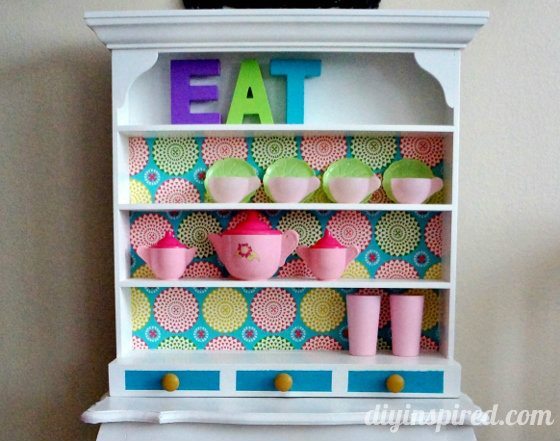
I measured and cut three pieces of fabric to fit the three bottom shelves.  There was fabric left over from the little upholstered stool I made over.

upcycled-kids-toy-kitchen-hutch (9) (560x372)

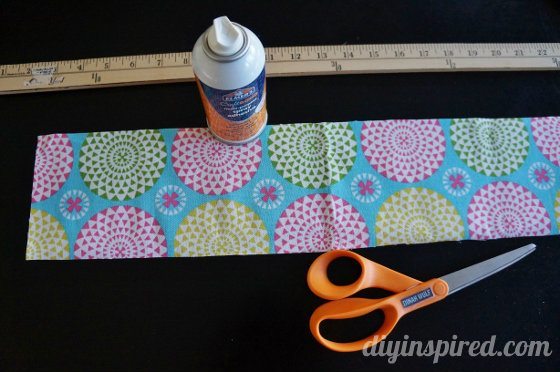
Next, I attached the fabric strips to the hutch with spray adhesive.

upcycled-kids-toy-kitchen-hutch (10) (560x372)

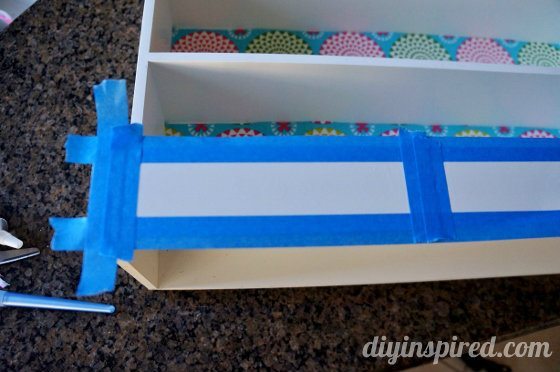
Next, I liked the fake drawers that the hutch had originally, so I taped off three drawers and painted them blue (of course).  

upcycled-kids-toy-kitchen-hutch (11) (560x372)

I added little knobs that I had left from an old dresser I upcycled a while ago. Since the bottom of the hutch was hollow and the way the hutch and table aligned, I had to use an industrial strength E6000 glue to attach the two together.

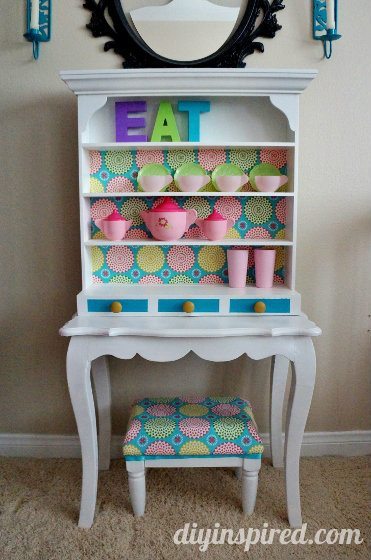
Here are a few AFTER photos. I love that it matches the repurposed toy storage stuffed animal cage I made and the upcycled play table I painted.

upcycled-kids-play-hutch (2) (361x560)

upcycled-kids-play-hutch (3) (560x344)

upcycled-kids-play-hutch (4) (560x441)

You May Also Like

  • Share
  • Twitter


22 Comments

Join our Community of Crafters!

Stay updated and never miss a thing!

Disclosure and Privacy Policy
Previous Post: « Heat Transfer Recycled Tote Bag
Next Post: Water Conservation for Kids »

Reader Interactions

Comments

  1. Irene says

    June 17, 2013 at 9:33 am

    That is truly adorable! And a great way to upcycle those two pieces!

    Reply
  2. Allyson says

    June 17, 2013 at 11:11 am

    Wow! This is such a great idea! I really love how it turned out!! Allyson@Domestic Superhero

    Reply
    • Dinah Wulf says

      June 17, 2013 at 12:10 pm

      Thank you so much, Allyson! It was so much fun to make too!

      Reply
  3. Tracie Gulit- the bunch says

    June 17, 2013 at 11:49 am

    This turned out beautiful!! What a great find. I shared it with my followers today at http://www.facebook.com/thebunchstore

    Reply
    • Dinah Wulf says

      June 17, 2013 at 12:10 pm

      Thank you Tracie! On my way to check out your page!

      Reply
  4. Sharon Garofalow says

    June 17, 2013 at 9:14 pm

    You are a genius. I am so impressed with your repurposing skills. I don’t even think I spelled the word right, let alone could use electric power tools and industrial strength glue!

    Reply
  5. Jill says

    June 18, 2013 at 12:24 am

    This turned out really cute!

    Reply
    • Dinah Wulf says

      June 18, 2013 at 7:29 am

      Thank you, Jill!

      Reply
  6. Wendy says

    June 18, 2013 at 1:19 am

    This turned out SO CUTE! Never mind it being a play hutch for kids … I want one for myself!

    Reply
    • Dinah Wulf says

      June 18, 2013 at 7:29 am

      LOL! It would brighten my day if my actual kitchen was this colorful! Thank you, Wendy!

      Reply
  7. Christy says

    June 18, 2013 at 11:52 am

    I love this! You have a talent for seeing something beautiful out of something ordinary. Nice Job!
    -Christy @ Mother of the Year

    Reply
    • Dinah Wulf says

      June 18, 2013 at 1:29 pm

      Thank you so much, Christy!!

      Reply
  8. FaVe Mom says

    June 18, 2013 at 8:44 pm

    Bring yourself over to my house and you can redo all of my furniture. Yep.

    Reply
    • Dinah Wulf says

      June 18, 2013 at 9:05 pm

      LOL! I need new projects! On my way! 😉

      Reply
  9. malia says

    June 25, 2013 at 10:06 pm

    You did an absolutely beautiful job with this project! It looks amazing.

    Reply
  10. Theresa @DearCreatives says

    July 11, 2013 at 8:33 pm

    Hi Dinah, This turned out so cute! I was sad when my youngest outgrew the kitchen set, but now she helps me in the kitchen & loves to bake. Great makeover!

    Reply
    • Dinah Wulf says

      July 12, 2013 at 8:23 am

      Thank you, Theresa! I was just thinking that the other day… they grow up way too fast!

      Reply
  11. Lolly says

    April 7, 2021 at 7:45 am

    You can extract the beauty out of anything.

    Reply

Trackbacks

  1. Play Kitchen Hutch from Thrift Store Finds - DIY Inspired says:
    October 24, 2014 at 6:19 am

    […] had made a little play kitchen hutch for my daughter before, as well as refurbished an old Disney princess table I got for free. Along […]

    Reply
  2. DIY Hacks & Repurposing: An Interview With Interior Design Bloggers | Internal Doors Blog says:
    November 8, 2014 at 7:56 am

    […] I have a few. I use these three every day and they help me (and my daughter) stay organized. The Repurposed Bed Spring Craft Storage, Repurposed Cabinet Turned Jewelry Organizer and Repurposed Kids Play Kitchen Hutch. […]

    Reply
  3. DIY Whiteboard Drawing Table for Kids - DIY Inspired says:
    December 26, 2014 at 6:16 am

    […] Repurposed Kids Play Kitchen Hutch […]

    Reply
  4. 25 Influential DIY Experts Reveal Their Favorite Project says:
    May 22, 2018 at 10:59 am

    […] finds that I put together to make a set. I made two hutches and refurbished a table and chairs." Click here to see what this hutch looked like before she […]

    Reply

Leave a Reply Cancel reply

Your email address will not be published. Required fields are marked *

This site uses Akismet to reduce spam. Learn how your comment data is processed.

Primary Sidebar

Welcome!

DIY Inspired Profile Picture 2015Thank you for visiting! I'm Dinah and I'm honored to have had an exciting career in blogging over the last 11 years. {Read more about me here}

Join our Community of Crafters!

Stay updated and never miss a thing!

Disclosure and Privacy Policy

Stay updated and never miss a thing!

Footer

You might also love these

DIY Classroom Mobile Phone Holder

Classroom Smart Phone Drop Station

How to Make Cotton Stems

DIY Fabric Covered Switchplates

DIY White and Gold Nightstands

Over Ten Years of Do-It-Yourself Inspiration

DIY Paper Flower Party Decor

Accordion Flowers How To

Copyright © 2022 · Divine theme by Restored 316

Copyright © 2005–2022 DIY Inspired. Installed and customized by TCN Design Studio