DIY Folding Chair Makeover
A Folding Chair Makeover with the New Fiskars DIY Tool Line
You know that feeling in a thrift store when you see something and you keep going back to look at it because you are indecisive about buying it or not? I even felt a little anxious when it was still in my sight line and I saw someone else looking at it. That’s how I felt when I saw this old folding chair. It was a single piece sitting all by itself for the low- low price of $15. It was sturdy but missing its partner.
Here is a photo.
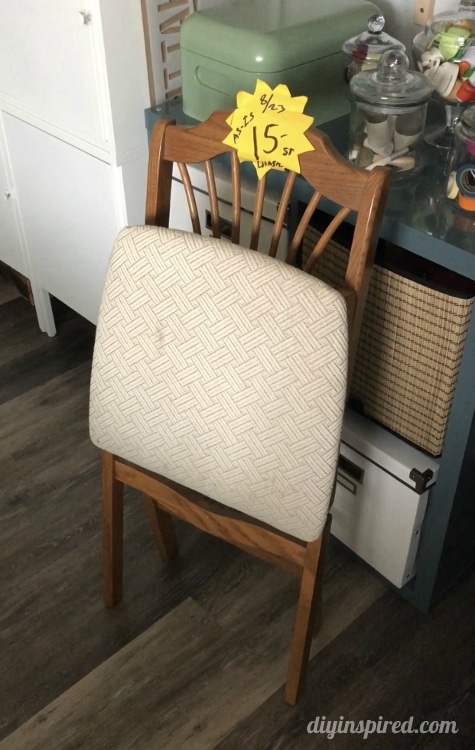
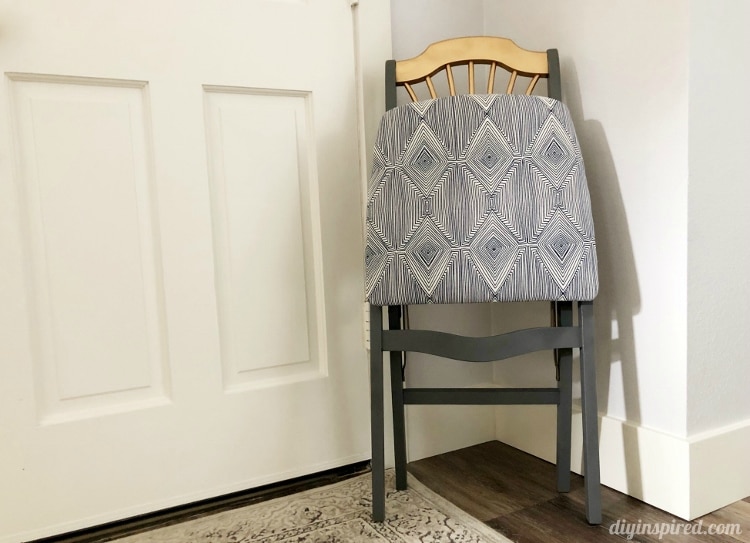
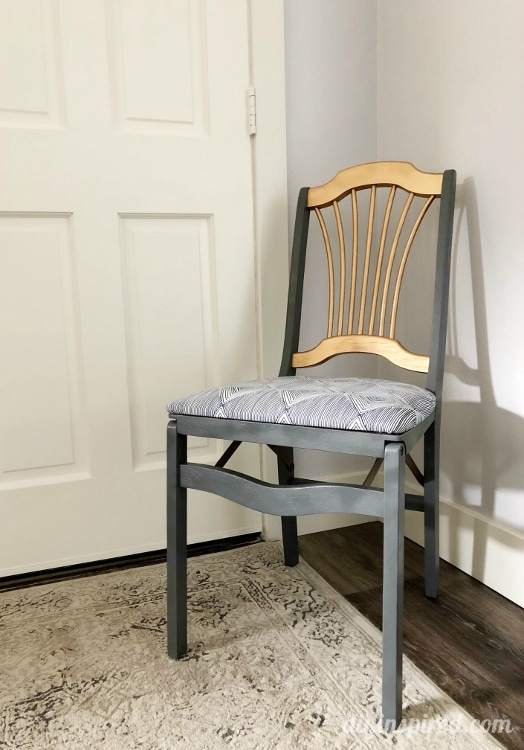
In hindsight I’m glad I decided to buy it. It is a great piece, can be easily stored, and perfect for extra guests, or a chair for my bedroom or craft room. Before I share the tutorial, I want to share something special because it involves some of the tools I used for this makeover.
My Involvement in the Creation of the Fiskars DIY Line
I have been working directly with Fiskars for over 3 years now and I was fortunate enough to have a unique experience in the creation of the new Fiskars DIY tool line. In a quaint creative studio setting, I sat on a panel with a few fellow DIY and Craft Bloggers to review and test prototypes of different tools. Some of the tools we tested included the Precision Hammer with the Nail Starter and the Precision Screwdriver. We took our time touching, testing, and discussing our candid opinions about each tool. We used them for different crafts and on various materials. It was such a great experience especially since I was in the company of some pretty amazing Bloggers.
I recall feeling privileged and a sense of self accomplishment, simply because I admired not only the brand, but the other panelists participating. Being in an intimate setting like that made me feel like my opinion was highly valued.
For this tutorial, I use the hammer and screwdriver. The hammer has multiple hand positions and has optimized weight for precision and power. I have used it for big wood working builds as well as small furniture makeovers. The screwdriver has a push and rotate feature and includes four screwdriver heads and 2 integrated heads. Both are officially available online at JoAnn Fabrics and Fiskars.com.
Watch the Video
DIY Instructions
Time: 2-3 Hours
Materials
- Old Chair
- Fiskars Precision Hammer
- Fiskars Precision Screwdriver
- Paint
- Paint Brushes
- Fabric
- Staple Gun
- Clear Glaze
- Scissors
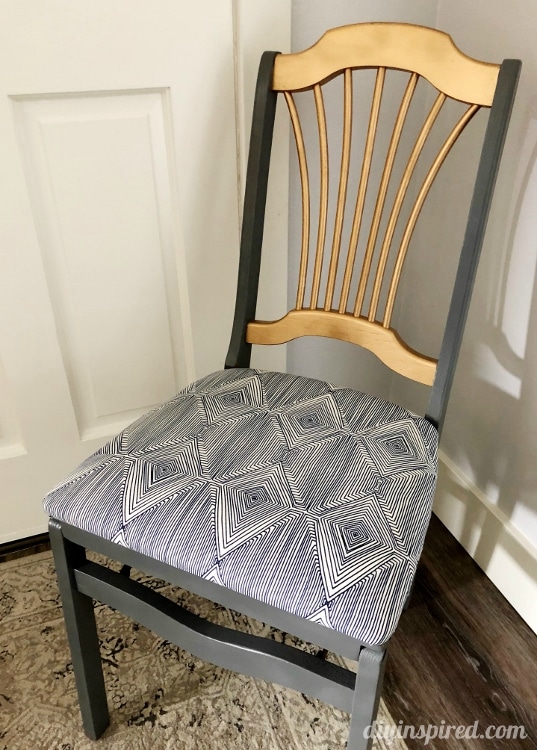
Reupholstering the Seat
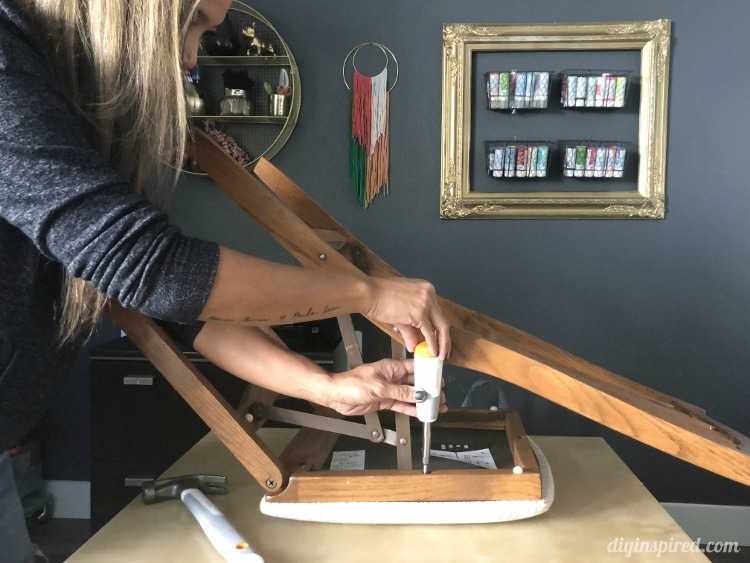
The first thing I did was remove the cushioned seat, using a screwdriver. I also removed the cardboard back and saved it to reuse.
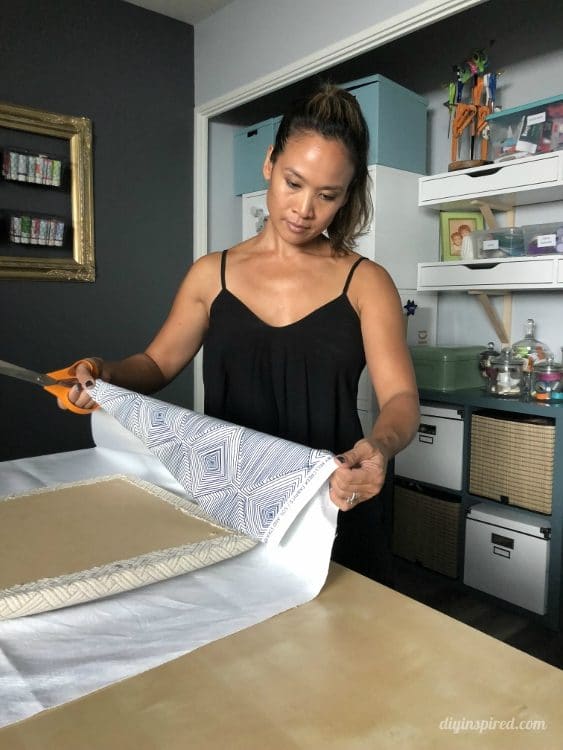
Next, I covered the chair cushion with my fabric of choice. I cut out the fabric, pulled it taut, and stapled it to the bottom.
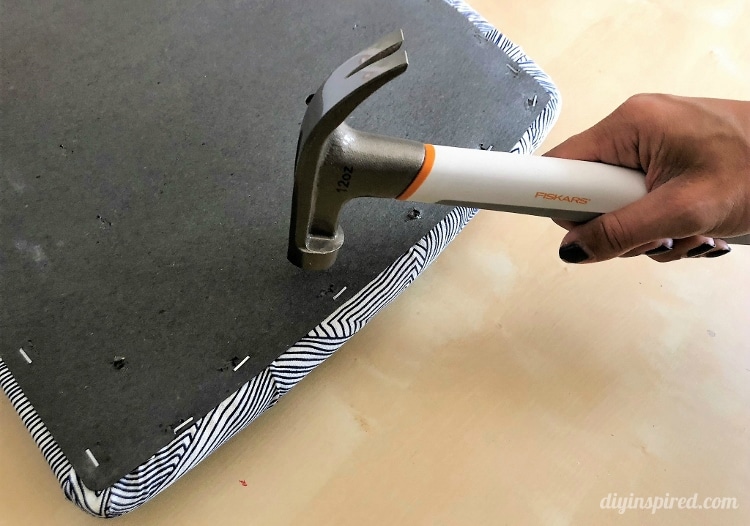
Some of the staples did not fully sink in, so I used the Precision Hammer, to hammer those back in. Lastly, I placed the backing back on and stapled it as well.
Painting the Chair
When painting the chair, I used different sized brushes because I chose not to remove the hardware. First, I painted spray painted the back metallic gold. Then, I hand painted the rest of the chair, unfolded. I painted two coats and waited for it to completely dry. Then, I painted the chair while it was folded to catch and missing spots. Again, painting two coats.
Once the chair was completely dry, I sprayed it with a top coat of clear glaze. Lastly, I screwed on the newly upholstered seat cushion.
Here is the after!
Like it? Pin it!

Hi Dinah
I was throwing out a few chairs and came across this article. Now I’m inspired to start a little project of my own.
This article is very easy to follow and I should have brand new chairs very soon.
Thanks,
Justin.
Love how the chair turned out Dinah! Great work!
Thank you so much!
I love what you did with the chair great work!