Painted Black Brick Fireplace
Our New Painted Black Brick Fireplace
We have slowly been updating our home over the past few years. In effort to stay within a budget, our updates involve both old and new. For example, in our kitchen, we kept our island and cabinets and just updated the countertops and sinks. In the family room, we refaced the fireplace, and kept the surrounding bookshelves intact. This knack for budget renovating lead us to our painted black brick fireplace.
Is Painting Brick a Good Idea?
In my opinion, yes. Here are a few reasons why:
- It’s more cost effective than refacing.
- Painted brick can update an outdated room.
- It is an easy update when selling or renting a home.
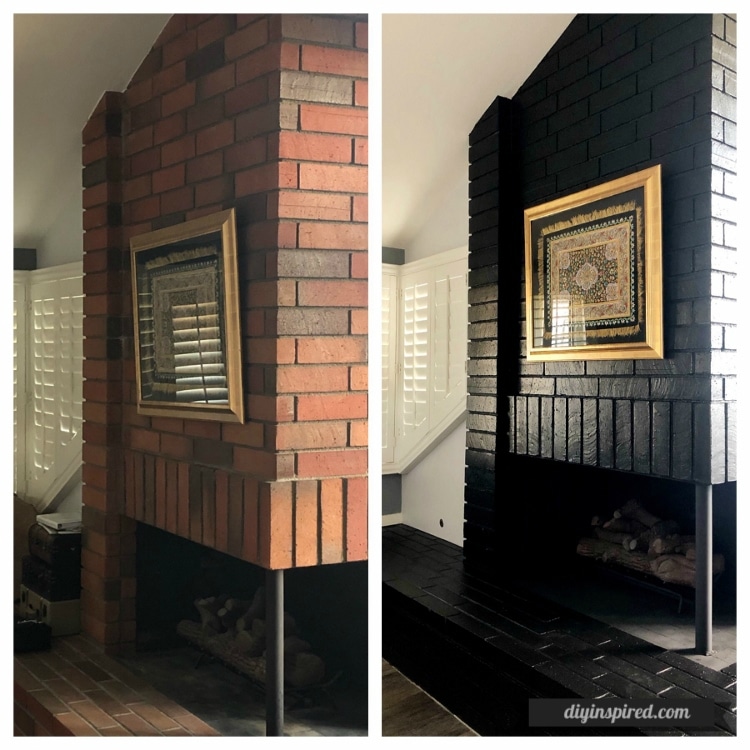
Here are a couple BEFORE photos.
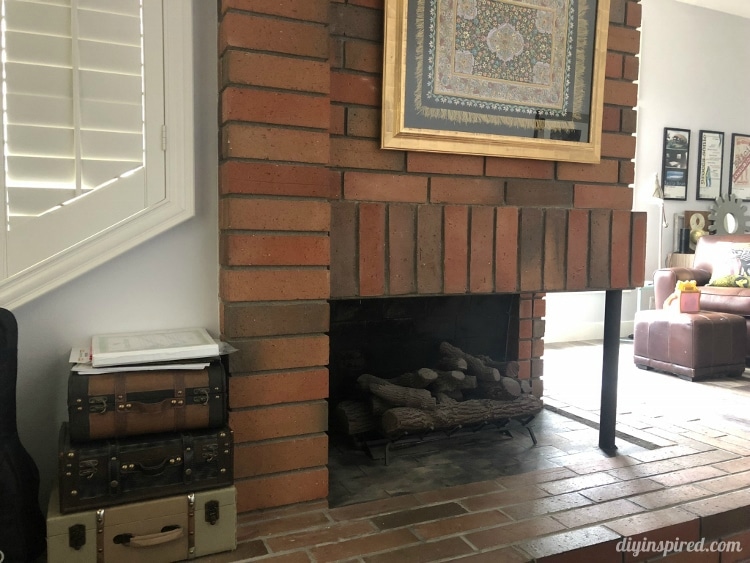
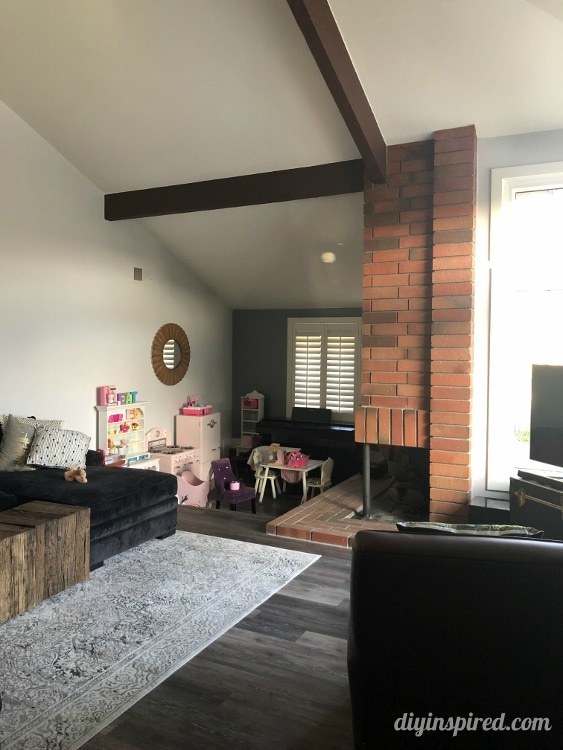
It took me what seems forever, to decide on the color black. I kept changing my mind. Should we cover it with stone? Leave it as is? Paint it white? Is black too bold? If you look at the before picture, there is A LOT of brick to cover. I was scared to make a decision on such a vast area and you can’t go back if you change your mind. It is also one of the first things you see when you walk through our front door.
Preparing the Brick
Cleaning the brick first will allow the paint to adhere better than not cleaning the brick. Use a wire or stiff bristle brush to get out any grime and soot. You can use soap and water to clean and rinse but allow it to dry for at least two days. I have also read that using TSP is an option for extremely dirty brick. TSP stands for trisodium phosphate. You can buy it at any home improvement store like Home Depot or Lowes in the paint section and comes in a small 16 oz. box for just a few dollars. It is a heavy-duty cleaner that is mixed with water to specifically clean surface in preparation for painting.
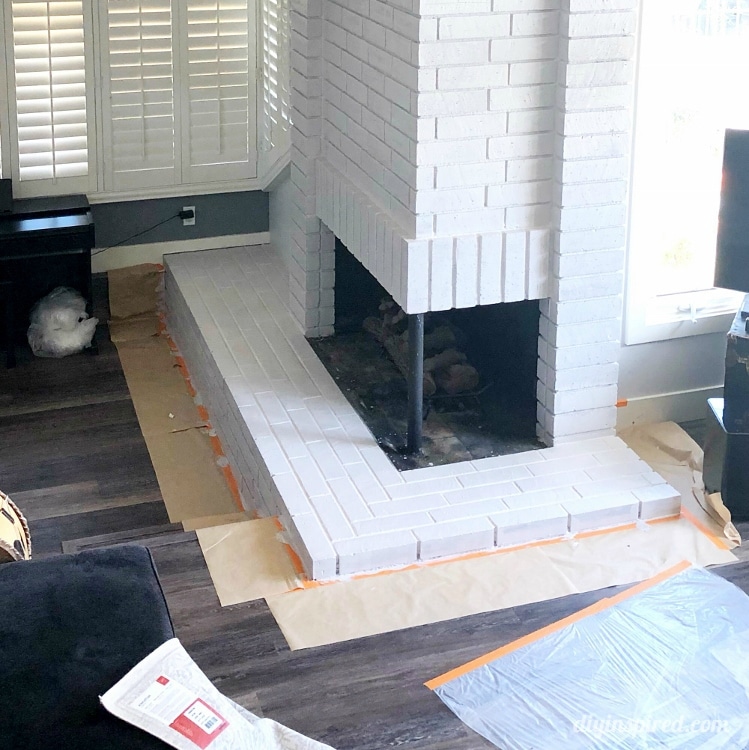
Prime Before You Paint
Prime the brick first with two coats of latex primer. You will need a brush to paint the crevices first and then a roller brush to paint the rest. Pay extra attention to areas with mildew and add an extra coat in those areas.
Here is our fireplace with two coats of primer. I knew at this point that I was ready to move forward with black, and white was not an option for this space.
Choose Your Paint
You want to use a latex, heat resistant paint. At your local home improvement store, look for masonry, stucco, brick paint. They are usually both indoor/outdoor. Some painters prefer elastomeric paint. Elastomeric paint is designed to protect brick surfaces, especially from weather. If your painting indoor brick, elastomeric paint isn’t necessary.
The color is: Behr Premium Plus in Glossy in Pure Black
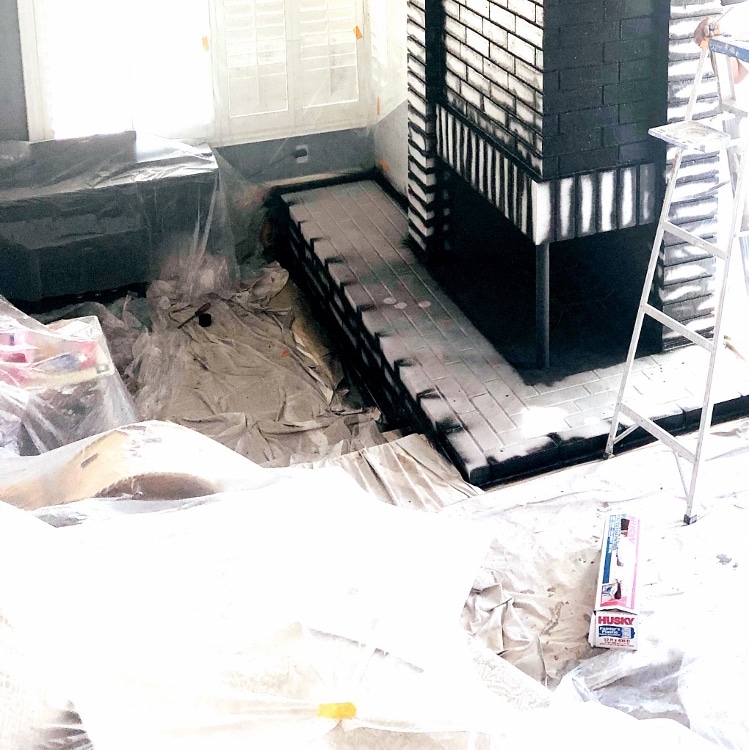
Here is a photo of the process.
Here are the AFTER photos.
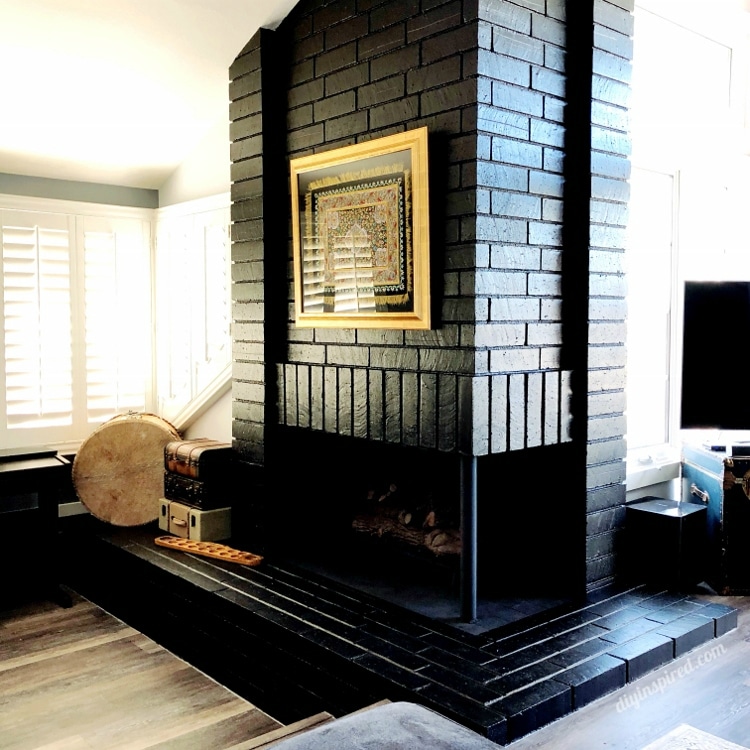
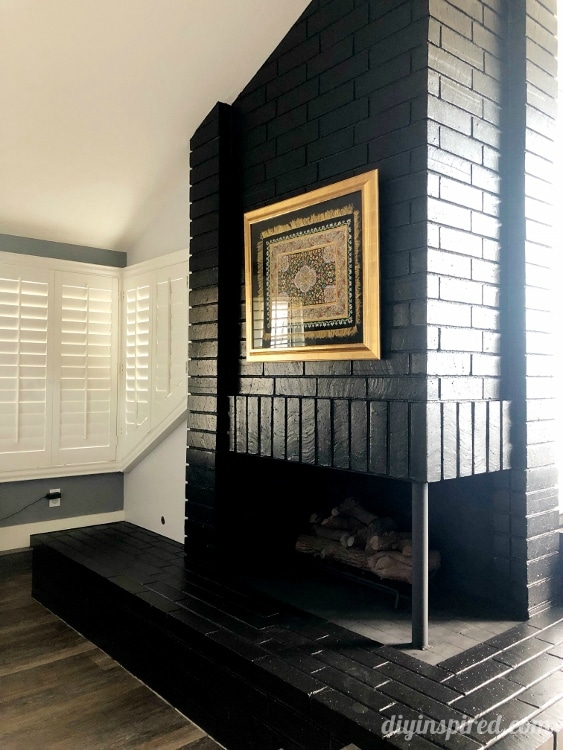
I think it is SUCH a big improvement. I couldn’t be happier with the final result. Also, even though the black is on a large area, it is not overwhelming. Because of our windows, high ceilings, and natural light, it works out well.
You May Also Like
- DIY Folding Chair Makeover
- Guest Bathroom Makeover
- DIY Upholstered Wood Bench
- How to Paint a Chalkboard Wall
- Craft Room Tour Makeover Reveal


What an amazing makeover. For me black makes everything look classy. Thanks for sharing.
Could you please share what type of paint & finish (satin, glossy?) you used?
Hi Valerie, I used Behr Premium Plus in Glossy
What was the color called?
Hi Melissa! I used Behr Premium Plus in Glossy in Pure Black.
Looks amazing! Thanks for the great inspo!