DIY Photo Cell Phone Case
DIY Photo Cell Phone Case
Years ago, I made my dad a DIY Photo Cell Phone Case. He used it everyday for years! His birthday is coming up again next month and since he updated his cell phone and had 2 more grand children, I decided to make him a new one. I am no stranger to cell phone cases.
Here are a few free tutorials:
I have since upgraded the tutorial so here is a new one including a YouTube video. I can also attest that this method lasts as my dad kept his for many years taking his phone in and out of his pocket all those years!
Watch the DIY Photo Cell Phone Case Tutorial
How to Make the DIY Photo Cell Phone Case
Time: One Hour
Materials:
This materials list contains affiliate links to products that I use and recommend.
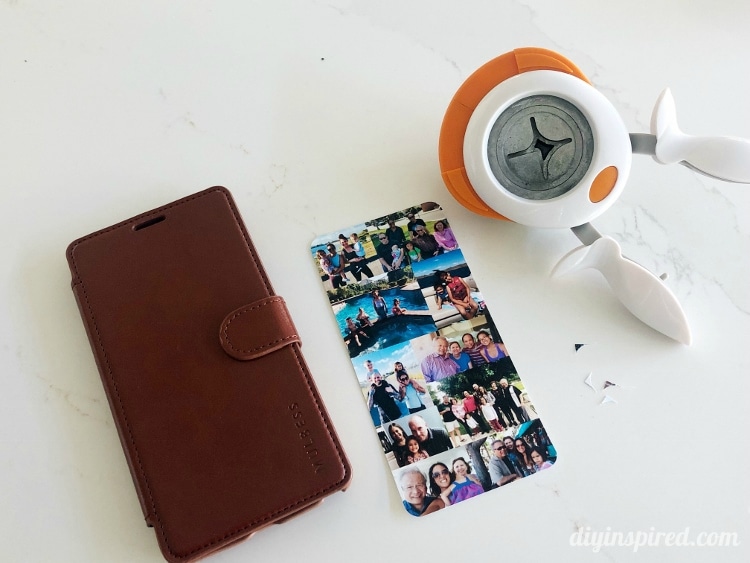
- Cell phone case
- Corner Punch

- Scissors
- Fabric Mod Podge
- Satin Mod Podge
- Foam Brush


Find Your Photos
Look for the photos you want to use first. I found that the best way to do this is to go on social media.
- Locate your photo on Facebook, for example.
- Right click it and save it to a folder on your computer.
- Repeat until you have about 10-15 photos.
Measure and Calculate Your Collage Size
- Measure the length and width of the cover of your cell phone case. For example, the one in this tutorial is 2.75” X 5.5”.
- Convert inches to pixels using NinjaUnits. Set the DPI to 200.
- Enter in your inches to find your pixels. For this tutorial my pixels were 550 X 1100.
Making the Photo Collage
Here is an easy way to make your own photo collage in just a few minutes using a free online software. The best part, other than it being free, is that you do not need to download any software or sign up for anything.
- Open iPiccy.com. Make sure to enable flash if you are asked.
- Click the right blue bar that says “Create a Design”.
- Click “new” and enter the pixels in width and height and click “create”.
- Next, click the “add photo” icon on the top right.
- Click “upload image”.
- Select all your photos and hit open to upload them into iPiccy.
- Click and drag the photos to make your own collage and then save it to your computer.
- Insert your collage into a document and print and cut it out.
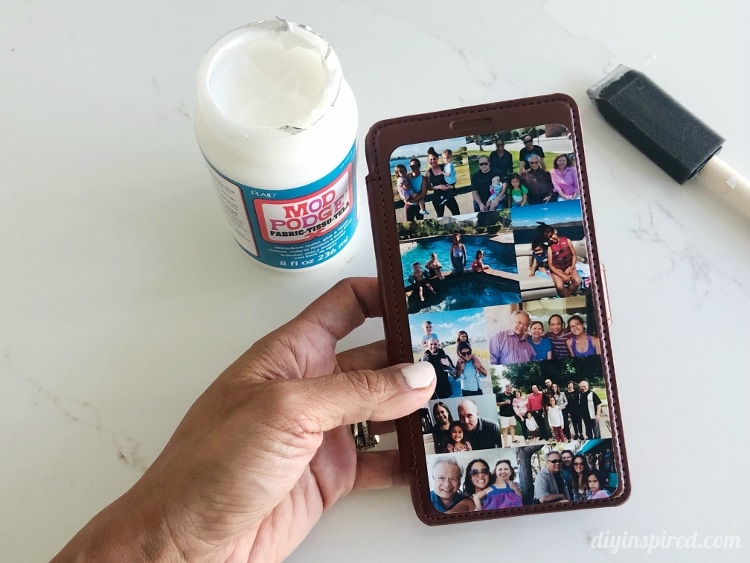
Adding the Collage to Your Phone Case
- If desired, use a corner punch to round out the collage. I did this because it matched my case.
- Since my case is leather, I used Fabric Mod Podge directly on the case as well as the bottom of the collage.
- Smooth it on with your fingers so that there are no air bubbles.
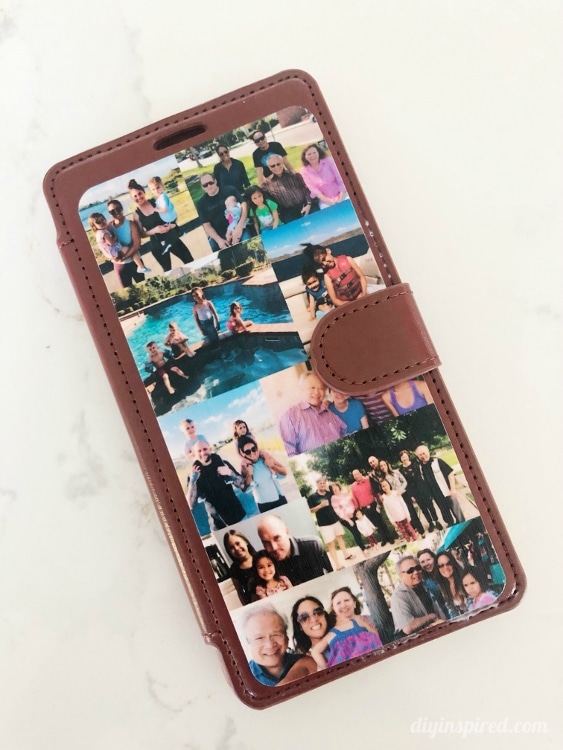
- Apply a layer of Mod Podge Satin (or any other finish you desire) to the top of the photo.
- Allow it to dry for fifteen minutes and apply another layer.
Mod Podge comes in different finishes, so it’s up to you if you would like a matte finish, satin finish, gloss finish, or even glitter!
Here is the end result. You can personalize this for parents, grandparents or anyone special in your life. I hope my dad likes it as much as he did the first time!
You may also like this other fun DIY gift idea. You can get the full tutorial here: Wood Burned Spoons