DIY Wood Slice Bunnies
DIY Wood Slice Bunnies for Your Easter Décor
This DIY Wood Slice Bunnies article was written on March 2, 2020 and has since been updated and improved.
We didn’t come up with the original idea for these DIY Wood Slice Bunnies. Rather, we saw a version on Google Images but could not find (for the life of me) the source of who came up with the idea. We just thought they were so adorable that we wanted to figure out how to make them might as well do a tutorial in case anyone else wanted to know how to make these adorable wooden bunnies too.

Watch the DIY Wood Slice Bunnies Video
Here is a quick tutorial video on how to make these Easter bunnies for your rustic decor.
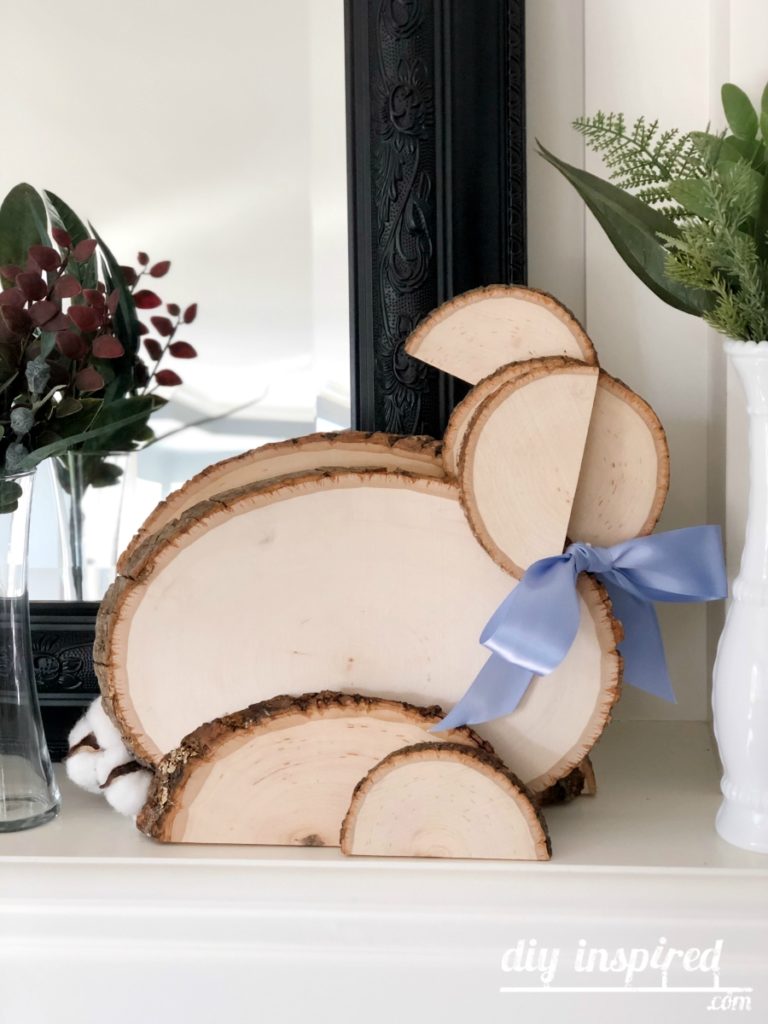
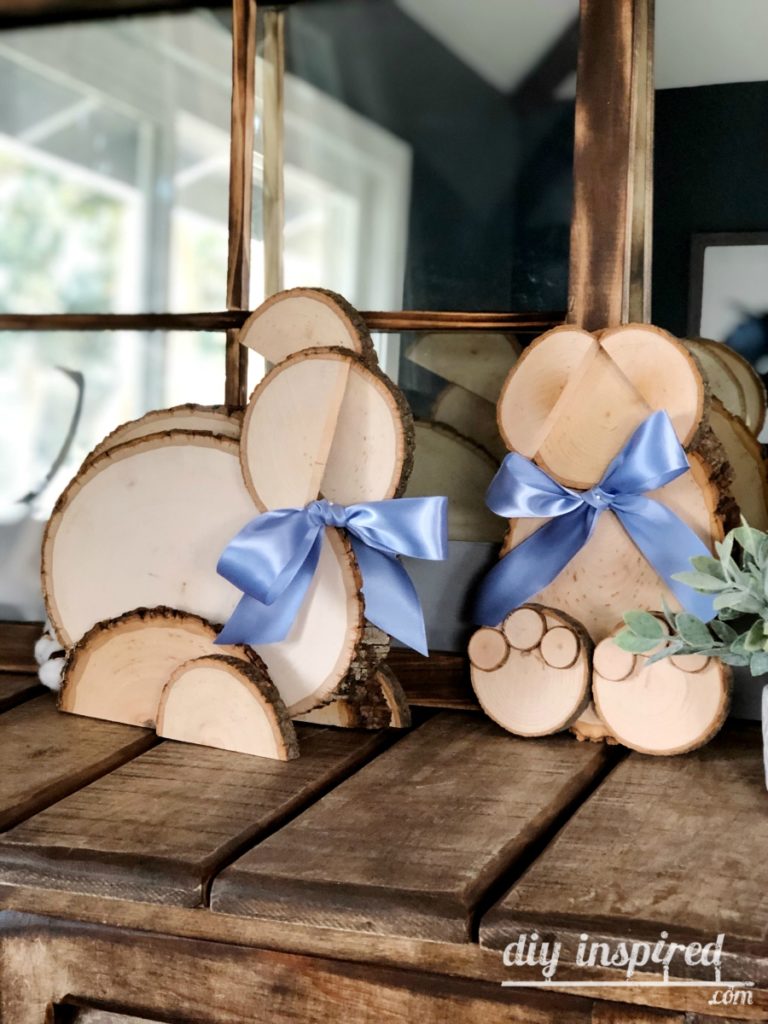
You can play around with shapes and sizes of wood slices as well as the body position of the bunny. Consider putting their feet up, or having their body perched up. Here is the materials list and tutorial for making the larger bunny shown here.
Here’s What You Need
Time 30-60 Minutes
Materials:
- 2 Large Wood Round (body)
- 1 Medium Wood Round (back legs)
- 3 Small Wood Coaster Slices (head, ears, front legs)
- Saw
- Wood Glue
- Pencils
- Straight Edge
- Clamps
- Cotton Stems
- Hot Glue and Glue Gun
- Ribbon (optional)
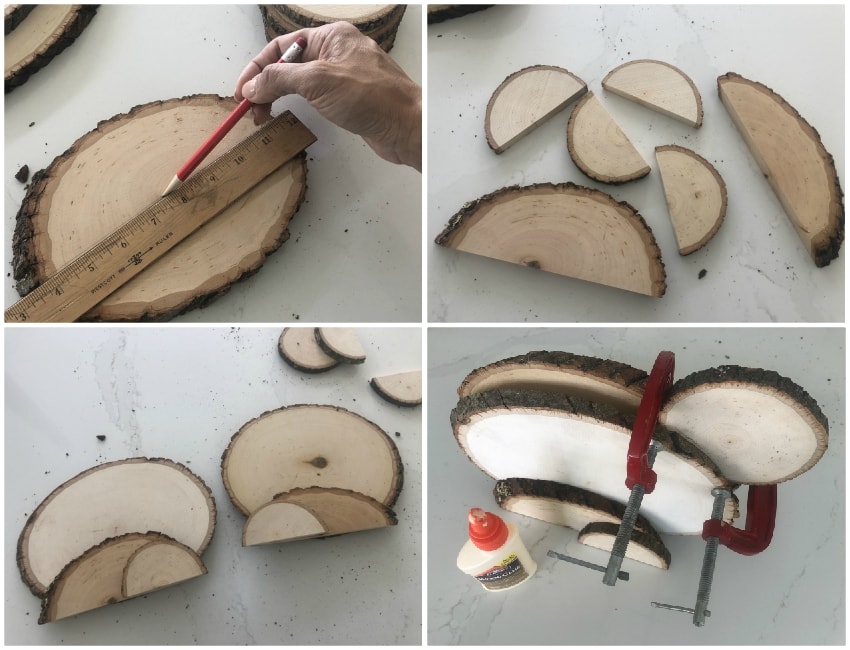
Making Your Wood Slice Bunny
- Make sure the two large wood slices are about the same size. All the slices pictured in this tutorial at Oriental Trading Company. This will be the body. Next, mark and draw the middle line for the medium slice and two of the small slices.
- Cut the marked medium slice and two small slices in half with a saw.
- Using wood glue, glue one of the medium halves to the bottom rear of the large wood slice. Hold it upright and flush to your work surface to make sure it can stand up. Next, glue one small half to the top front of the medium slice to complete the bunny’s leg.
- Repeat step 3 on the opposite side so that you have a mirror piece for the body.
- Place the small full wood slice in the head position between the two large body slices. Placement will depend on your liking. I used a pencil to trace the area where I needed to place the glue (as shown in the video). Glue the head on. Use clamps to help you hold it in place.
- Use the remain small half wood slices for the ears. I placed one side up and one side down. You can do any variation of this. Again, use the clamps to help you hold it in place.
- If desired glue or pin a bow to the bunny’s neck.
Here is a photo of each side. As you can see one large wood slice is slightly larger than the other, but it still looks very cute!

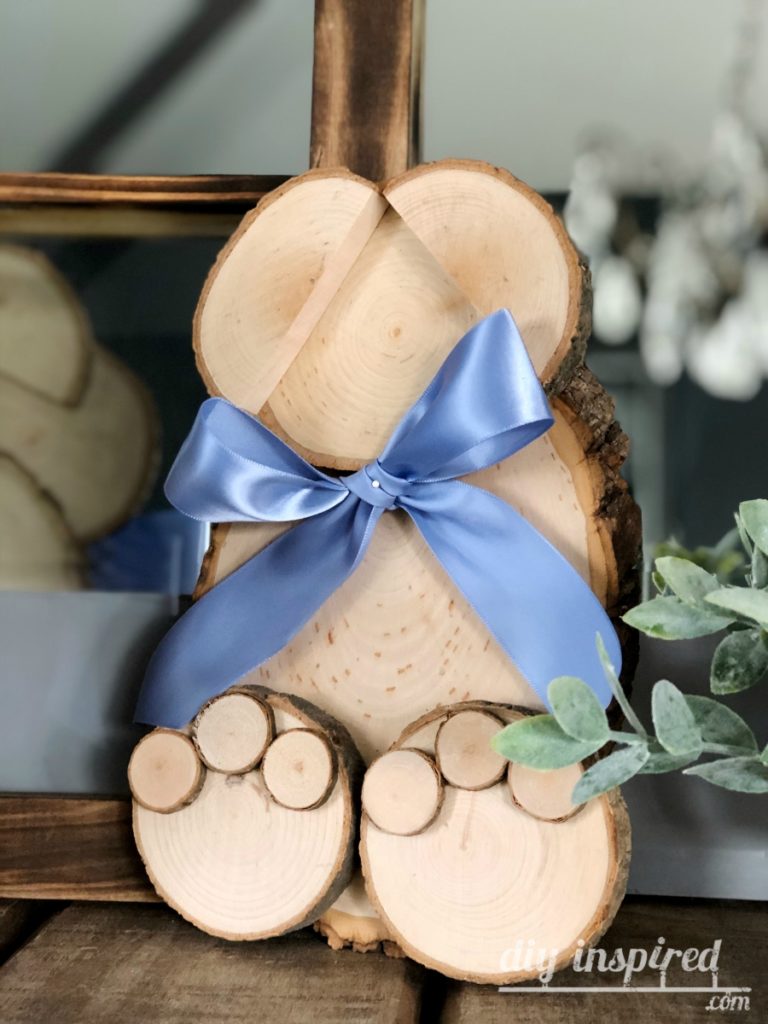
Small Wood Slice Bunny
For the smaller bunny below you need:
- 1 Small Wood Round
- 4 Coaster Wood Rounds
- 6 Small Wood Slices
Hope you like them!


These are so cute ! Love them