• Project Gallery
  • DIY
    • Recycled DIY
    • Upcycled DIY
    • Repurposed DIY
    • Refurbished DIY
    • DIY Furniture
    • Repurposed Furniture
    • Thrift Store Transformations
  • Crafts
    • Wood Crafts
    • Paper Crafts
    • Photo Crafts
    • Kids Craft Ideas
    • Doll Crafts
    • Felt Crafts
    • Stenciling
    • Gift Wrapping
    • Printables
  • Party
    • Birthday Party
    • Baby Shower
    • Bridal Shower
    • Wedding
    • Team Sports
    • Sweets and Treats
    • Cocktail Corner
  • Holidays
    • Father’s Day
    • Fourth of July
    • Back to School
    • Halloween
    • Halloween Costumes
    • Thanksgiving
    • Elf on the Shelf
    • Christmas
    • New Years
    • Valentine’s Day
    • St. Patrick’s Day
    • Easter
    • Earth Day
    • Teacher Appreciation
    • Mother’s Day
  • Home & Garden
    • Storage & Organization
    • Cleaning Tips
    • Gardening
    • Makeovers
    • Kid Stuff Makeovers
    • DIY Tips & Tricks
    • DIY Artwork
    • Curb Appeal
  • Health & Beauty
    • Health & Wellness
    • Bath & Body
  • Nav Social Menu

    • Facebook
    • Instagram
    • Pinterest
    • Twitter
    • YouTube

DIY Inspired

Repurpose, Reinvent

  • About
  • Contact
  • Advertising
  • Featured
  • Disclosure

Holidays Trash To Treasure

Repurposed Paper Pine Cone Ornaments

Repurposed Paper Pine Cone Ornament

Since I made my DIY Paper Christmas Ornaments not long ago, I have received a few emails and comments about how people liked them because it reminded them of a pine cone. I didn’t even think of that! So, it inspired me to make some matching ornaments for my tree, with the intention of them actually looking like pine cones… ha! So here is how I made these repurposed paper pine cone ornaments out of plastic Easter eggs, a fun and easy trash to treasure craft.

Time: 15-30 Minutes

Materials:

  • Plastic Easter Eggs
  • Hot Glue and Glue Gun
  • Small Circle Craft Punch
  • Scrapbook Paper (1 12X12 piece makes 2 pine cones)
  • Scissors
  • Twine
  • Ribbon
  • Embellishments (optional)

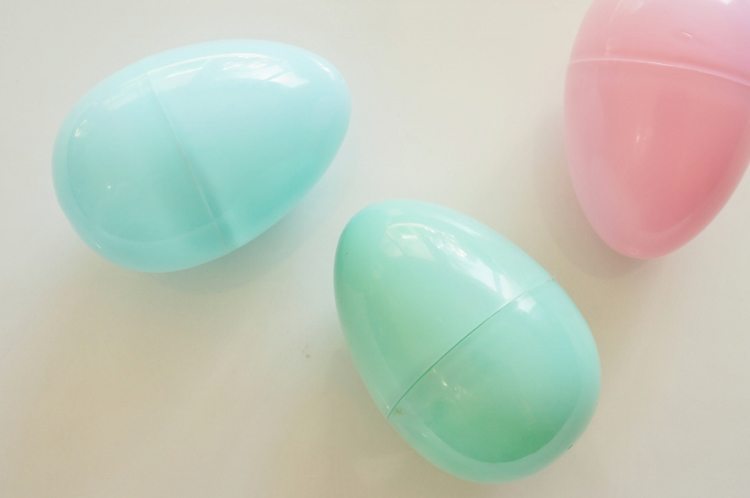
I grabbed a few Easter eggs out of my Easter bin in the garage. Upside down, they would make the perfect pinecones.

Paper Pine Cone from Plastic Easter Eggs

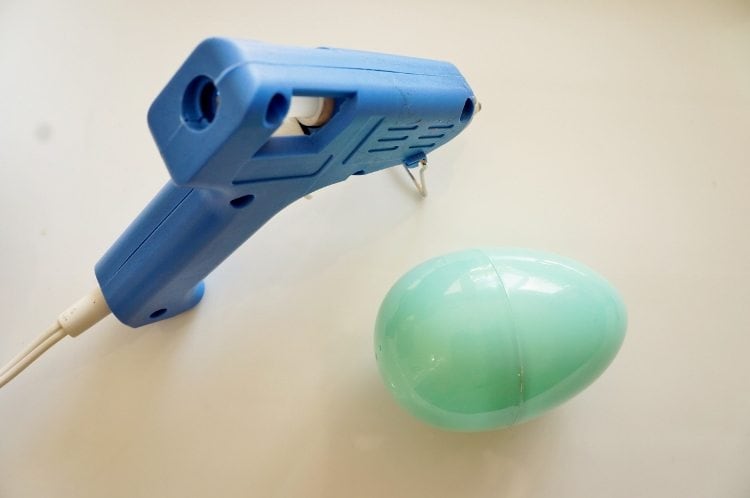
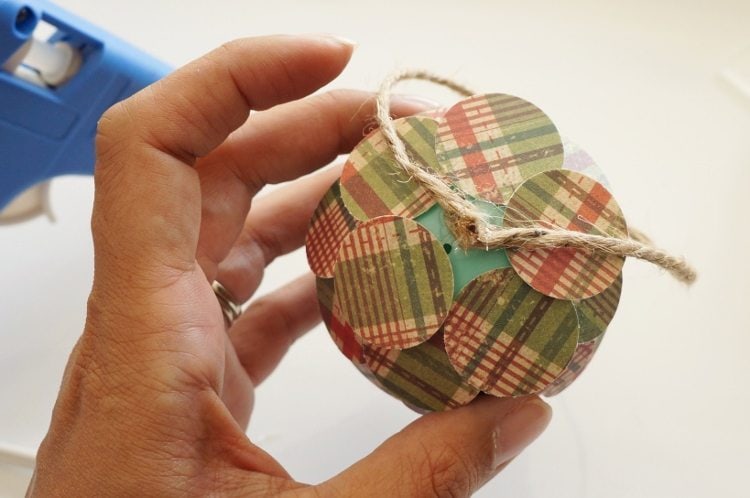
The first thing I did was glue the two pieces together with some hot glue. This will prevent it from breaking in half while you are gluing each circle.

Paper Pine Cone Repurposed Plastic Egg

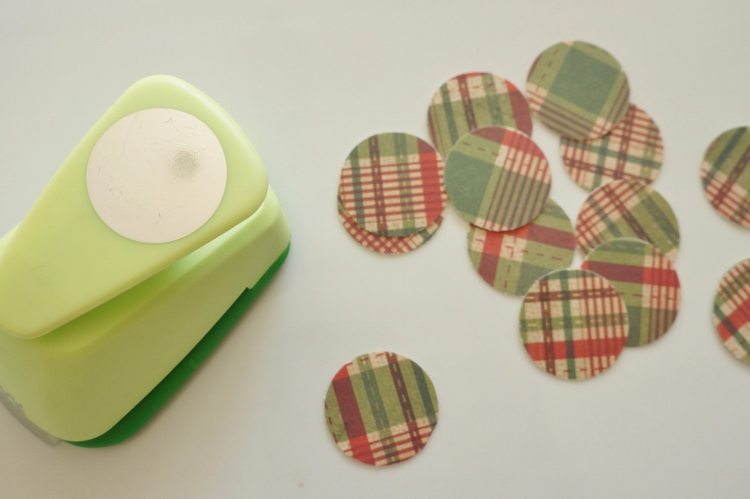
Using a small circle craft punch, I punched out several circles (about a 12X6 piece of scrapbook paper per pine cone).

Paper Pine Cone Craft

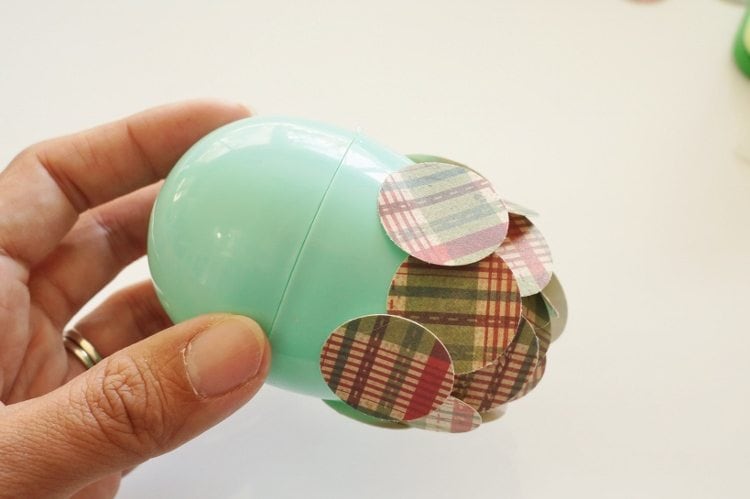
Starting at the narrow end of the egg, glue your circles on. For each row, overlap and alternate circles as shown.

Paper Pine Cone Ornament

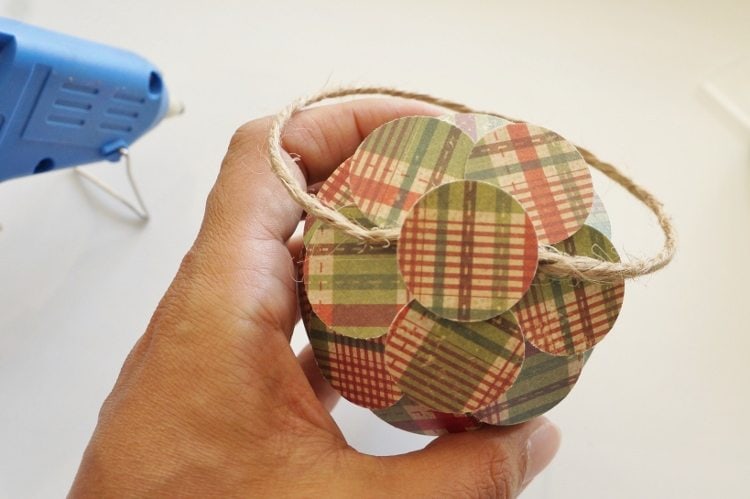
When you reach the top, place a dab of hot glue on the top and glue on a piece of twine for your hanger.

Paper Pine Cone Christmas Ornament DIY

Glue another circle on top.

Paper Pine Cone How To

If desired, decorate the top with ribbon and fake pine. I used some leftover mini pine garland from the repurposed bed spring Christmas tree I made.

Paper Pine Cone Paper Craft

There you have it! You can play around with the colors and patterns of paper. You can also opt to use other types of glue, but I feel that hot glue is the easiest because it dries so quickly.

Repurposed Paper Pine Cone Ornament Paper Craft DIYInspired.com

Check out some of my recent tutorials for Christmas ornaments and décor that match these pine cones!

  • Upcycled Bed Spring Christmas Tree
  • DIY Wood Slice Snowman
  • Repurposed Bed Spring Christmas Bells
  • DIY Paper Christmas Ornaments
  • Share
  • Twitter


1 Comment

Join our Community of Crafters!

Stay updated and never miss a thing!

Disclosure and Privacy Policy
Previous Post: « DIY Ideas for Your Thanksgiving Table
Next Post: How to Make Paper Tassels »

Reader Interactions

Comments

  1. susan says

    November 28, 2015 at 5:44 pm

    this is just way to cute.

    Reply

Leave a Reply Cancel reply

Your email address will not be published. Required fields are marked *

This site uses Akismet to reduce spam. Learn how your comment data is processed.

Primary Sidebar

Welcome!

DIY Inspired Profile Picture 2015Thank you for visiting! I'm Dinah and I'm honored to have had an exciting career in blogging over the last 11 years. {Read more about me here}

Join our Community of Crafters!

Stay updated and never miss a thing!

Disclosure and Privacy Policy

Stay updated and never miss a thing!

Footer

You might also love these

DIY Classroom Mobile Phone Holder

Classroom Smart Phone Drop Station

How to Make Cotton Stems

DIY Fabric Covered Switchplates

DIY White and Gold Nightstands

Over Ten Years of Do-It-Yourself Inspiration

DIY Paper Flower Party Decor

Accordion Flowers How To

Copyright © 2022 · Divine theme by Restored 316

Copyright © 2005–2022 DIY Inspired. Installed and customized by TCN Design Studio