Easy Torched DIY Skateboard Wall Rack
Recycled Wood DIY Skateboard Wall Rack with a Wood Burned Design
This article, Easy Torched DIY Skateboard Wall Rack, is sponsored by Bernzomatic. All opinions are 100% my own.
I am no stranger to dumpster diving. In fact, trash day is my favorite day to go on a walk. Our neighborhood is turning over and there is a lot of new construction, which also means free materials for DIY projects! So, today, I want to share how I made this simple DIY skateboard wall rack out of discarded wood from my neighbor’s trash.
Watch the Video
Here is the Easy Torched DIY Skateboard Wall Rack YouTube video. Keep scrolling to get the full details and tutorial.
Prepping Scrap Wood
You Will Need
- Bernzomatic ST3500
- Bernzomatic Propane
- Sand Block and Sandpaper
- Work Gloves

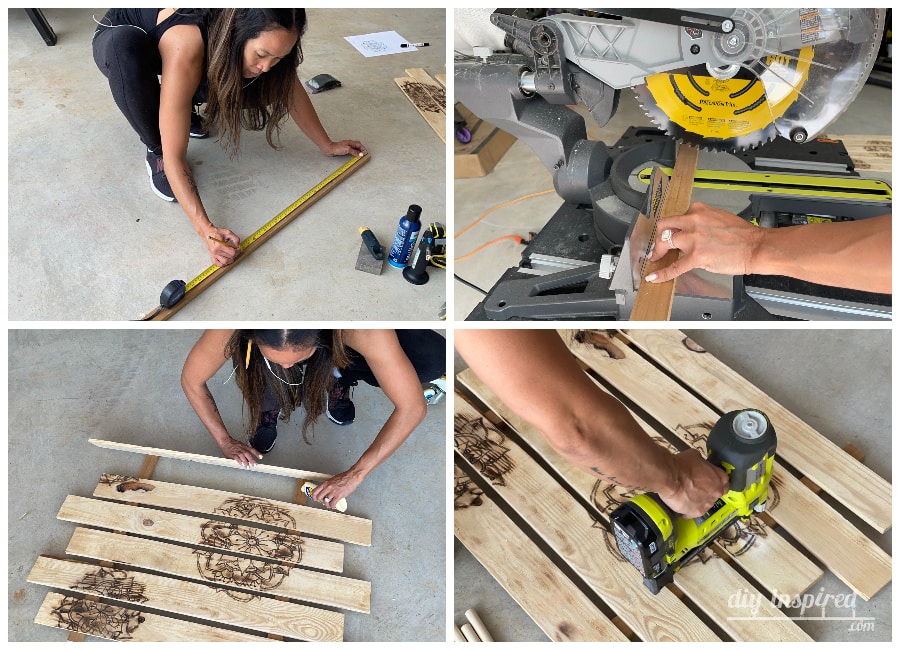
Because I found this wood in the trash, it was not perfect. Each plank was rough with a lot of splinters. Sand all sides and edges completely. Next, I used the Bernzomatic ST3500 with a medium flame to burn off some splinters, while at the same time coloring the wood a slightly darker shade. Sand each plank again. The result is a cleaner and smoother wood plank.
Pro Tip: Use the Bernzomatic fuel gauge to check the amount of propane you have left in your tank. If you do a lot of projects like me, this tool comes in very handy. It is a pocket-sized device and is designed with user-friendly functionality. The fuel gauge features an easy-to-read, digital LED display to indicate the amount of fuel remaining in your cylinder.
Drawing a Design
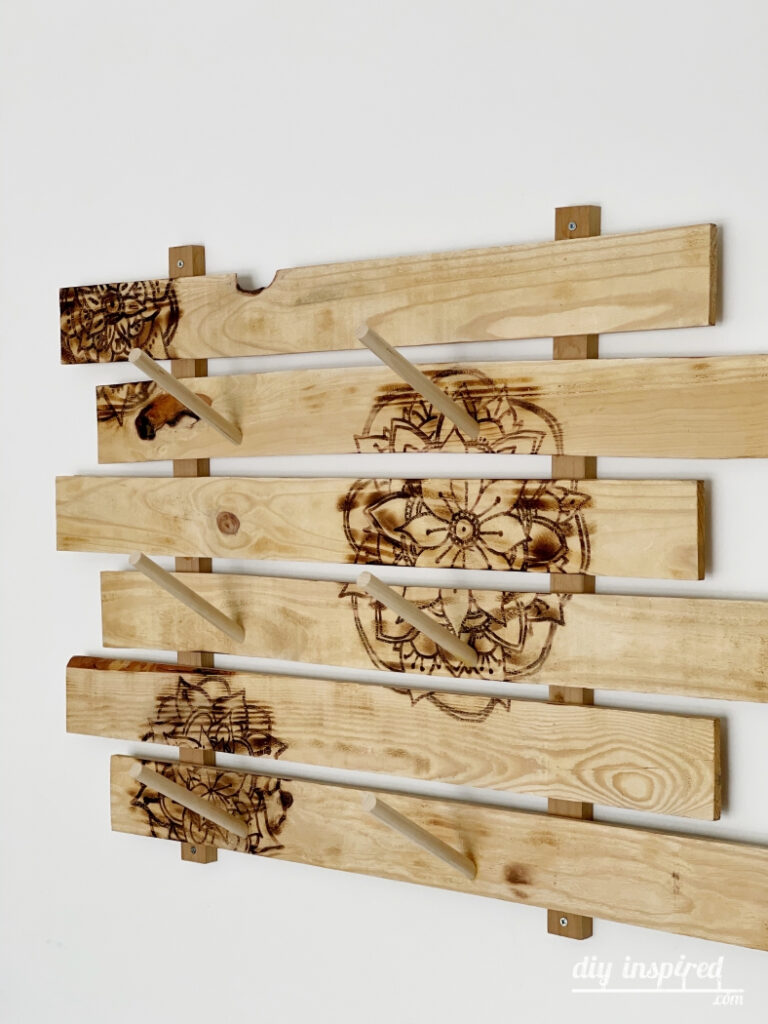
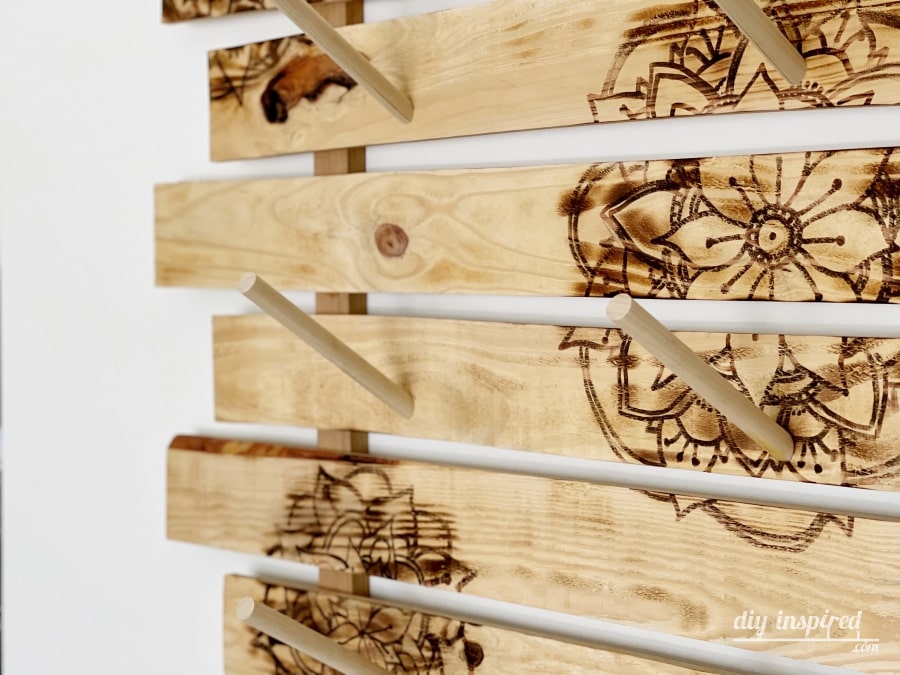
Because I was making this skateboard wall rack for my two daughters, I wanted to add a feminine touch to it by adding a flower mandala inspired design.
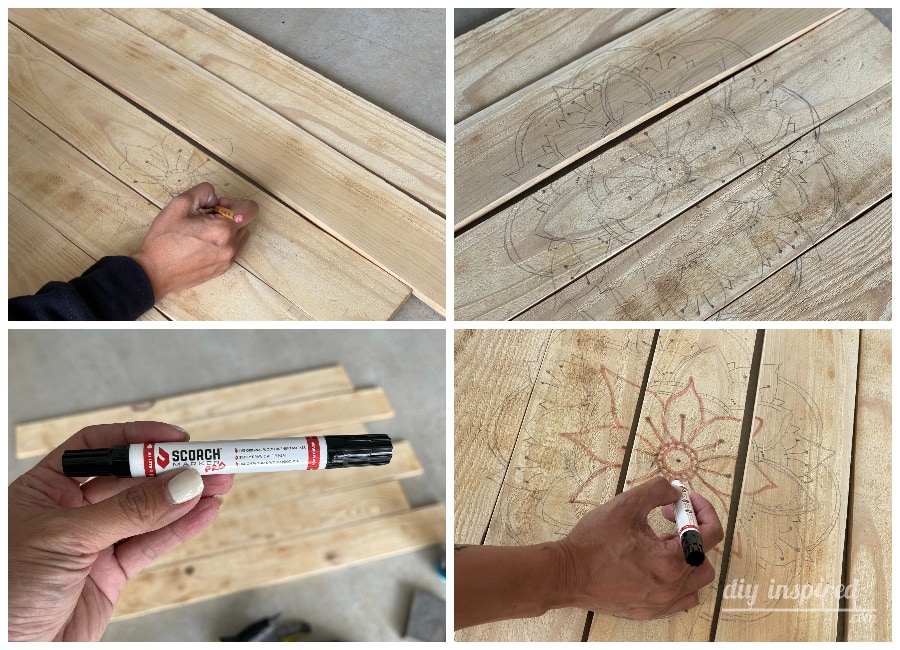
Here are a few tips and tricks to creating your own design.
- Arrange the wood planks together so that they touch. I decided to off-set every other plank.
- Use a pencil first so that you can easily erase mistakes.
- Look for inspiration online. Print out a picture and copy it onto your wood canvas.
Burning a Design onto Wood
You Will Need
- Bernzomatic ST3500
- Bernzomatic Propane
- Scorch Marker
The Bernzomatic ST3500 is the perfect torch for this project because of the trigger start and continuous mode as well as the ability to adjust the flame to a low setting.
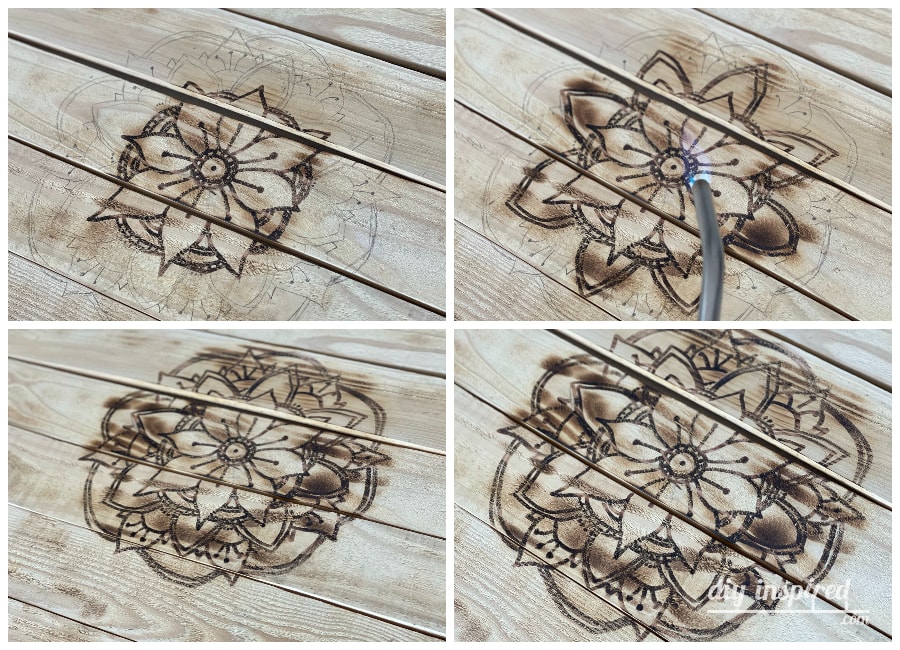
Instructions:
- Trace the pencil drawing with a Scorch marker.
- Push the trigger and ignite the flame on your Bernzomatic ST3500.
- Turn the dial to a very low setting. Start at the lowest if you feel uncertain.
- Glide the flame over the design.
You will see the drawing appear right before your eyes! It’s a neat effect and very addicting!
Assembling the Skateboard Wall Rack
Now that your design is complete. It’s time to assemble the skateboard rack.
You Will Need
- 2 Pieces of Wood (for back support)
- Wood Glue
- Nail Gun and Nail Brads
- Saw
- Measuring Tape
Instructions:
- Cut two additional pieces of wood to size. Again, I found this wood in the trash, but any common board will do.
- Lay the two pieces of wood perpendicular to the planks on each side to use as a back brace. Leave gaps in between planks.
- Use wood glue to attach the back brace to the planks.
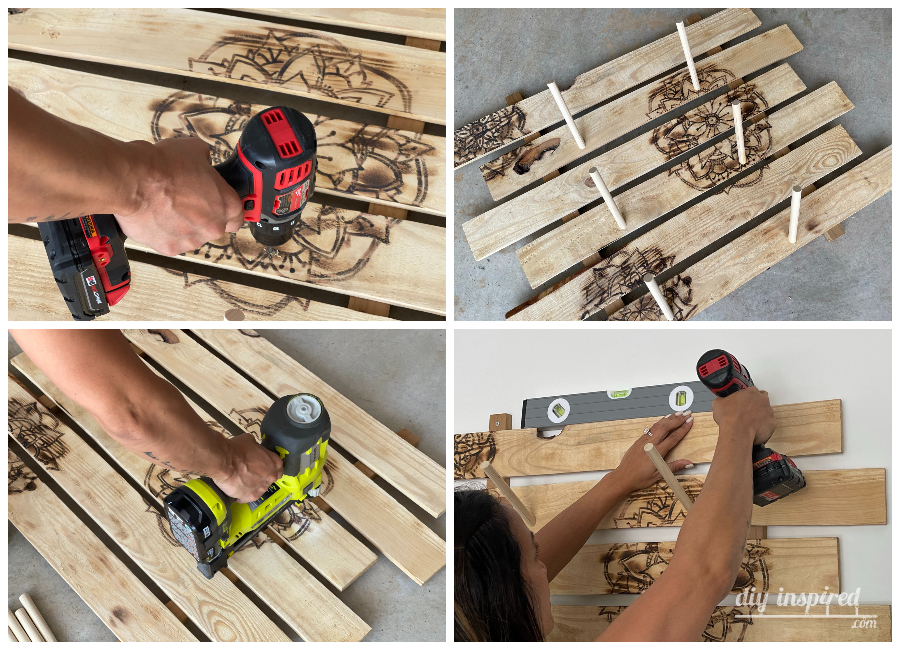
- Secure it with a nail gun.
Final Touches to the DIY Skateboard Wall Rack
You Will Need
- Wood Dowls
- Miter Saw
- Wood Glue
- Wood Screws
- Drill
- Drill Bit
- Measuring Tape
- Pencil
Instructions:
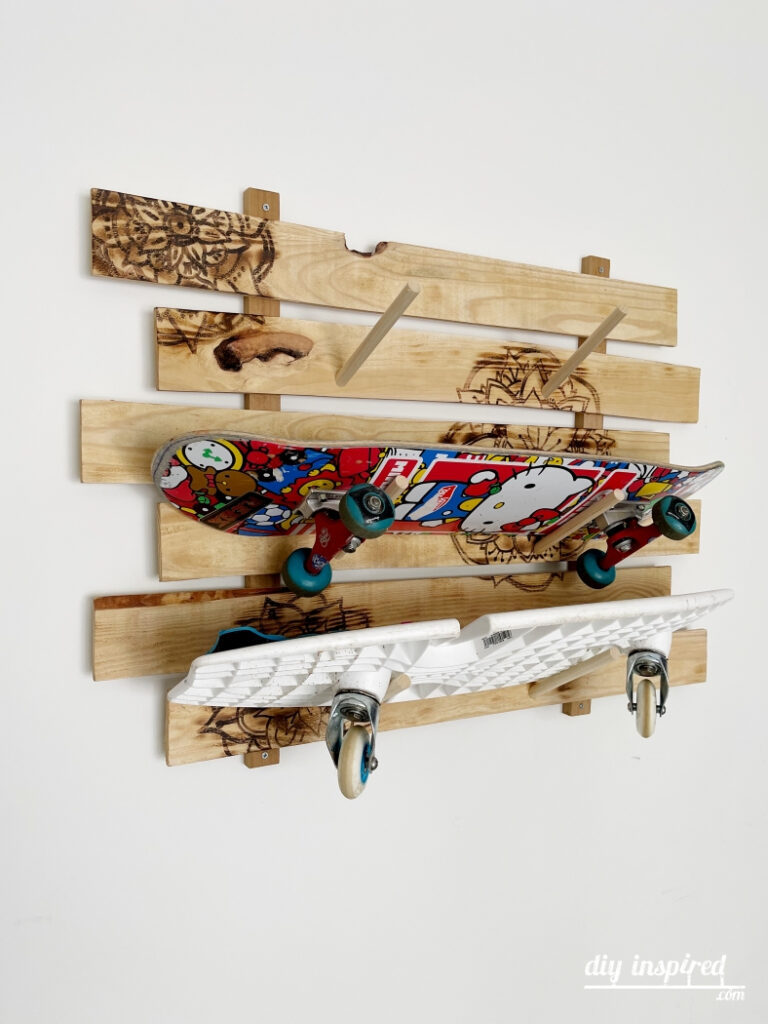
- Measure and mark where you would like to place the wooden dowels. I needed a rack to hold a skateboard, a long board, and a rip stick, so I measured accordingly. Use a drill bit to drill holes. This step makes it easier for you to see where to attach the wood dowls from the back of the skateboard rack.
- Cut two dowels for each board. For example, I cut 6 dowels for 3 boards. Cut the dowels so that they are 7 inches long with one side at a thirty-degree angle.
- Place wood glue on the angled side and screw in each dowel to the rack.
- Hang the rack by screwing it directly into the wall.
Here are a few pictures of the rack with and without the skateboards on them.

You May Also Like
Before you go, check out these other fun tutorials.