How to Paint a Bathroom Vanity
How to Paint a Bathroom Vanity and Cabinets
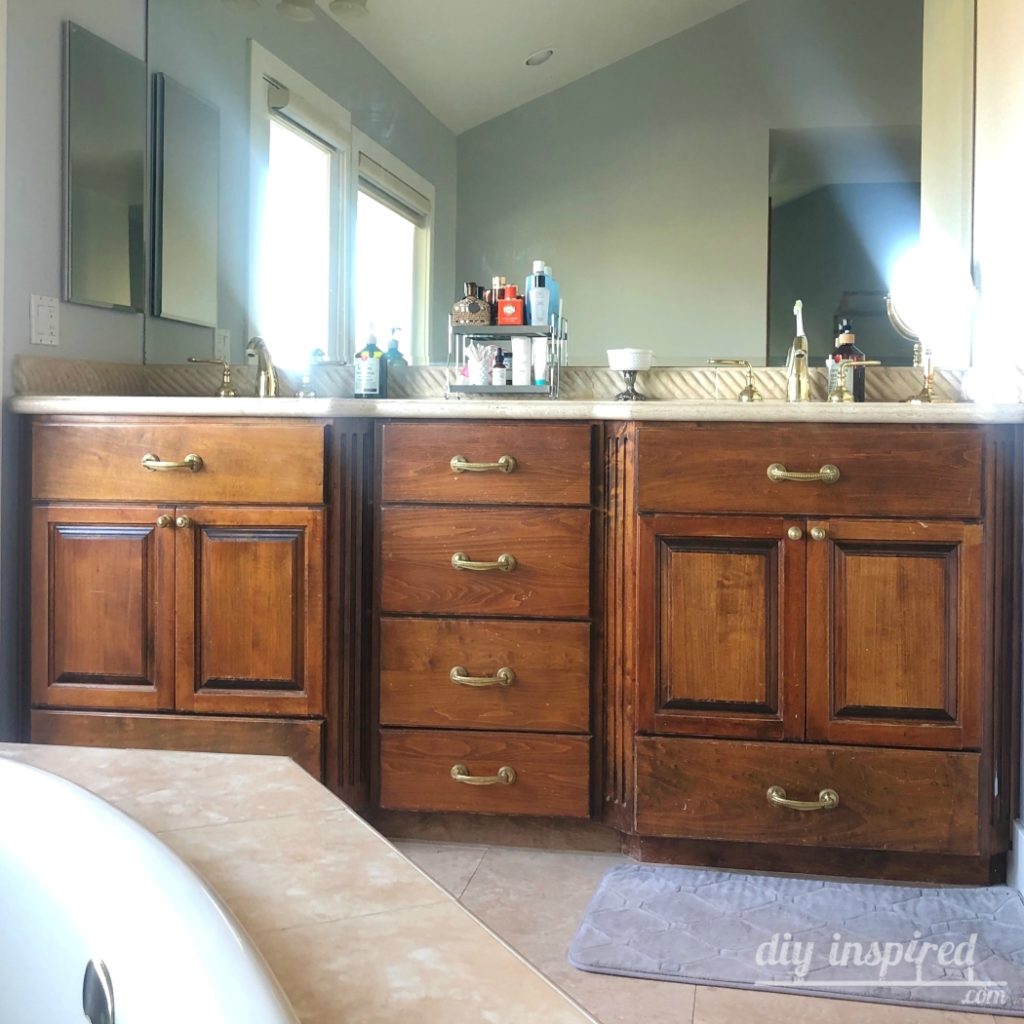
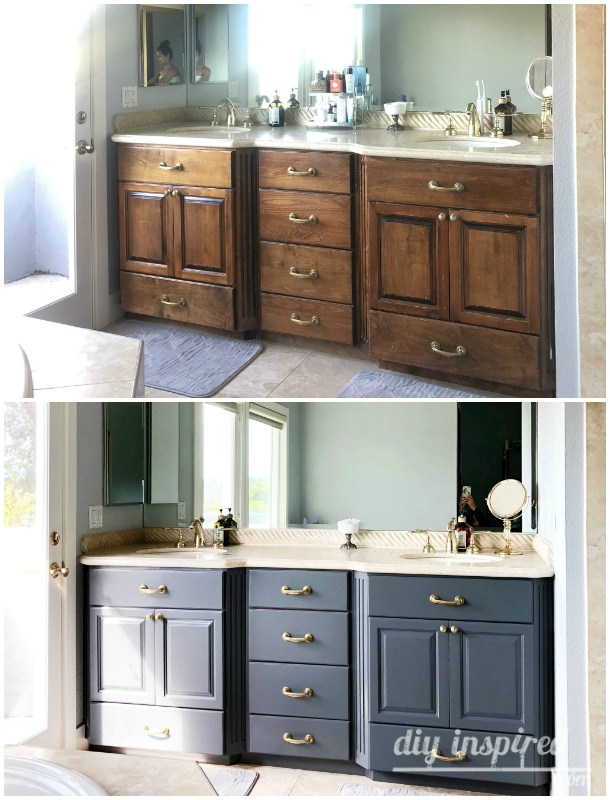
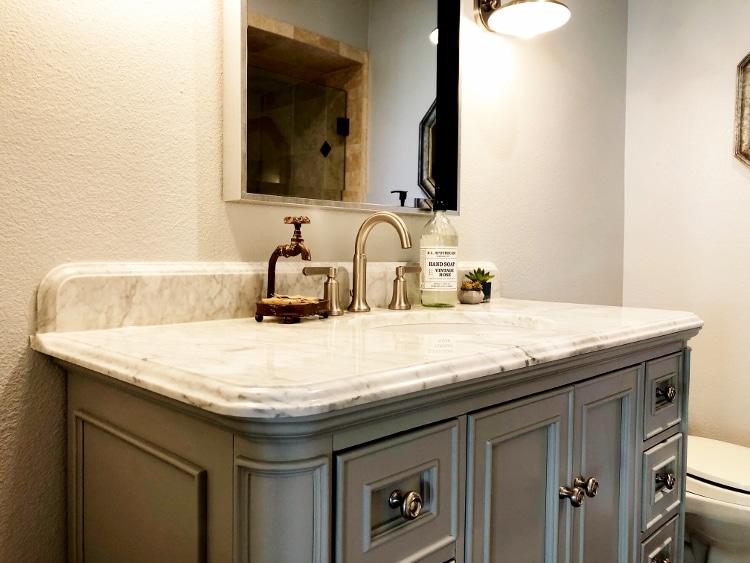
Being cooped up the last few weeks, I started getting motivated to make small improvements to the house. One of our last things to upgrade is the master bathroom. The vanity is beautiful, however it’s old and chipped. The brown wood also looks outdated. I had some leftover paint from painting my laundry room cabinets and so it led to this post, How to Paint a Bathroom Vanity.
Here is the BEFORE.
Hardware: Love it or Leave it?
The hardware is gold and outdated, however I knew that the previous owners spent a lot of money on them. I also knew that given a different color cabinet, they would look more updated and intentional. Keeping or getting new hardware is up to you! In this case, once they were back on the newly painted cabinets, they looked brand new again.
Here’s What You’ll Need
Time: One Day Project
Materials:
- Drop Cloth or Tarp
- Painter’s Tape
- Paint Brush
- Small Roller
- Small Paint Pan
- Screwdriver and/or drill
- Sander (Electric and/or Block)
- Clean Rags
Prepping Before Painting
- Remove all the hardware, drawers, and cabinet doors.
- Sand any areas that need it. We had a lot of nicks and scratches. I used a block sander for hard to reach areas and an electric sander for the doors.
- Clean off any debris with a clean cloth.
- Use Painter’s tape to tape off any areas that you do not want painted.
What Paint do I choose?
The Paint: Behr Premium Plus Paint and Primer in One, Interior Semi-Gloss Enamel Deep Base 3300
Color Shown: Imperial Gray by Behr
There are three main reasons I chose this paint for this project:
- Paint and Primer in One – primer is needed due to the nicks and scratches. It also allowed me to do one coat and a touch up versus several coats.
- Interior Semi-Gloss Enamel – there is a lot of moisture in the bathroom. Also, semi-gloss enamel allows the cabinets to be easily wiped clean.
- It dries smoothly.
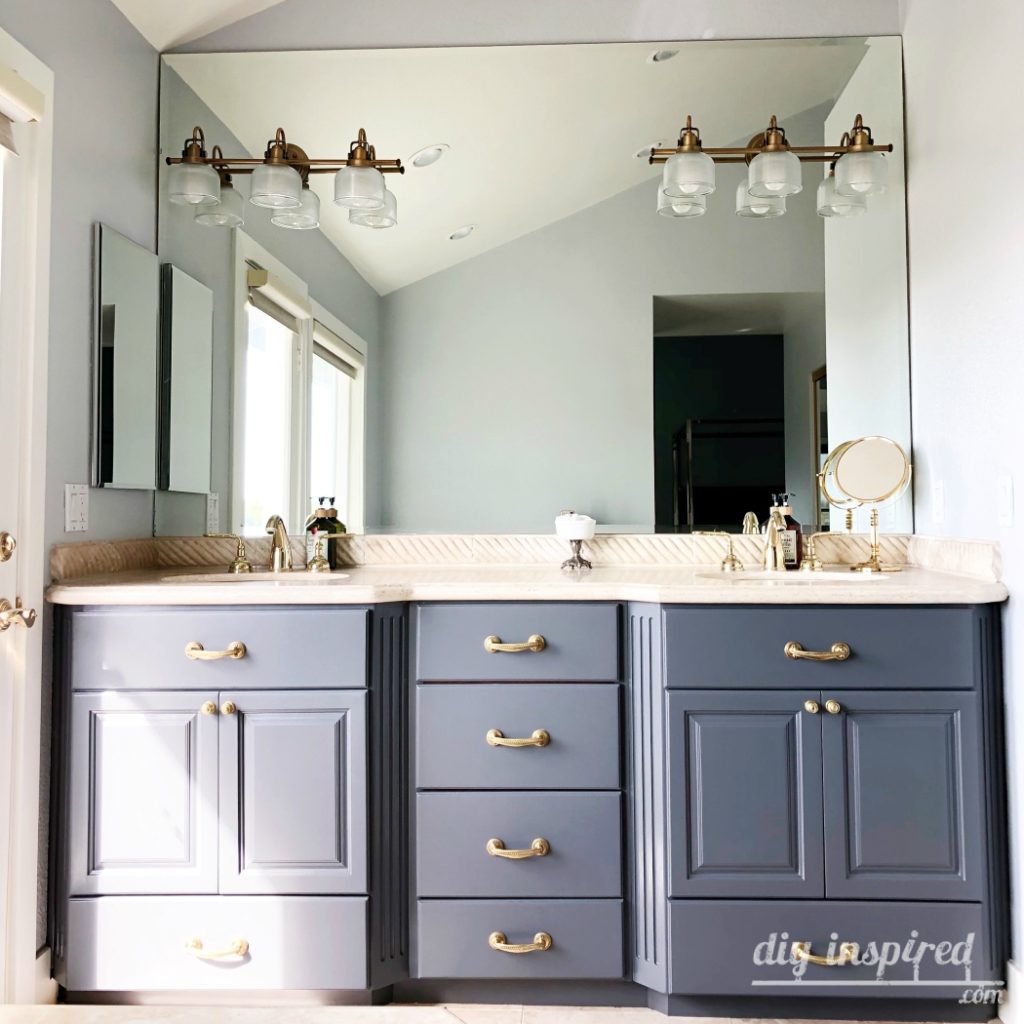
Painting Your Bathroom Vanity
Use a paint brush to paint cervices or hard to reach areas. Use a small roller brush to paint larger surfaces. I allowed the first coat to dry for a few hours. I was prepared to paint a second coat; however, I didn’t really need to. There were a few areas I missed, but only a quick touch up with both the brush and roller were needed. Allow it to dry a few hours before putting the hardware back on.
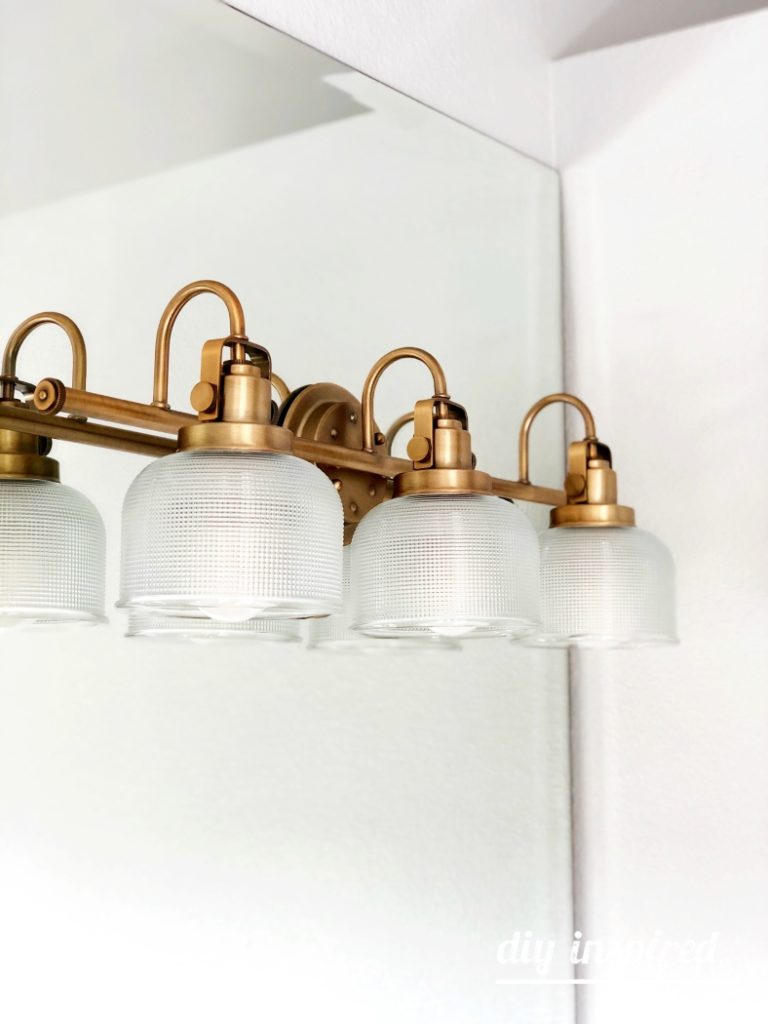
An electrician changed the vanity lights. I have changed them myself in the past, however I didn’t want to risk breaking the mirror. I bought these at Lowe’s. It is the Progress Lighting Archie 3-Light Brass Transitional Vanity Light.
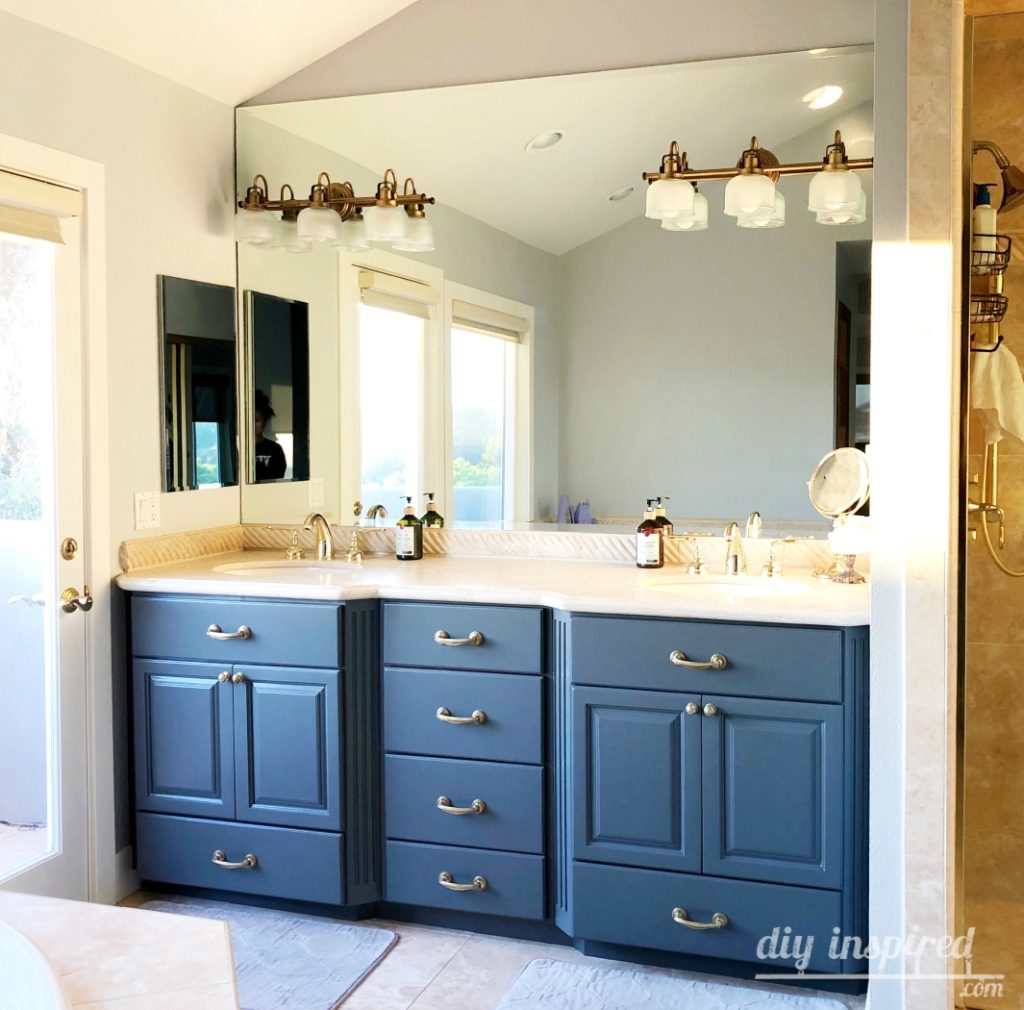
Here is a photo right before sun set. As you can see the color changes. I love it!
You May Also Like
Check out this fun old dresser makeover:
This is such a great post! Thanks for all the tips!
Happy day friend!
karianne
Thank you so much, Karianne!!
Great article! Painting a bathroom vanity and cabinets can be a cost-effective way to update the look of a bathroom without a complete renovation. To paint a bathroom vanity and cabinets, you’ll need to prepare the surfaces by cleaning them thoroughly and removing any hardware. It’s also important to sand the surfaces lightly and apply a primer to ensure that the paint adheres properly. Once the primer has dried, you can apply the paint in thin, even coats, allowing each coat to dry before applying the next. It’s important to use a paint that is specifically formulated for use in bathrooms, as it will be more resistant to moisture and mildew. You can also consider adding a clear coat of polyurethane to protect the surfaces from wear and tear. With the right preparation and execution, painting a bathroom vanity and cabinets can be a relatively easy and rewarding DIY project.