DIY Cinderella Carriage Stroller
DIY Cinderella Carriage Stroller for Trick or Treating on Halloween
I love DIY submissions! This one, DIY Cinderella Carriage Stroller, was submitted by my friend Lilly Meehan of Bakersfield, California. She is no stranger to DIY Inspired. In fact, she has submitted some pretty cool projects in the past like:
- DIY Step Stool with Upcycled Vintage Rulers
- Painted Rock Craft
- Upcycled Ladder Garden Display
- Recycled Clock Watch Display Case
- Thrift Store Chair Makeover
- Upcycled Thrift Store Penny Table
Today I want to share this fun DIY Halloween idea.
Materials:
- Stroller
- Hula Hoops
- Fabric Paint
- Silver Spray Paint
- Zip Ties
- Mini LED Lights
- Tulle
- Ribbon
- Crown
DIY Cinderella Carriage Stroller, by Lilly Meehan
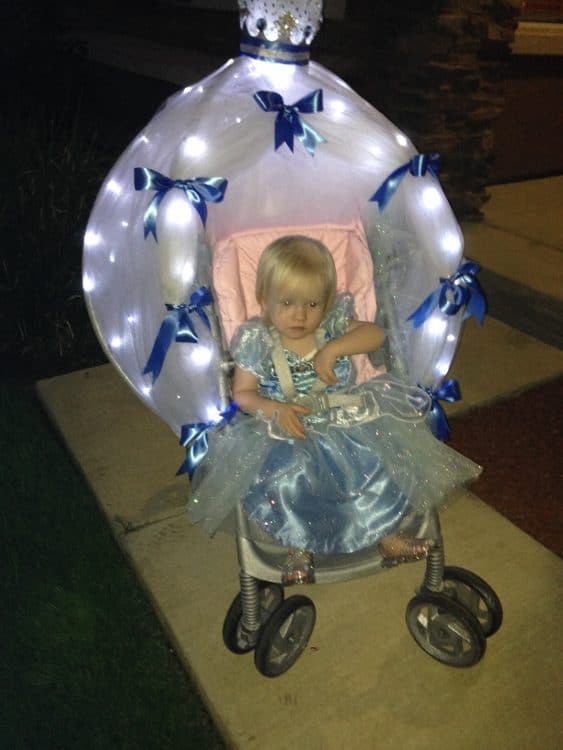
My granddaughter had only been walking for a few months, so walking in the typical way for Halloween seemed beyond expectations for someone so young. There are several stroller and wagon Cinderella costumes on Pinterest, so images there were the inspiration.
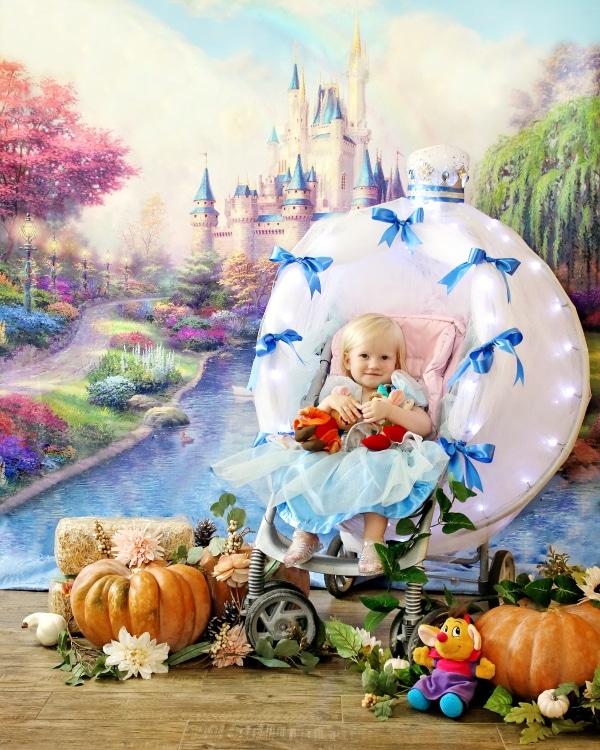
Photo Credit: Pam James of Pamela James Photography
Upcycling an Old Stroller
First, a used stroller was purchased. It had a typical canopy and front tray, which were removed and discarded. The fabric seat and straps were removed and washed, and the frame was hosed down. Once dry and clean, the frame itself was spray painted silver. The gray & green color of the seat did not match the theme, so it was painted a soft baby pink with fabric paints.
Adding the Hula Hoops
Next were the hula hoops – they were covered in a colorful plastic overlay which needed to be peeled off, allowing silver paint to be sprayed on.
Once painted, the hula hoops were added to the frame using zip ties. Mini LED lights were attached to the hula hoops using more zip ties. Being the lights had green wire, that wire was carefully painted by hand in silver to match the background hoop color. The battery compartment fit nicely into the tray below the handle. (rugratsva.com)
Adding the Tulle
The next step was to add tulle to create the carriage illusion. Quite a few yards were wrapped around the hula hoops and the back. The tulle draped over the seating area a bit, so zip ties covered by blue ribbons were added to the front to pull back the tulle. Extra tulle was bunched up and added to the top and sides of the seat.
Making the Crown
The next step was the crown at the top. A birthday crown was purchased from a party supply store and spray-painted silver. A rhinestone pin and acrylic gems were added, and ribbon was wrapped around the base to hide the Happy Birthday wording. Extra tulle was bunched up and covered with a scrap of fancy fabric to fill the center of the crown. The ends of the mini lights were pushed into the center of the crown and the crown was attached with string to the hula hoops.
Final Touches
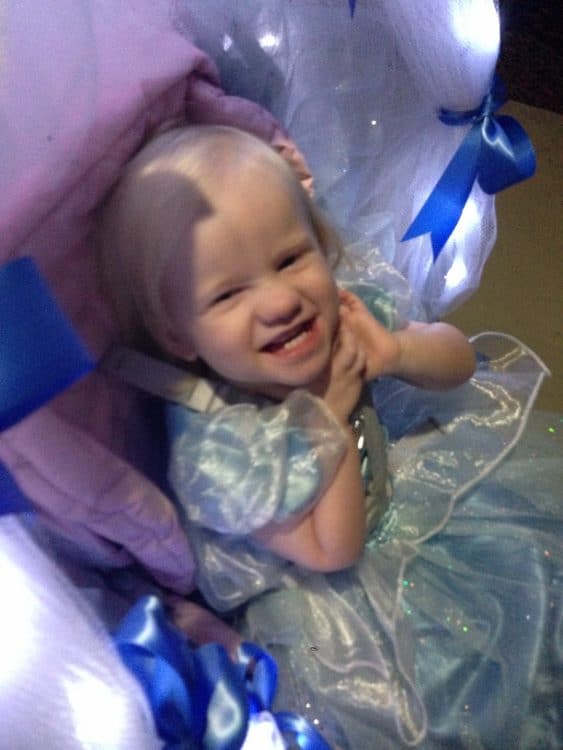
The Cinderella costume itself was purchased. It needed a few alterations, including an opening near the front waist to allow the straps of the stroller to be fastened. Clear sparkly jelly shoes were the “glass slippers”. We worried someone so young would not understand the concept of Halloween, however when we began our after dark stroller walk, squeals of delight and foot kicking were the result. Lots of oohs and aaahs were heard, and one person even took her picture. It was a whole lot of fun!
Here are some pictures of us trick or treating that night!