DIY French Rounded Back Chairs Makeover
DIY French Rounded Back Chairs Makeover by Pam and Thom James
One of the great perks of blogging is meeting other creative people that you are inspired by. In this case, I met Pam and Thom James from my DIY Inspired Facebook page. They shared a beautiful French rounded back chairs makeover with me and I just had to share it with all of you.
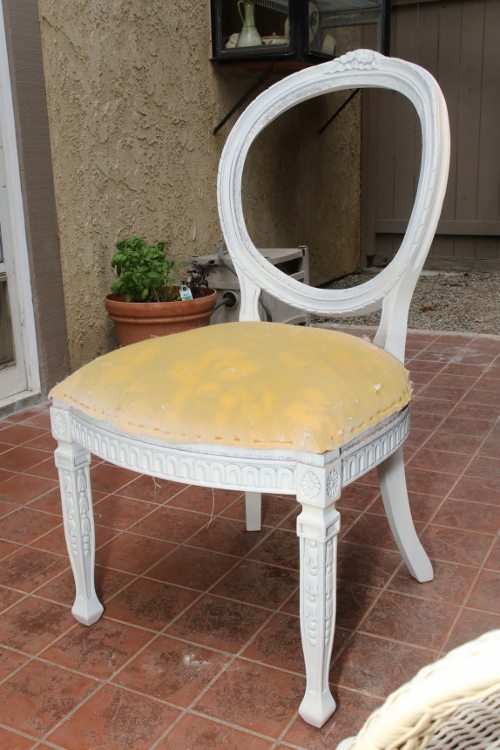
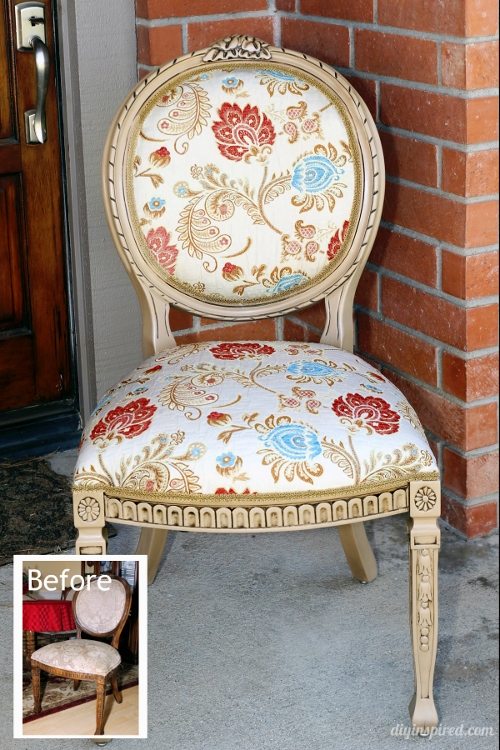
Here is the BEFORE:

Here is what she said about these chairs destined for the trash at her church rummage sale:
“We are big-time DIYers since [my husband] is disabled and I am his caretaker. He has many good days where he can do creative things. I found four French Round-backed chairs not sold after our Church’s rummage sale. They had been taken to the back of the church to be discarded. I asked if I could take them and was given permission.
After sanding them we discovered that the wood wouldn’t take a stain. We’ve run into that before with production made furniture and for small parts (like feet of sofas, etc.) we paint them or do faux finishes. After some experimentation, we decided to create a caramel finish with glazing to pick up the warm tones in some antiques in our dining room as well as the caramel in our wool area rug.
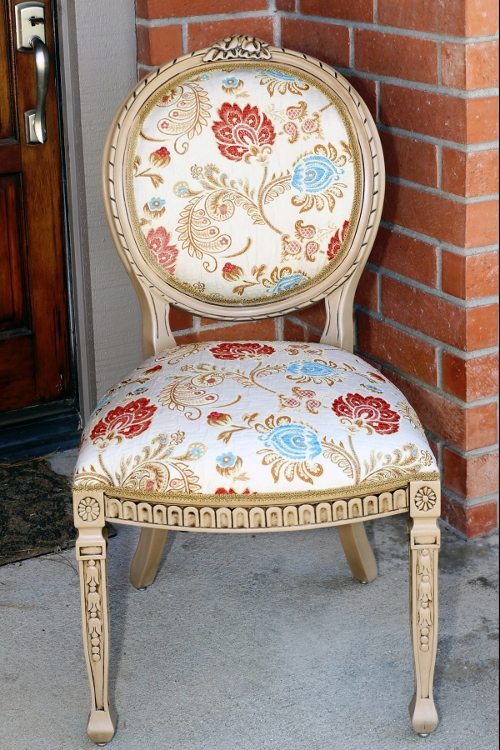
The colors in the dining room are a wheat-gold, a brick red and a bit of blue and olive. Not quite a split-complimentary color scheme but it works because the blue and olive are very small accent colors. I found a tapestry that is almost the reverse of the area rug as far as color and design and a caramel gimp.
Because we had to start over a few times to get the effect we wanted and working around my husband’s bad days the project took over three months.”
Pam mentioned that the pictures do not show how “doesn’t show how awful they were. All nap had worn off the tapestry, and there were spots so threadbare they were ready to give way, not to mention how dirty they were.”
How They Did It
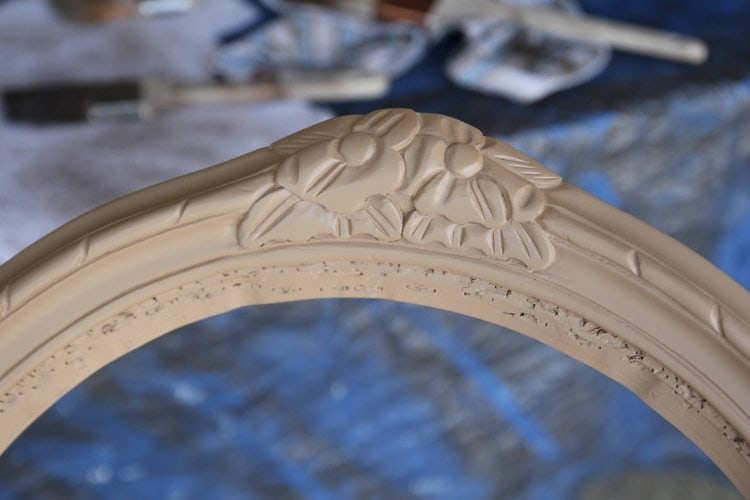
The James’ sanded and added two coats of primer. They painted four coats with a Burlap spray paint . It was sanded with 800 grit wet/dry sandpaper
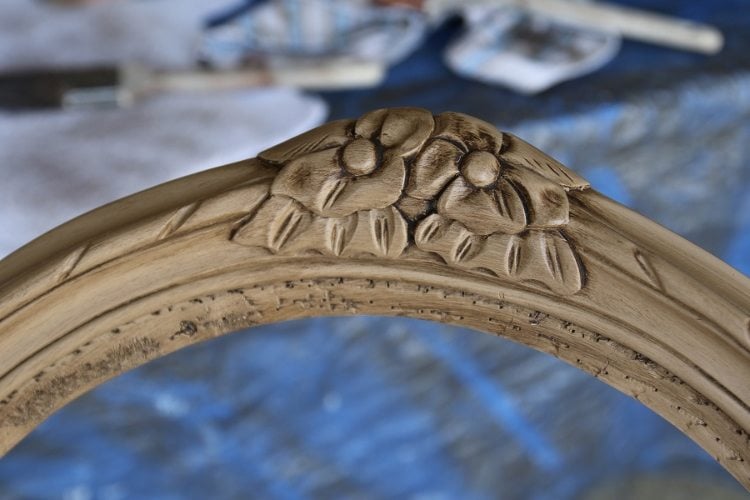
 between coats. They were glazed with a purchased glazing compound and wiped with microfiber cloths.
 Pam went back with a fine paint brush and painted each of the slashes and the small areas to create more depth.There is a very small amount of fly-specking which gives character. Three coats of matte poly to finish, then buffed with tinted wax.
Be sure to check out my article for when and how to use primer for DIY painting projects and furniture makeovers.
Thom upholstered the chairs by using tacks the way you would use pins for sewing. After positioning the fabric (all four chairs match) he tacked the fabric in place then slowly stretched it, turned under the raw edges and worked out any fullness. Once everything fit he used his power stapler to secure it. After upholstering, he hot glued the gimp onto the edges of the fabric.
Pam says that he dining room looks so beautiful. She has a china cabinet that has embossed floral garlands that I am painting to match the fabric on the chairs.
Check out my guide for why you should buy furniture secondhand. It also includes a list of trash to treasure project ideas.
Thank you Thom and Pam for allowing me to share your beautiful work here on DIY Inspired. You are both truly an inspiration and it was an honor to share it!
Like it? Pin it and share it!

I have seen these chairs in person, and it was indeed a spectacular makeover. The chairs looked quite neglected and shabby, but now they are a sight to behold. Thom and Pam are very talented friends of mine and they do fabulous work.
Thank you for referring them, Lilly!