DIY Upholstered Wood Bench
Easy Garage Sale DIY Upholstered Wood Bench Plus Garage Sale Tips for Finding Furniture
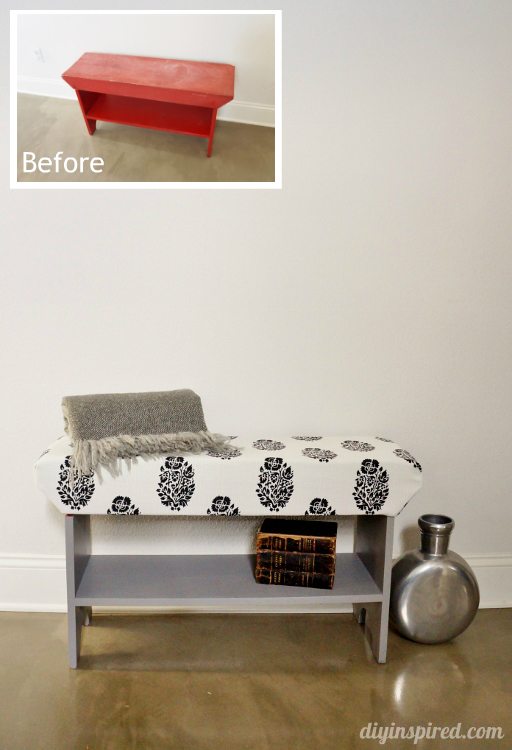
I scored on this bench months ago at a garage sale for $5.00. It was made over once to go at the foot of my guestroom bed, but since I decided to put up wallpaper in there, I had to change it. I took the old one apart and simply repainted it and changed the fabric. This was another fun trash to treasure that I can do over and over again!
Here are some quick garage sale hunting tips when looking for furniture:
- Wood is good. I feel like the furniture today isn’t made like it used to! Quality solid wood pieces are easy to find.
- Look past the ugly. Keep shape in mind when looking for your piece. Paint and hardware can easily be changed.
- Some damage is OK. If you notice slight damage that can easily be fixed, think of it as an opportunity versus a pass.
- Always negotiate on price. Keep in mind that you will have to spend money on supplies and material.
- If you wait until the end of the day, you can get furniture for practically free. If they haven’t sold it by the end of the garage ale day, they are likely going to donate it or have the trash come pick it up.
Check out my guide for why you should buy furniture secondhand. It also includes a list of trash to treasure project ideas.
Level: Easy
Time: 30-40 Minutes (not including drying time)
Materials:
This list has some recommended supplies from Amazon that are my affiliate links.
- Wooden Bench
- Paint
- Paint Brush
- Fabric
- High Density Foam
- Scissors
- Staple Gun
DIY Upholstered Wood Bench Instructions:
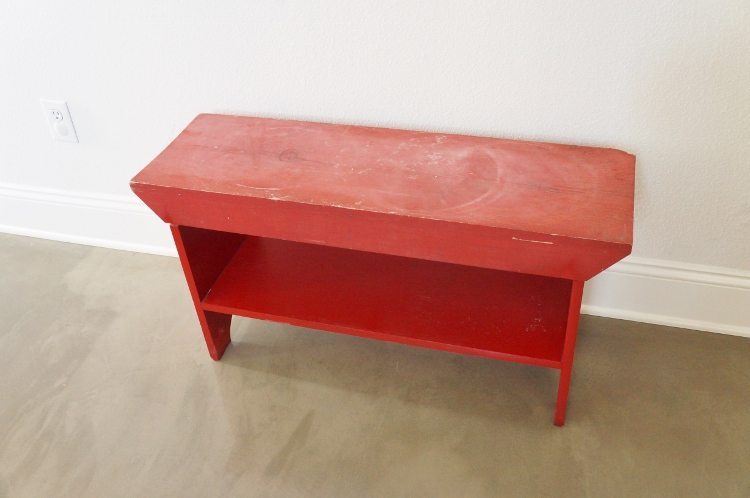
Here is the bench. You can use any type of wood bench. Garage sales and thrift stores are perfect places to find a great one. As you can see, this one was a little beat up, but it was worth the five bucks. I didn’t mind that the top is a little beat up because I will be covering it anyway.
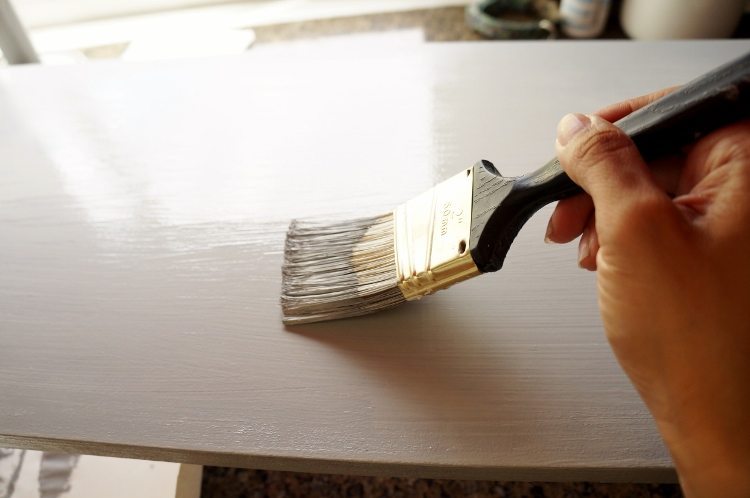
I painted it gray to match my guest room. It’s also a nice neutral color In case I decided to move it. I painted the bottom and sides and didn’t bother to paint the top because it would be covered.
Be sure to check out my article for when and how to use primer for DIY painting projects and furniture makeovers.
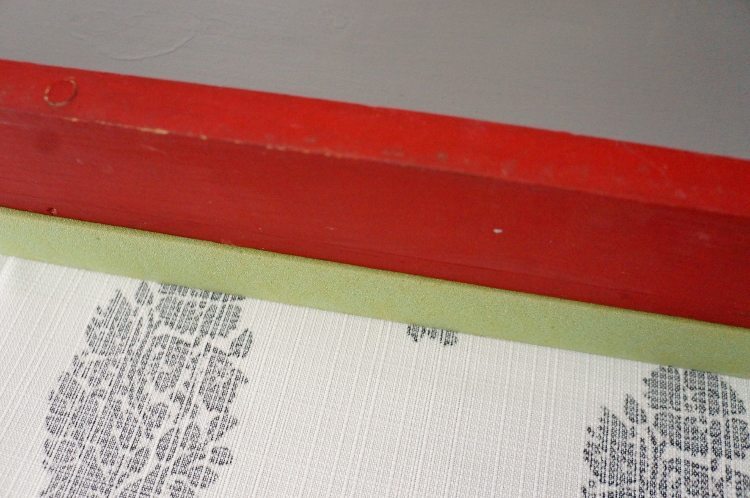
Once the paint dried, I measured and cut my fabric. I laid it upside down, followed by the high density foam in the middle and the upside bench on top.
I worked my way around the bench and stapled the fabric to the wood.
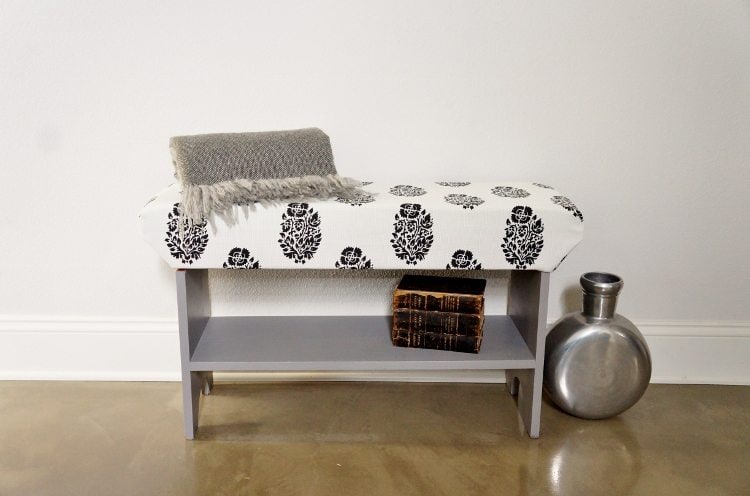
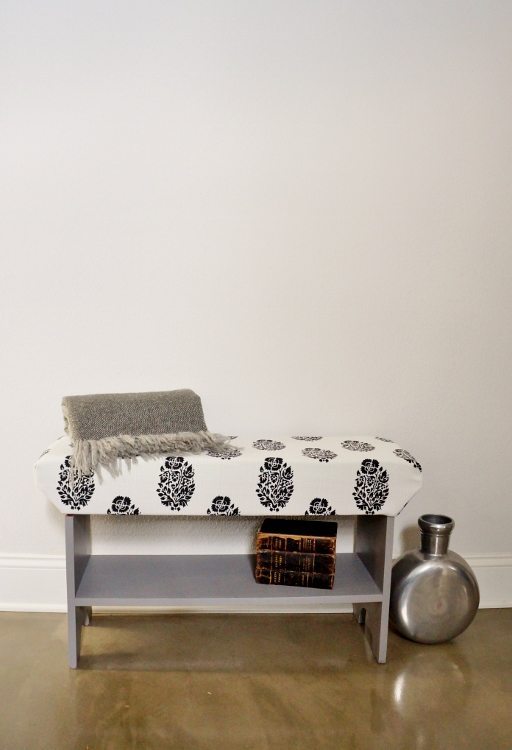
Here is the after.
It’s such an easy and inexpensive change, that you can do it over and over again. In case you missed what it looked like before, here it is. Now it will look much better with my new wallpaper!
Update: I originally made this bench in September 2015. I took it when we moved into our new home and still have it and now it sits on my covered balcony that is off of my master bedroom. It looks great out there and in hindsight I’m glad I used outdoor fabric.
One last quick money saving tip:
New hardware can get expensive. If you need to buy new hardware, I would suggest going to Habitat for Humanity Restore. BUT, outdated ornate pulls or knobs can look modern in a new color. If you have a piece with knobs or pulls, here is a quick video I made on the easiest way to spray paint knobs. If you are upcyling a piece for a kid’s room, spray paint it a fun bold color. Also, if you don’t like it, change it!
You May Also Like



Loving your blog! Great makeover to this little bench! I would like to invite you to share your posts each week at my Making Broken Beautiful Party. it has already begun but there is still time to join in.. It goes every Thursday from 6:00pm (MST) till Saturday 6:00pm (MST). It is a furniture and home decor party. I hope you can join, you have great taste!
Smiles!
Terry
http://thecuratorscollection.wordpress.com
I’ll check it out! Thank you, Terry!