Recycled Map Drawer Makeover
How to Mod Podge a Drawer with a Recycled Map
This is a project I did in 2013 for my craft room at the time. It wasn’t complete when I recently published the craft room makeover reveal. It needed a chandelier of some sort, which I never found. I decided to cover my craft drawers with a recycled map to go with the lovely calming blue hues I have going in the room.
I bought these maps at a local gift shop. It is actually gift wrap, however old maps work well too.
Other Decoupage Materials:
- Thick gift wrapping paper
- Wallpaper
- Photos
- Newspapers and Magazines
- Scrapbook Paper
- Other Decorative Paper
Before we start you can also choose the finish you would like by using different types of Mod Podge. This list has some recommended supplies from Amazon that are my affiliate links.


How to Decoupage with Maps
Time: 30-60 Minutes
Materials:
- Piece of furniture you are covering
- Maps, gift wrap, or decorative paper
- Ruler
- Scissors
- Craft knife
- Mod Podge
 (affiliate link)
 - Paint Brush
- Knobs (optional)
- Cutting mat
Instructions:
Here is how the drawers looked BEFORE I decoupaged them.
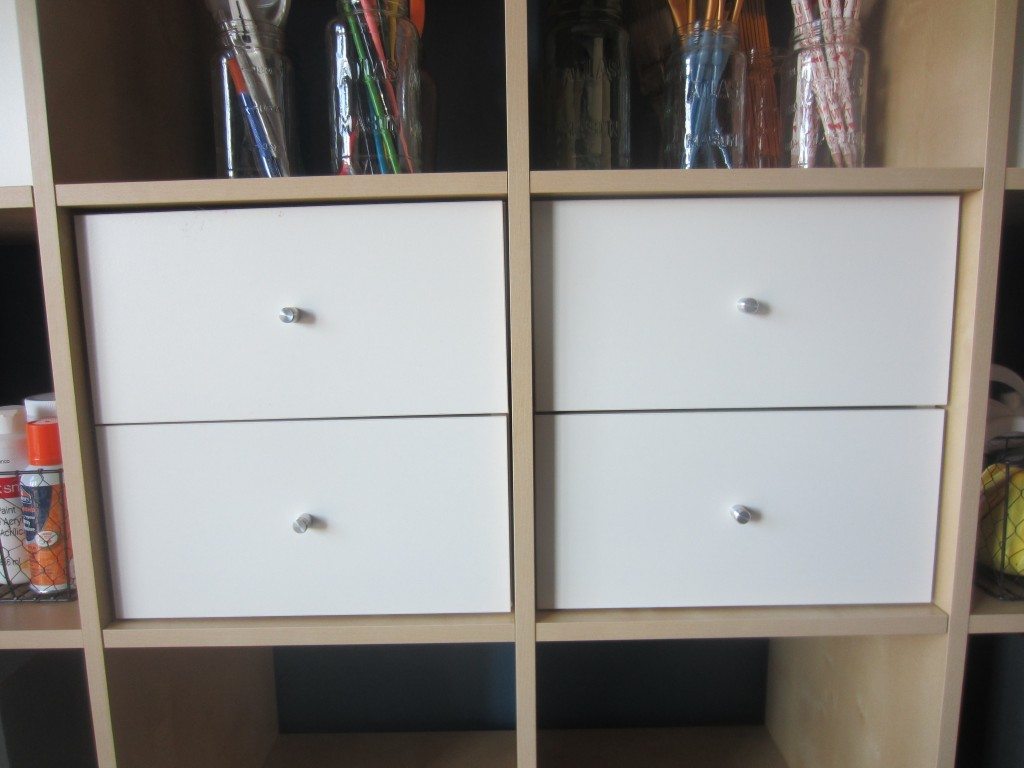
First, I removed the drawers from the shelving unit and took off the knobs.
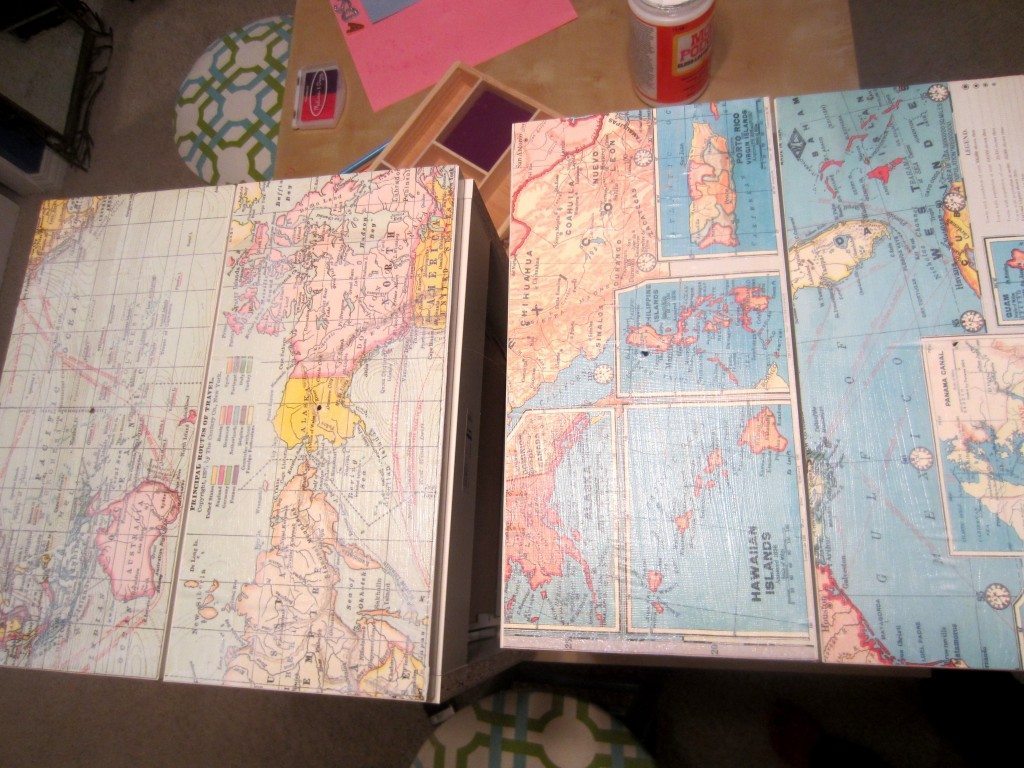
Using a ruler and a craft, measure your area and cut out the desired size on a cutting mat.
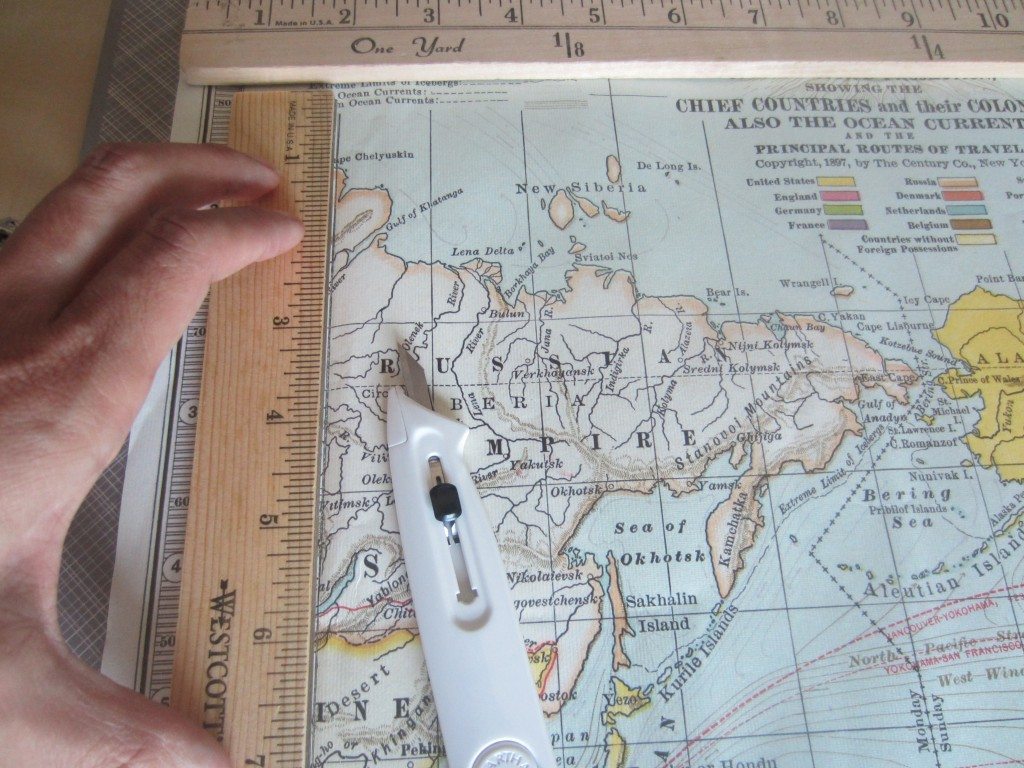
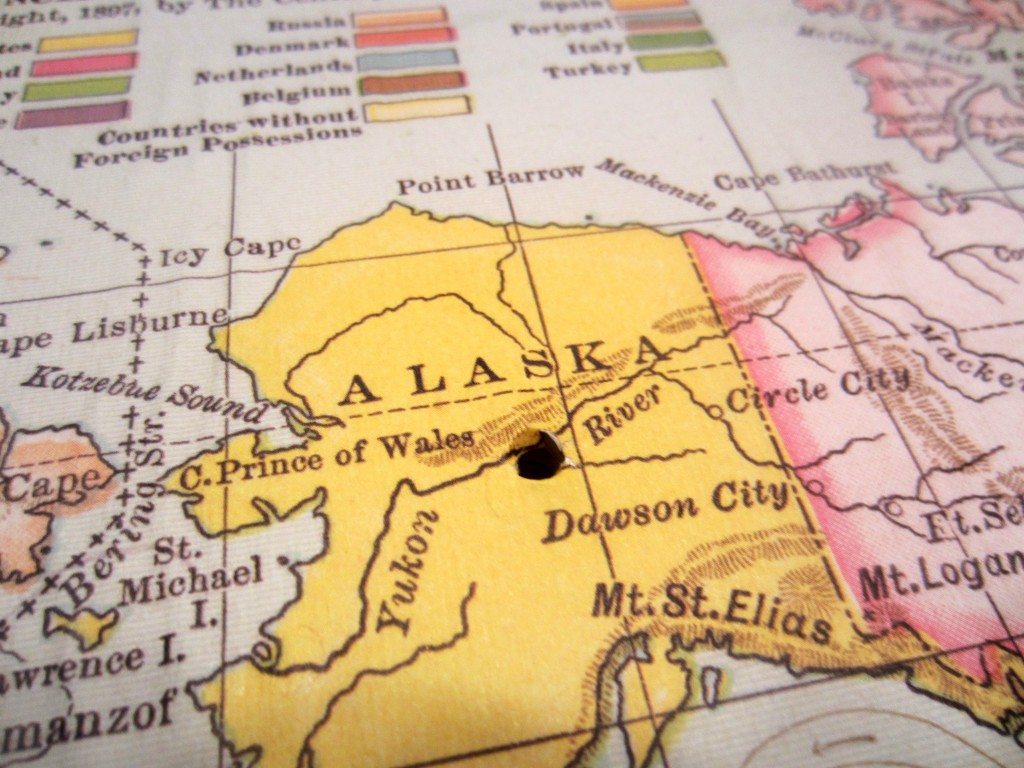
Lay the cut map and align it on top of the drawer. Using your craft knife, mark the area where your knob will be inserted.
Remove the map and apply Mod Podge to the drawer using a paint brush. After doing four drawers, the best technique is to apply the Mod Podge to the entire drawer and then place the map on top smoothing it from left to right. If you do this application enough, you may find your fingers or wrists hurting.
Bonus: If you want to paint the knobs, here is the easiest and quickest way to do it!
Quick tangent alert! As I am writing this post, I’m thinking about how much we do with our hands nowadays. I am now looking at the endless amount of hand and wrist conditions . You may not want to look if you get easily squeamish. Anyway, after securing the map, use the screw from the knob to poke out the hole for the knob.
Apply a layer of Mod Podge on top of the map. I applied three coats, allowing it to dry in between coats (approximately 15 minutes).
Lastly, when the Mod Podge on the drawers is dry, insert the hardware.
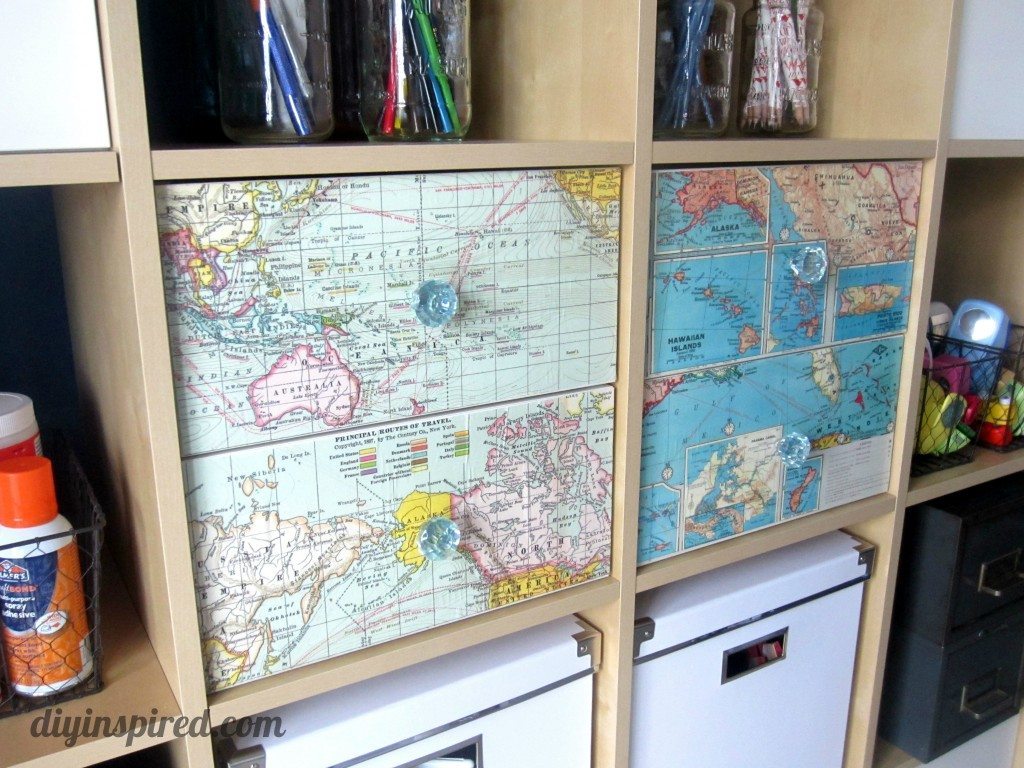
Here are some AFTER photos.
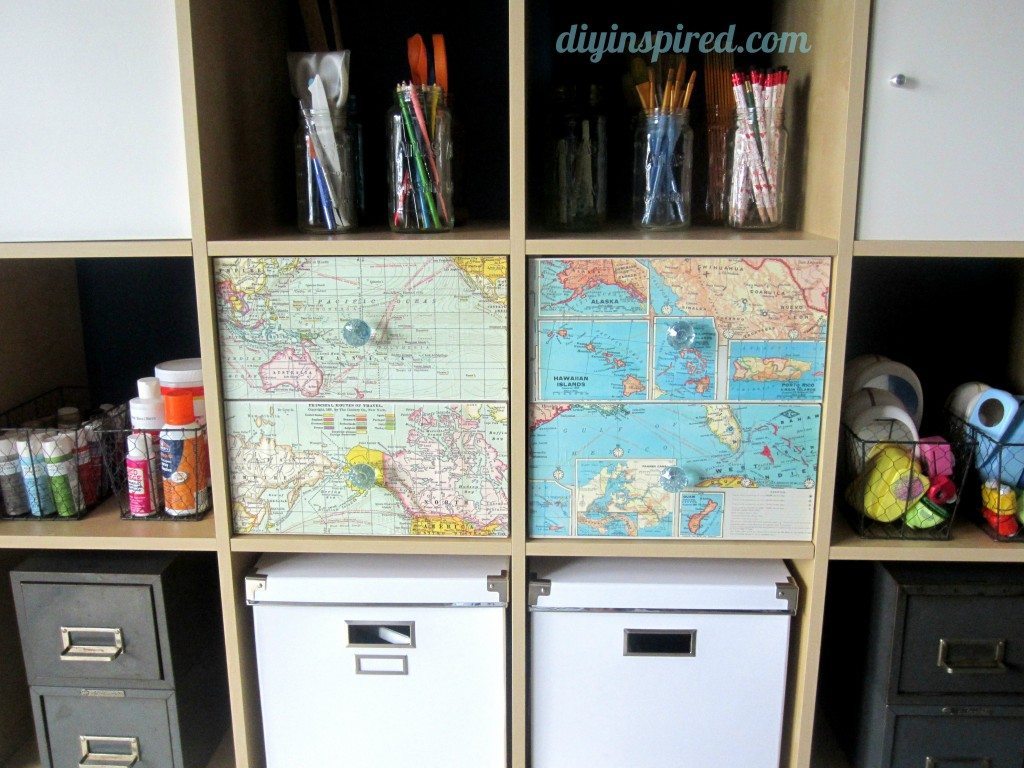
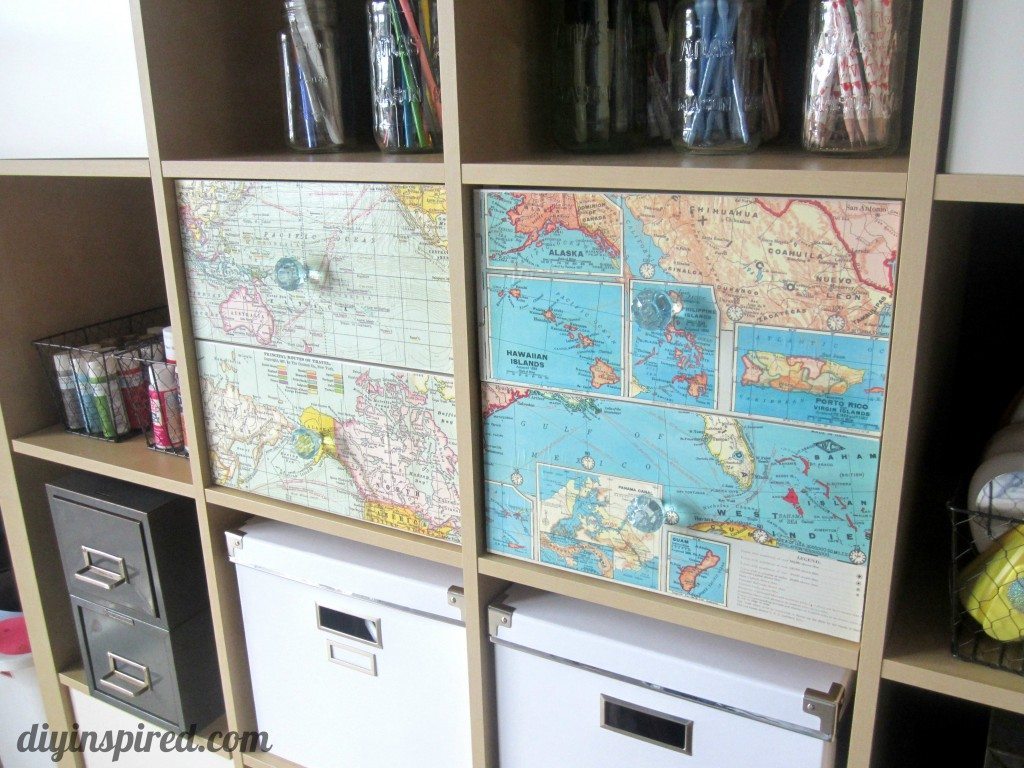
For more repurposing ideas and trash to treasure ideas, check out this fun round-up of garage sale and thrift store transformations! There are over two dozen original projects I have done including housewares and furniture transformations.
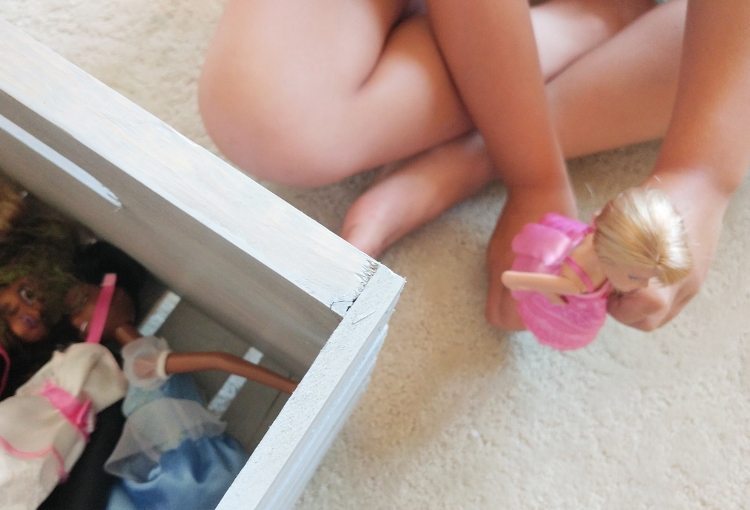
Here is my most recent craft room in our new house.
LOVE so much, Dinah! Wow, it really made a huge difference!
Thanks Tara!! It was easier than I thought too!
I love it! What a big difference that would make! I assume I can use other wrappers or scrapbooking papers I still have with me. It’s also very easy to do. You don’t seize to amaze me. I’m so happy to have found your site. It’s a very practical way to spice up a boring room. Thanks again.
Love it girl! The knobs look great against the map too! Pinned and tweeted!
Love the maps! It’s amazing what some paper and a little Mod Podge can do to makeover a piece!
Thank you so much, ladies!!!!
Very cool drawers. Thanks a lot!
Very cool! We must have been on the same wavelength this week- I decoupaged the inside of my end table drawers! 🙂
I am so impressed! I absolutely love this idea and I can’t wait to try it out! Thanks for the inspiration.
Great idea! I saw map coasters once and to this day I regret not buying them at the garage sale I saw them in- now I’m inspired to map something out myself!!! Maybe even something for my son’s room since I have been trying to think of a way to add a travel element there. Thanks!! I am definitely looking forward to following you. Check out my blog at http://www.thefamilylearningfactor.blogspot.com
Thanks, Connie! I love the idea of putting it in your son’s room. On my way to visit!
Great tutorial to make recycled map drawer makeover and its very nice looking drawer.
This is a fantastic idea! Would it work on the clear plastic drawers, with a different adhesive? Just wondering. Thanks for the idea and the post!
Thank you, Deborah! Yes it would work on plastic. What time of adhesive were you thinking? I believe you can make your own Mod Podge solution with white glue and water 50/50, but I haven’t tried it.
Those glass knobs are perfect for these drawers since they don’t block any of the map goodness. 🙂 Love the new look!
Thank you, Audra!
I love that! It makes such a huge difference in that whole furniture piece!
Thank you so much, Nicki!
Love the maps such a pretty way to do your drawers and the knobs are perfect. Thank you for sharing at Share It One More Time Cathy
What a nice upcycle. I like the crystal knob against the maps- makes it look quite elegant.
Wow the maps really improve the drawers. I love working with maps.
Those maps add so much vintage charm to the room! I love how they turned out. I just found you on the Moonlight & Mason Jars Link Party. I just starting co-hosting a new link party and we’d love for you to join us. It starts every Tuesday at 7pm and runs throughout the week. Thanks! Dream. Create. Link. Party
What a fun project! It looks wonderful!
Love how this turned out! My 5 year old has a vintage airplane themed bedroom and I think adding some maps like this would be perfect.
Oh you know I am all about a good upcycle! LOVE THIS!