Recycled Plastic Grocery Bags

3 Tutorials for Crafts Using Recycled Plastic Grocery Bags

Recycled plastic grocery bags—especially plastic ones—are surprisingly versatile! Here are some cool and creative things you can make.

Plastic Grocery Bag Crafts

🧺 Home & Storage

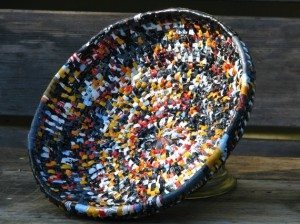
  • Woven Baskets – Cut the bags into strips and weave them into sturdy baskets.
  • Storage Bins – Fuse several layers of bags to make thicker, box-like containers.

👛 Fashion & Accessories

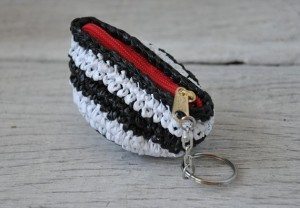
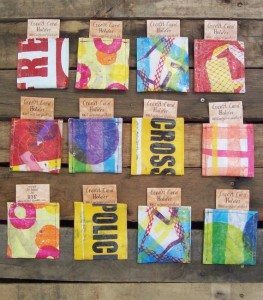
  • Wallets & Pouches – Fuse plastic bags together with an iron (using parchment paper!) to make a durable, sewable material.
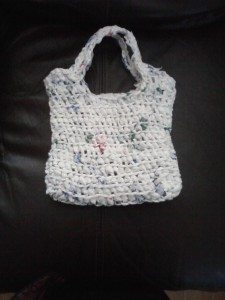
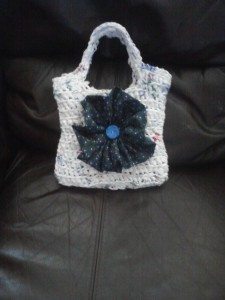
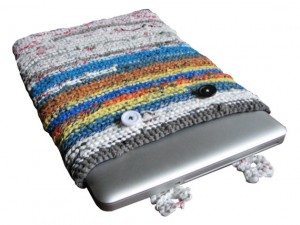
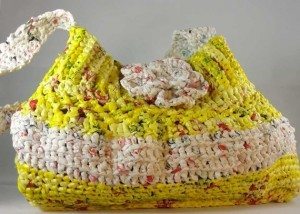
  • Tote Bags – Braid or crochet the bags into reusable shopping totes.
  • Jewelry – Roll up or twist plastic into beads or pendants.

🪴 Gardening

  • Planter Liners – Use them as liners for pots to retain moisture.
  • Macramé Hanging Planters – Braid or knot bags into plant hangers.
  • Mini Greenhouses – Use clear bags to create humidity domes for seedlings.

Here are 3 fun tutorials for how to make a woven basket, a wallet, and a hanging planter out of upcycled grocery bags.

How to Make a Woven Basket from Plastic Grocery Bags

A woven basket from recycled plastic grocery bags is not only eco-friendly but also super durable and fun to make. Here’s a simple step-by-step guide:

🧰 Materials Needed:

  • 15–30 plastic grocery bags (more for a larger basket)
  • Scissors
  • Ruler
  • Large-eyed needle (optional)
  • Hot glue gun or sturdy thread (optional)
  • Cardboard (for base support, optional)
  • Clothespins or binder clips (to hold pieces while working)

✂️ Step 1: Prepare the “Plarn” (Plastic Yarn)

  1. Flatten the bags and cut off the handles and bottom seam.
  2. Cut the remaining tube into loops (1″–2″ wide).
  3. Link the loops together by pulling one loop halfway through another and looping it back through itself to form a chain.
  4. Roll your plarn into a ball for easier handling.

🧶 Step 2: Create the Base

You have two options:

  1. Woven Base (Traditional)
  • Lay out 6–10 strands of plarn vertically (warp).
  • Weave another long strand horizontally (weft), over-under, back and forth.
  • Alternate the over-under pattern with each row.
  • Push rows tightly together as you go.
  • Continue until your base is the size you want (e.g., 6”x6” square or a circle).
  1. Cardboard Base (Sturdy Option)
  • Cut a cardboard circle or square.
  • Punch holes around the edge.
  • Knot plarn through each hole to create the vertical supports.

🧺 Step 3: Weave the Sides

  • Fold the vertical strands up (from the base).
  • Start weaving a new plarn strand in and out around those vertical strands.
  • Every few rounds, push the rows downward to tighten the weave.
  • Keep going until you reach the desired height of your basket.

🔚 Step 4: Finish the Rim

  • Once you’re at the top, fold the ends of the vertical strands over and tuck them into the previous rows.
  • Secure loose ends with a bit of hot glue or by stitching them down.
  • Optional: braid a decorative rim and glue or stitch it to the top.
Extra Tips:
  • Mix colored bags for cool patterns.
  • Add a handle using a braided plarn rope.
  • Use clothespins to hold weaves in place while you work.
  • For a sturdier structure, double up the plarn strands.


DIY Recycled Plastic Grocery Bag Wallet

Making a wallet out of recycled plastic grocery bags is a clever way to reuse them and get something useful and unique. The trick? You fuse layers of plastic together to make a thicker, leather-like material you can cut and sew. Here’s a step-by-step guide:

🧰 What You’ll Need:

  • 4–6 plastic grocery bags (for one wallet)
  • Scissors
  • Parchment paper or baking paper
  • Iron
  • Ironing board or heat-safe surface
  • Ruler
  • Pencil or fabric marker
  • Sewing machine or needle & strong thread (or hot glue)
  • Velcro, snap, or button for closure (optional)

🔥 Step 1: Fuse the Plastic

  1. Flatten and clean your bags, then cut off handles and bottoms.
  2. Cut out the large side panels from each bag.
  3. Layer 6–8 pieces of plastic together. Thin bags need more layers; thicker bags need fewer.
  4. Place the layered plastic between two sheets of parchment paper.
  5. Set your iron to low or medium (no steam).
  6. Gently iron in circular motions for ~10–15 seconds at a time.
  7. Check frequently! Once the plastic fuses into a smooth, slightly textured sheet, it’s ready.
  8. Repeat with more sheets if you want different colors or textures.

✂️ Step 2: Cut the Wallet Pieces

Use your fused plastic like fabric or leather. Here’s a simple layout for a bi-fold wallet:

  • Main body: 8″ x 3.5″ rectangle
  • Card pockets (optional): 3″ x 2.5″ (cut 2–4 of these)
  • Closure flap (optional): 2″ x 2″ with rounded edge


🧵 Step 3: Assemble the Wallet

  1. Position the card pockets on one side of the inside piece, staggered.
  2. Sew or glue the sides and bottom edges of each pocket.
  3. Fold the main body in half (like a book) to form the wallet shape.
  4. Sew or glue the outer edges of the wallet for durability.
  5. Add closure – Velcro, snap, or a button can be stitched or glued on.
Tips for Style & Durability:
  • Fuse a clear bag over a colorful one for a cool layered look.
  • Add stitching detail around edges with contrasting thread.
  • Reinforce stress points (like fold lines) with extra fused plastic.

Here is one made of woven plastic bags.


Macramé Hanging Planter

Making a Macramé Hanging Planter from plastic grocery bags is a creative and sustainable way to upcycle waste! Here’s a step-by-step guide based on traditional macramé techniques, adapted for using plastic “plarn” (plastic yarn):

🌿 Materials Needed:

  • 6–8 plastic grocery bags
  • Scissors
  • A keyring, metal ring, or wooden ring (for hanging)
  • Optional: A planter pot to size it with

As a reminder…

✂️ Step 1: Make Plarn (Plastic Yarn)

  1. Flatten and fold each bag lengthwise several times.
  2. Cut off the handles and bottom seam.
  3. Cut the rest into strips about 1–2 inches wide.
  4. Loop the strips together with a lark’s head knot to form a long strand.
  5. Roll your plarn into a ball.

🔗 Step 2: Prepare the Base

  1. Cut 8 equal-length strands of plarn (about 3–5 feet each, depending on desired length).
  2. Fold all strands in half and loop through your ring using a lark’s head knot.
  3. You should now have 16 working strands hanging down from the ring.

🪢 Step 3: Knot the Structure

  1. First row (approx. 2–3 inches from the ring): Tie square knots or simple overhand knots in pairs.
  2. Second row (2–3 inches below first): Take one strand from one knot and one from the next, and knot them together to form a net pattern.
  3. Repeat rows until the desired length is reached—this forms the basket to hold your planter.

🪴 Step 4: Secure the Bottom

  1. Gather all strands together about 2–3 inches below your last row of knots.
  2. Tie them in a tight overhand knot or wrap with an extra plarn strand for a neater finish.
  3. Trim any excess plarn if needed.

🌞 Step 5: Hang It Up!

Place a small planter inside and hang it from a hook, curtain rod, or ceiling beam.

More Fun Upcycled DIY Ideas


Similar Posts

14 Comments

  1. Congratulations DIY Inspired! Here’s to a million more posts.

    >clink<

    [The above toast was performed with champagned glasses repuposed from found Tic-Tac containers and worn tires.]

    1. Hi. We are running an oraingc fresh produce delivery in Panama, Latin America. We work with small farmers in the interior and deliver in the capital area.I follow your blog for ideas and inspiration for the work we do here.From the get go we implemented a system of returnable baskets made of a local woven material called bejuco .It is quite strong and durable, and so far after 10 deliveries it is still usable. It also offers added income to the local artisans we buy it from.We designed a rectangular shaped basket with a lid so we can stack them when making deliveries and storing.Not sure if you have a local sustainable material you can work with instead of plastic, but that might be an option to look into. Maybe wicker or willow?Just an idea

Leave a Reply

Your email address will not be published. Required fields are marked *

This site uses Akismet to reduce spam. Learn how your comment data is processed.