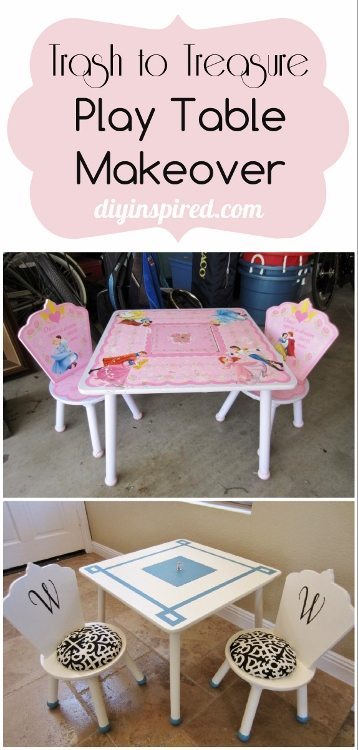
Upcycled Children’s Play Table
Trash to Treasure Makeover: Upcycled Children’s Play Table
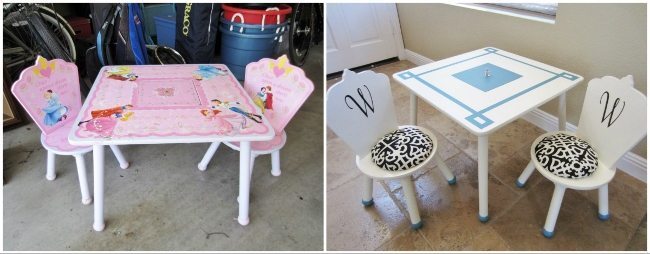
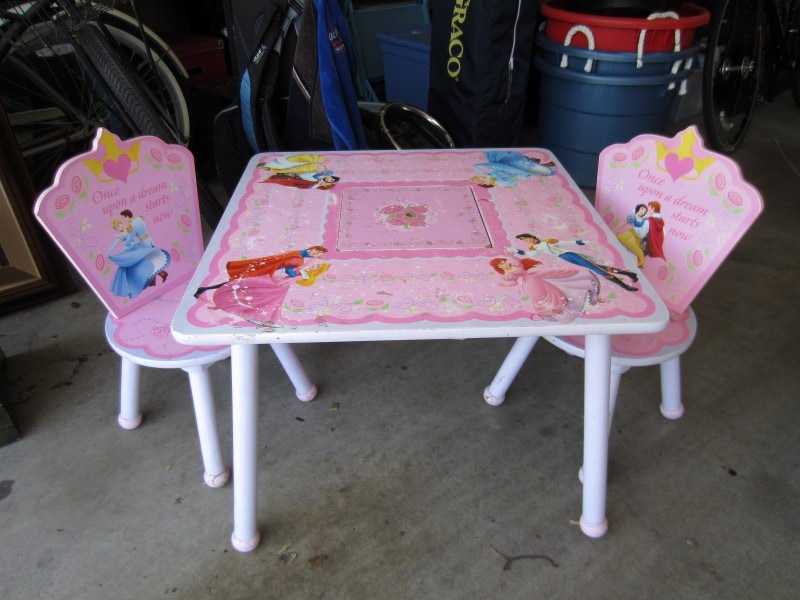
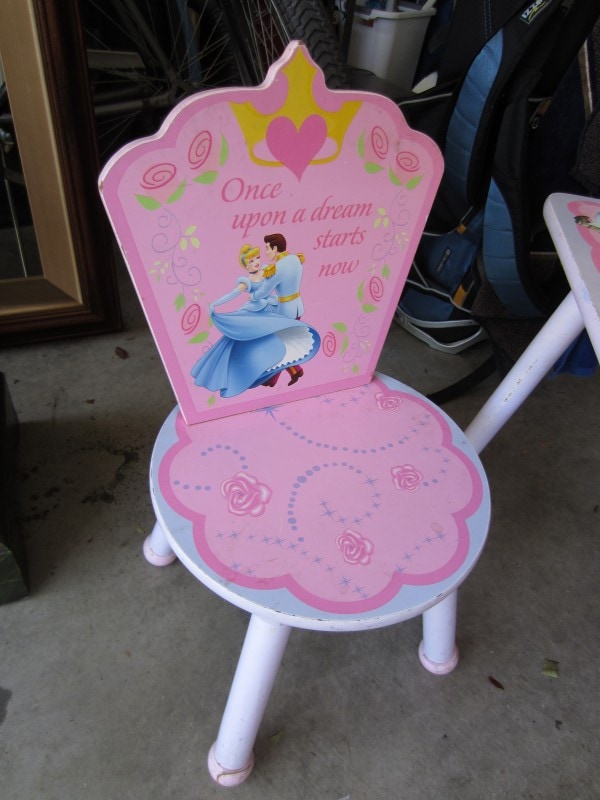
One of my best friends gave me this Disney princess table when she moved. I loved the shape of the chairs and the storage pocket in the center; however it was a little worn from use. It was perfect for this Upcycled Children’s Play Table project.
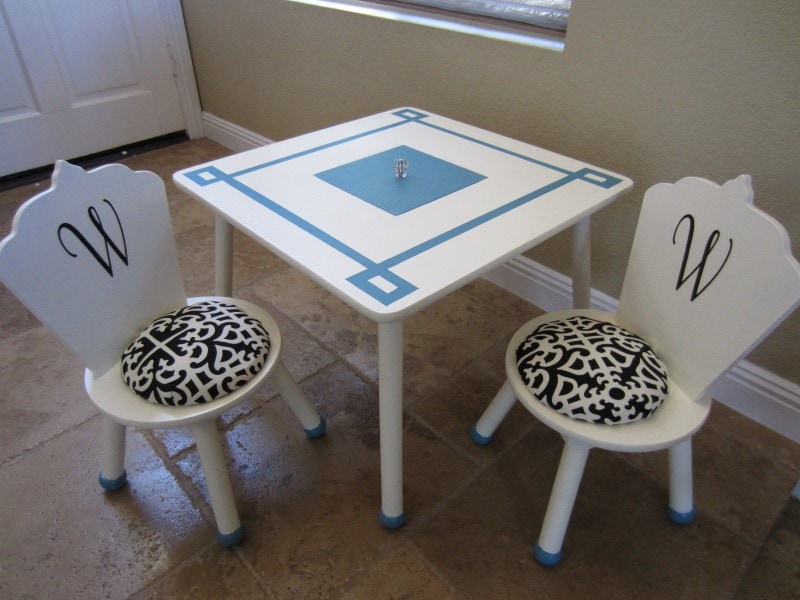
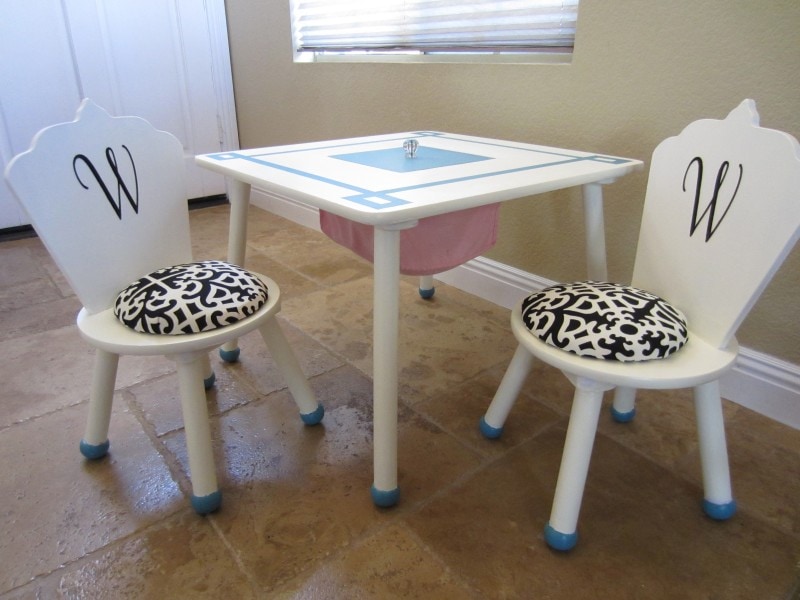
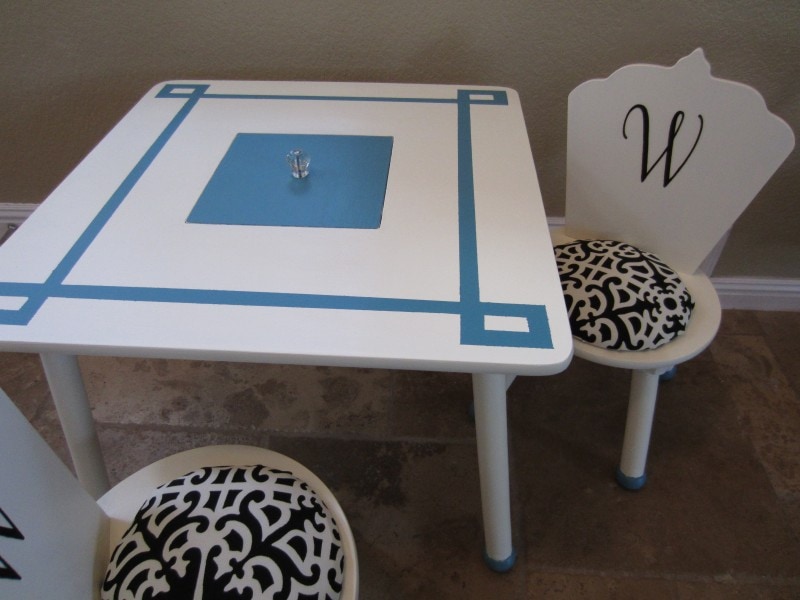
I decided to take on this DIY project, paint it, and “glam” it up a bit with a Hollywood Regency style. This do it yourself project required painting it, adding seat cushions, a monogram, and a clear crystal knob. I had the primer, paint, and fabric from past projects already, so the total cost for this table and two chairs was less than $20.00.
Here is the after:
Here is What You Need
Time: 2-3 Hours
Materials:
This list contains affiliate links for recommended products.
- Primer

- Sand Paper
- Paint
- Paint Brush
- Painter’s Tape
- Knob
- Polyurethane
- Round Wood Plaques
- Polyester Fiberfill
- Staple Gun
- Fabric
- Scissors
- Wood Glue
- Screwdriver


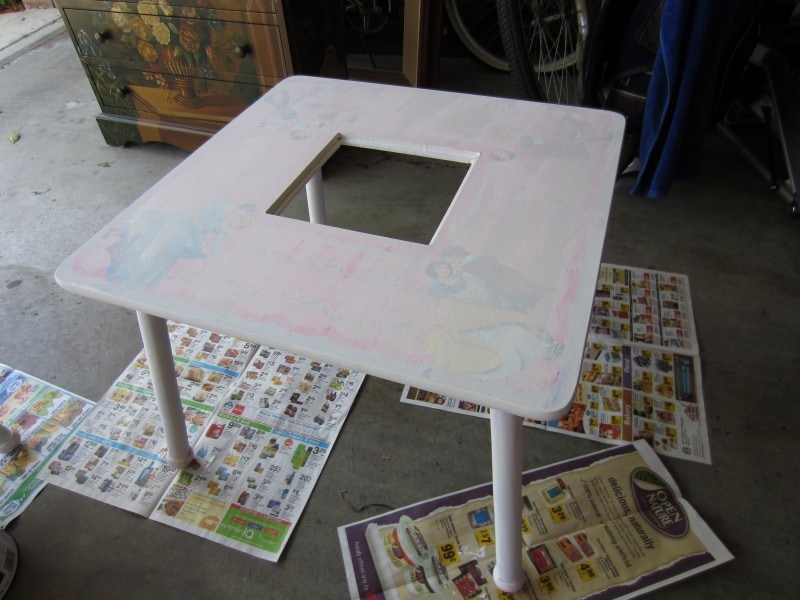
I decided to prime it first, even though the surface was already smooth due to the existing character design. I used a light sand paper  to help remove a few old stickers, and cleaned the surface. Two coats of primer
 worked perfectly. When priming, make sure the paint is completely dry in between coats. You may consider using spray paint primer.

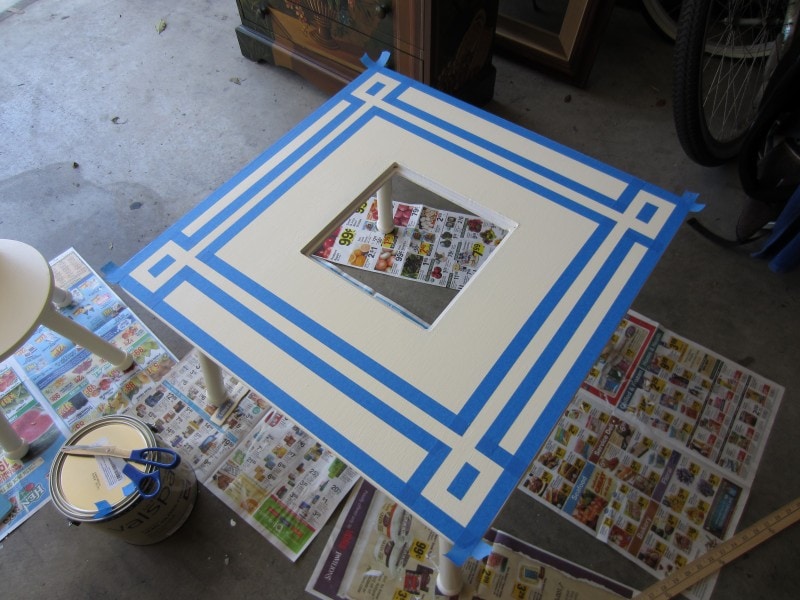
I painted both chairs and table with two coats of white paint . After is dried completely, I used painters tape to tape off my design. I painted the design, the storage cover, and the balls of the table legs and chairs blue.
After you paint is completely dry, I recommend painting the table top with polyurethane with at least two coats. It is added protection for it’s future marriage with crayons and markers!
Meanwhile, I used a circular wooden plaque , polyester fiber fill
 , and fabric for the seat cushions.
When stapling fabric onto the plaque, it’s best to keep the extra material and trim it after.

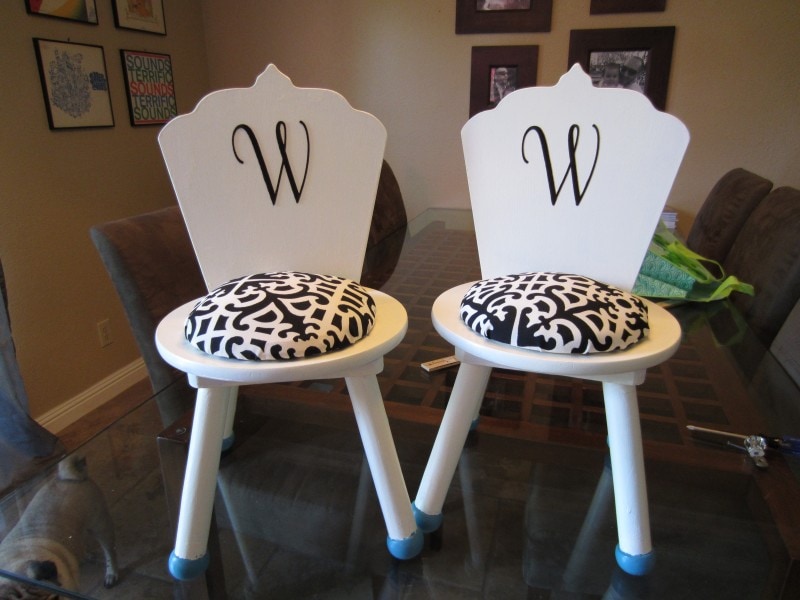
I glued the seat cushions to the chair with an extra strength wood glue and added a self adhesive monogram. I also added a few coats of decoupage medium to seal in the monograms.
Next, I reattached the storage bag and added a knob to the lid.

Here are some before and after pictures.
Since I didn’t have to buy paint or fabric, here is what I ended up spending. Not too shabby!
- Clear Plastic Knob – $2.97
- 2 Monogrammed Letters – $2.97 each
- 2 Wooden Plaques – $5.49 each
- Polyester Fiber Fill – $2.99 for one bag
Total Cost: $17.39 plus tax
Update: I have had this table for over 7 years! It has lasted through my 2 kids and my youngest still plays with it now.
I also made two matching play kitchen hutches! This one and this one.
Like it Pin It!
You May Also Like
Here are a few fun DIY ideas you may like. My favorite o all time is the dog house.

This play table is adorable! What a great idea to repaint it. I like that you didn’t do the traditional pink color for a girl.
Thank you so much! 🙂
LOVE LOVE LOVE this table! So much better than throwing it away. Truly trash to treasure. Great job!
What a cute table! Love it 🙂
Thank you so much!
Love the look of your new table. I have actually been looking for a new table for my sons room and haven’t had much luck- I think I might have to re-think my shopping strategy. thanks!
Thank you, Robert!
I love all your transformations! Thank you for the inspiration!
Thank you so much, Sherry!
It’s so cute!!! I wish I had a daughter to be able to make this furniture for her
Thank you so much!
Looks amazing, you have done a great job!
All of your makeovers are fantastic! Thank you very much for the motivation!
Thank you so much!