Breakfast at Tiffany’s DIY Invitations
I have been on a roll with invitations lately! I have to say, I really enjoy paper crafts like this. Recently, I made a clam shell for a Little Mermaid Party and a Rapunzel Tower invite with yarn hair for a Tangled themed party. This time, I am helping my best friend with her oldest daughters Breakfast at Tiffany’s birthday party (her name is Tiffany too!). Here is how I made Breakfast at Tiffany’s DIY Invitations.
Materials:
- Blue Card Stock

- Black and White Patterned Card Stock
- White Card Stock
- Glue Stick
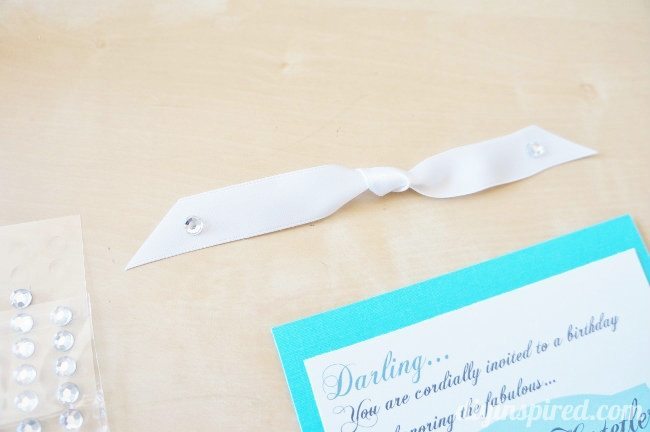
- White Ribbon
- Paper Cutter
- Scissors
- Adhesive Gems
- Envelopes


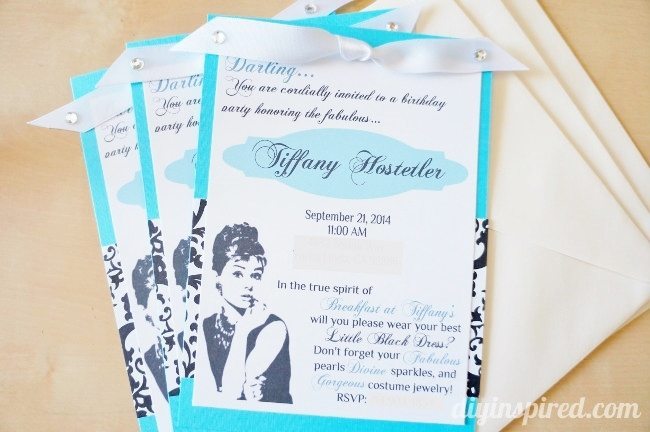
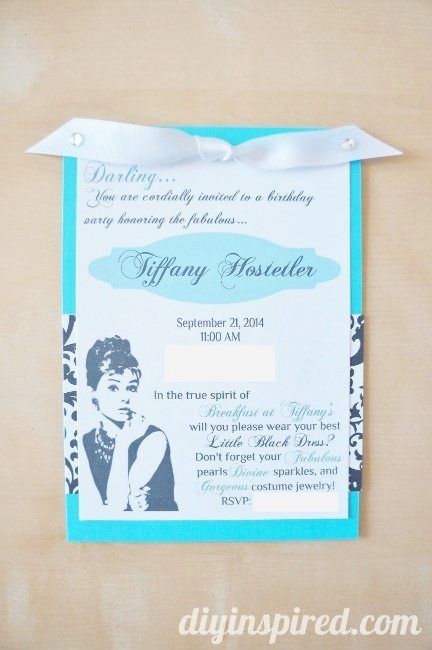
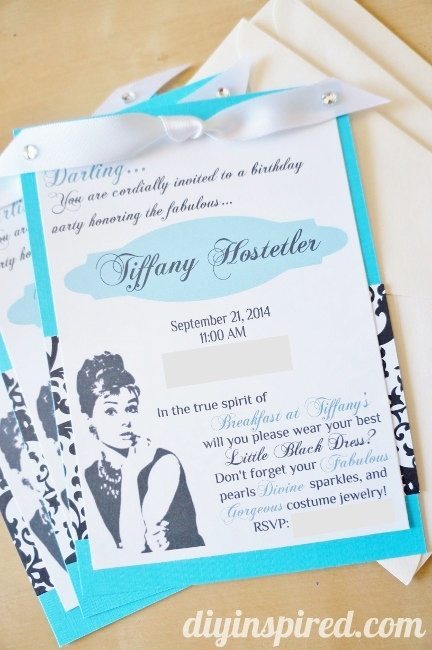
To prepare my little assembly line, I cut 5” X 7” pieces for the main backing and 3” X 5” pieces of black and white paper and 6” white ribbon. I designed the invitation, printed them on white card stock and cut them out at 4.25” X 6.25” (approximate).

I used a glue stick to assemble them.

I also tied the ribbons in knots and put a little gem on each side.
My friend looked online for Breakfast at Tiffany’s DIY Invitations for inspiration and she loved the wording on this one.
So, on her invitation I wrote:
Darling…
You are cordially invited to a birthday party honoring the fabulous…
Tiffany Hostetler
Date
Time
Place
In the true spirit of Breakfast at Tiffany’s
Will you please wear your best
Little Black dress?
Don’t forget your Fabulous pearls,
Divine sparkles, and
Gorgeous costume jewelry!
RSVP
I loved the end result.
I was so inspired that I also made…
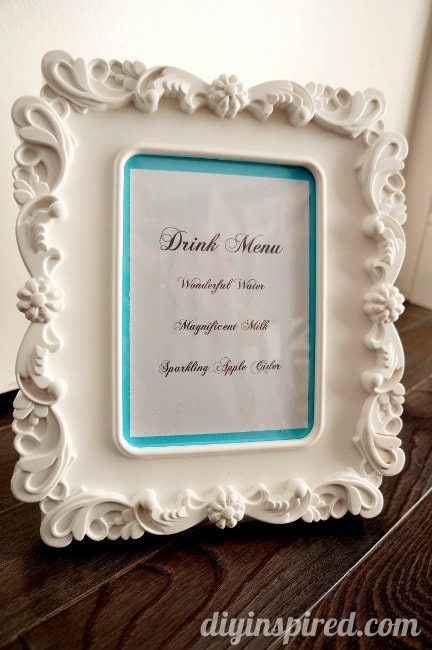
… a drink menu including, Wonderful Water, Magnificent Milk, and Sparkling Apple Cider…
… some food labels including Picture Perfect Pancakes, Wonderful Waffles, Divine Donuts, Delish Bacon, Marvelous Mini Muffins, Fabulous Mini Bagels, and Yummy Yogurt and…

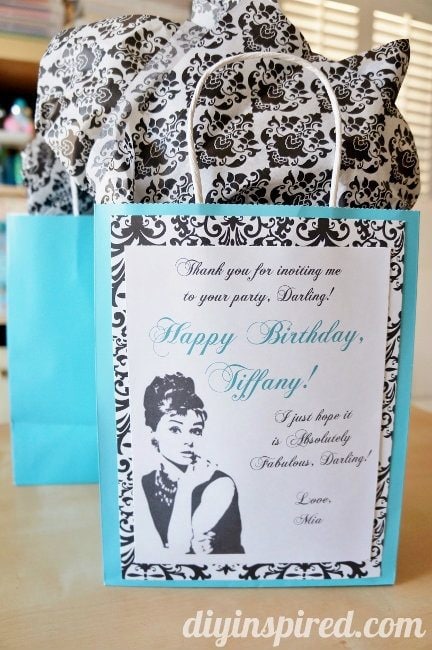
… some special gift wrapping for the birthday girl too!

What font did you use on your card?
Hi Rimsha, I believe it is Chopin Script.
Did you make it using Microsoft word. And how did you print on the white cardstock.
If there is a template for this invitation would u mind sending it to me. I’m throwing a tiffany and co party in a month and I loved your idea for these invitations
Hi Rimsha! Unfortunately I don’t have a template. I designed it on a free design site called iPiccy.com. It’s easy and user friendly. You can feed the cardstock directly into your printer and it works great! I hope this helps!!
Where did you find that picture of Audrey
I Googled the image.
What color did you use for the fonts and the banner label
I’m sorry, but I don’t remember! Yikes!