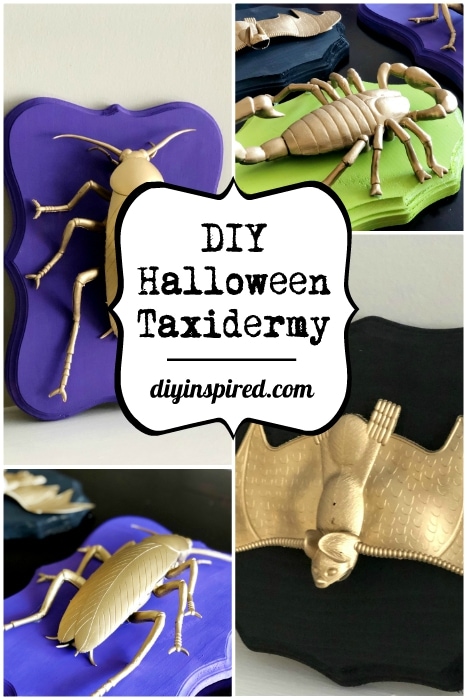
DIY Halloween Taxidermy
Gold DIY Halloween Taxidermy for Your Halloween Décor
I love decorating for Halloween and this year, I’m adding this DIY Halloween taxidermy to my home décor. I love spooky but I also love a little glam, like these Glam-O-Ween Ideas I have shared in the past. These are easy to make and besides dry time, they only take a few minutes.
Below are the materials and instructions. First, let’s watch a short video I made on how to make your own Halloween taxidermy.
Watch: DIY Halloween Taxidermy
Here’s What You Need
Time: 30 Minutes
Materials:
- Wooden Plaques
- Plastic Halloween Bugs and Creatures
- Acrylic Paint
- Gold Spray Paint
- Paint Brushes
- Glue
Instructions:
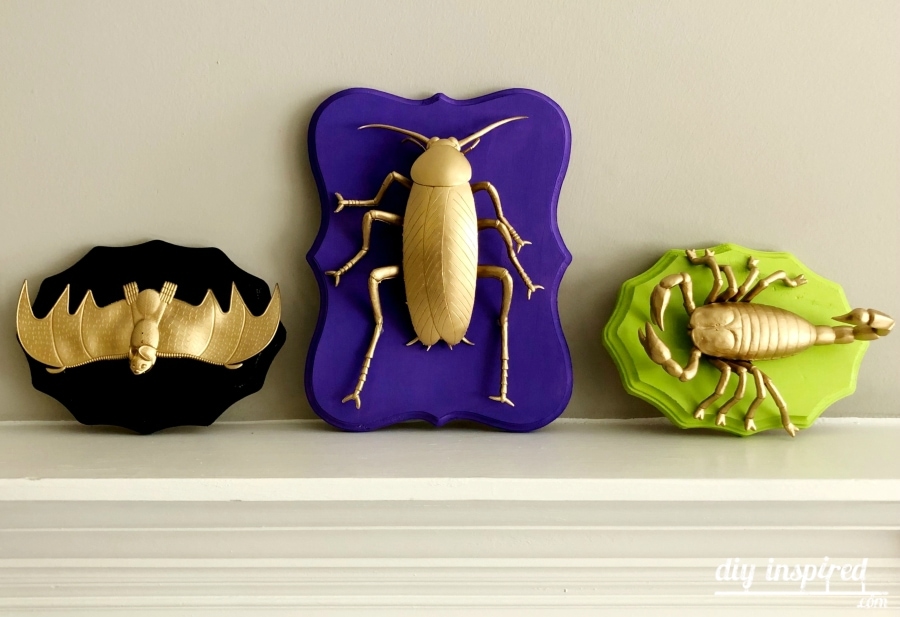
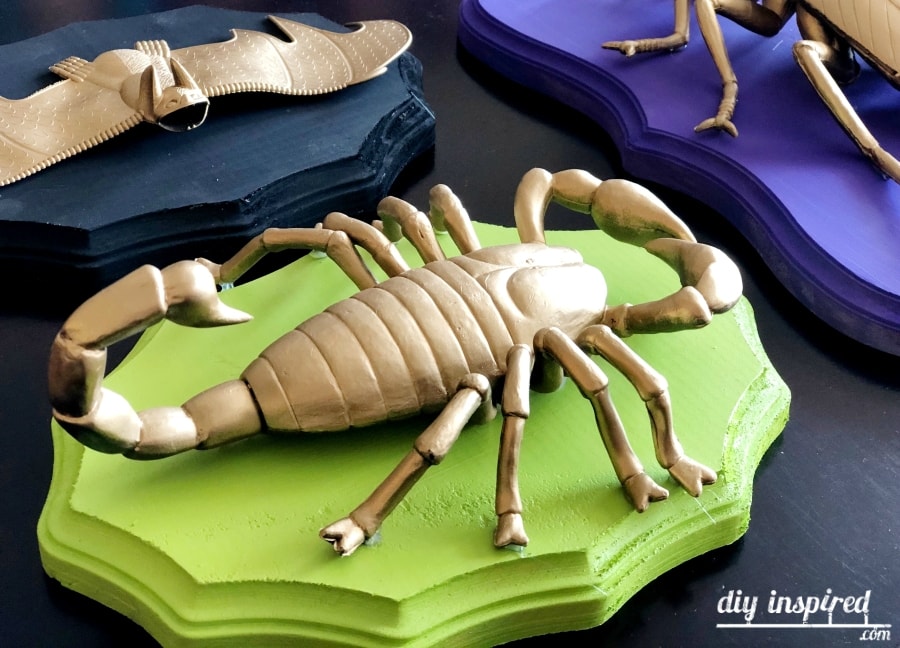
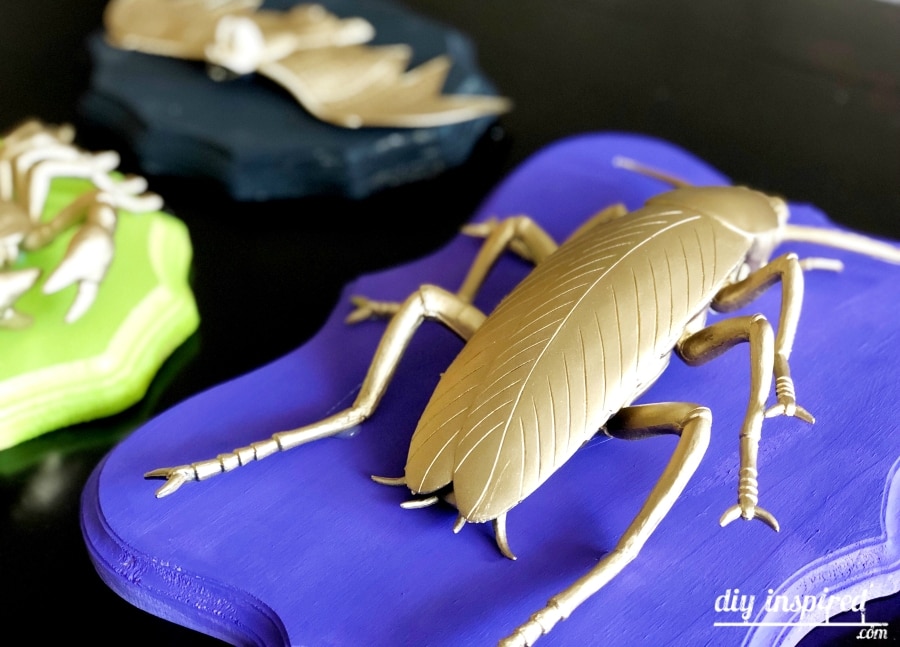
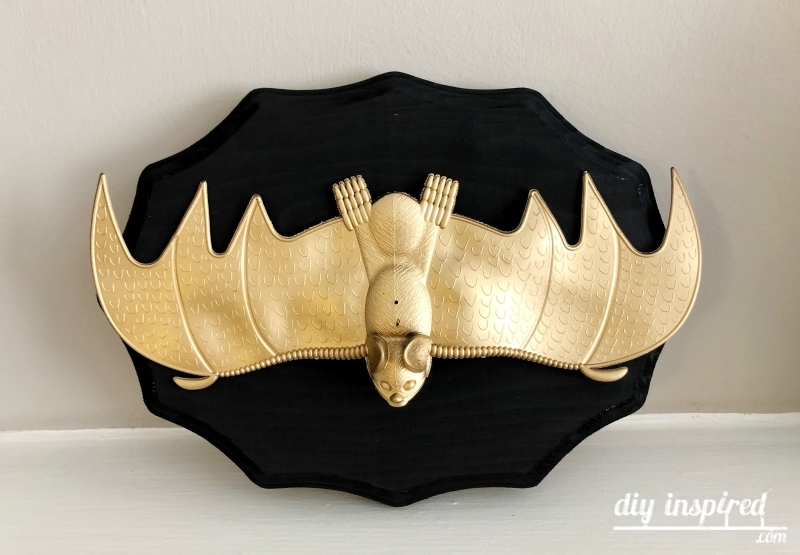
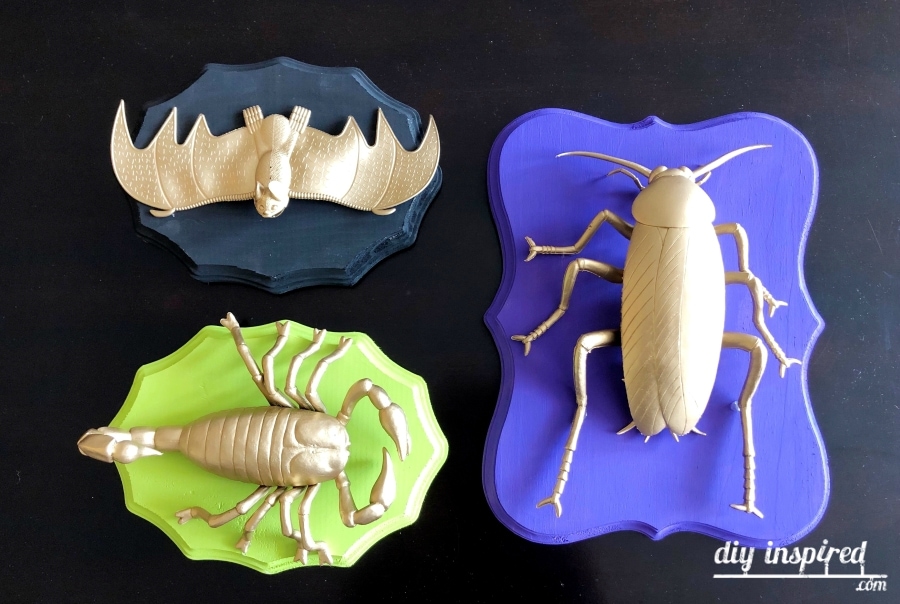
- Make sure your wooden plaques are large enough to fit your insect or animal. I bought these at Michael’s. Paint each plaque the desired color with acrylic craft paint. I used:
- Craft Smart Purple
- Craft Smart Black
- FolkArt Happy Green
- I found the scorpion, bat, and insect at Party City. Protect your surface with paper and spray paint each creature gold. I used Design Master Colortool Spray in Brilliant Gold.
- Once completely dry, glue each creature to the wooden plaque. I used hot glue and a glue gun and they are staying very well. Just make sure you glue on every part the plastic touches because the creatures are heavy.
Consider different colors and sizes. You can place a picture hanger on the back or Command Strips to hang them.

Need More Halloween Decorating Ideas?
Here’s a video on How to Make Tombstone Vases out of shipping boxes for your Halloween table centerpiece.
You May Also Like
- HALLOWEEN DECORATING WITH SKELETONS
- EASY TRUNK OR TREAT IDEAS FOR CARS
- 5 WAYS TO MAKE GIANT CANDY FOR A CANDYLAND THEME
- SPELL BOOK PAGES
- DIY REPURPOSED HALLOWEEN SIGN
Like it? Pin it!