• Project Gallery
  • DIY
    • Recycled DIY
    • Upcycled DIY
    • Repurposed DIY
    • Refurbished DIY
    • DIY Furniture
    • Repurposed Furniture
    • Thrift Store Transformations
  • Crafts
    • Wood Crafts
    • Paper Crafts
    • Photo Crafts
    • Kids Craft Ideas
    • Doll Crafts
    • Felt Crafts
    • Stenciling
    • Gift Wrapping
    • Printables
  • Party
    • Birthday Party
    • Baby Shower
    • Bridal Shower
    • Wedding
    • Team Sports
    • Sweets and Treats
    • Cocktail Corner
  • Holidays
    • St. Patrick’s Day
    • Easter
    • Earth Day
    • Teacher Appreciation
    • Mother’s Day
    • Father’s Day
    • Fourth of July
    • Back to School
    • Halloween
    • Halloween Costumes
    • Thanksgiving
    • Elf on the Shelf
    • Christmas
    • New Years
    • Valentine’s Day
  • Home & Garden
    • Storage & Organization
    • Cleaning Tips
    • Gardening
    • Makeovers
    • Kid Stuff Makeovers
    • DIY Tips & Tricks
    • DIY Artwork
    • Curb Appeal
  • Health & Beauty
    • Health & Wellness
    • Bath & Body
  • Nav Social Menu

    • Facebook
    • Instagram
    • Pinterest
    • Twitter
    • YouTube

DIY Inspired

Repurpose, Reinvent

  • About
  • Contact
  • Advertising
  • Featured
  • Disclosure

Crafts Trash To Treasure

DIY Rag Balls and Tray Makeover

DIY Rag Balls and Tray Makeover

DIY Rag Balls

Here’s the dilemma – I wanted a centerpiece for our dining room table but I didn’t want to spend any major money on it.  So, back to my original junk pile to see if there was anything I could use.  (You may remember this picture!) 
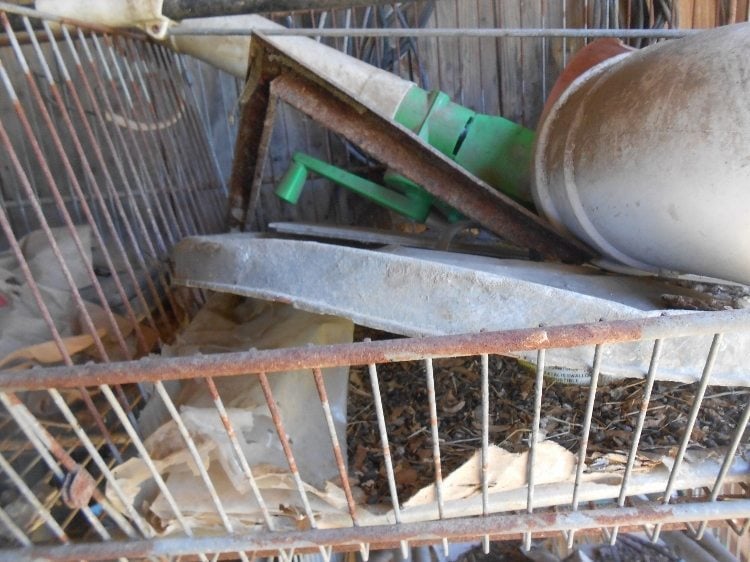
Upcycled Tray Makeover

I found a tray!

Old Rusty Tray Makeover

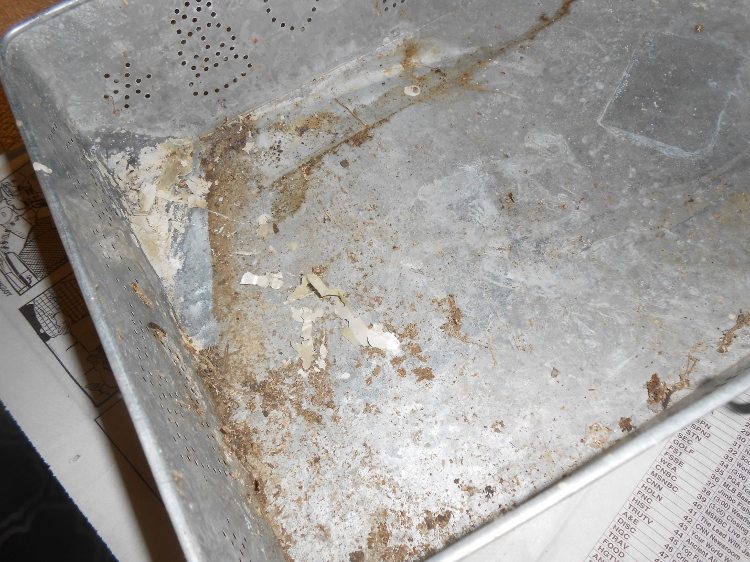
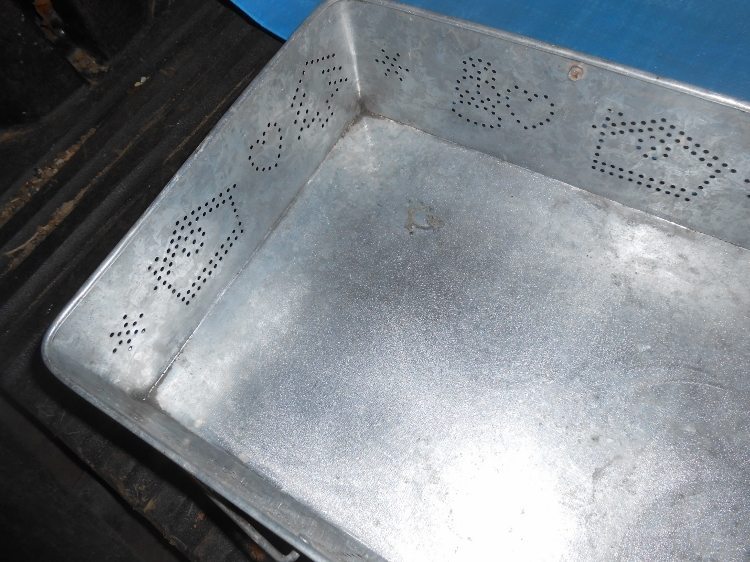
Rusty, dirty and full of paint!  Time to wash, and sand!  Here’s what it looked like once those steps were finished.  Much better!

Upcycled Metal Tray Makeover

A coat of red paint and it was ready to fill.

Upcycled Tray Paint Makeover

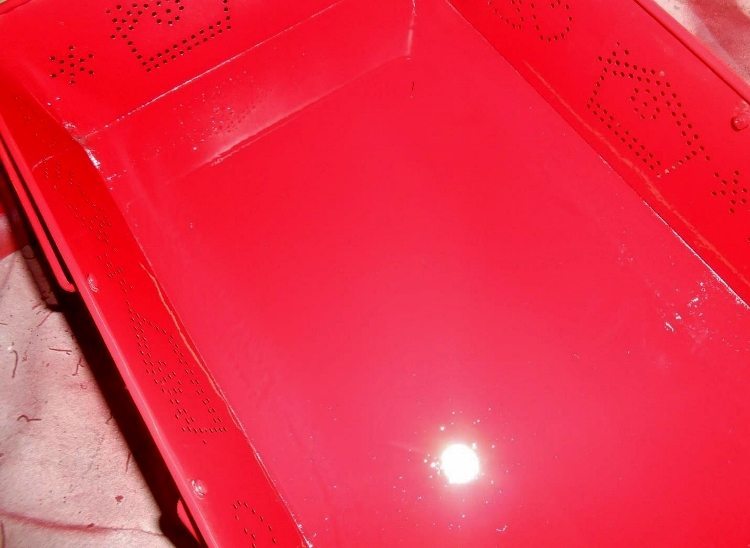
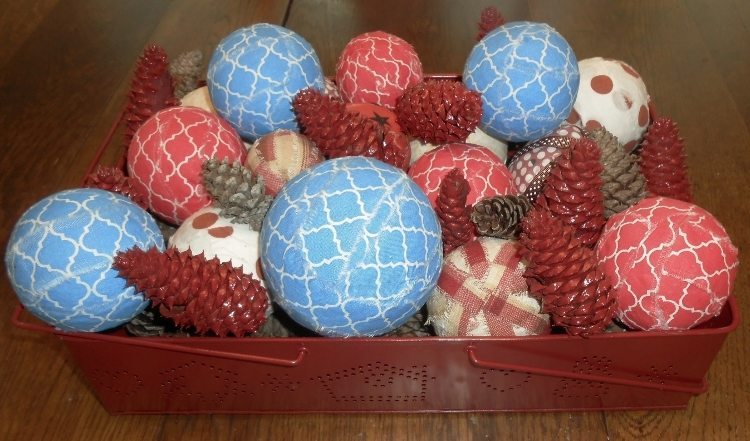
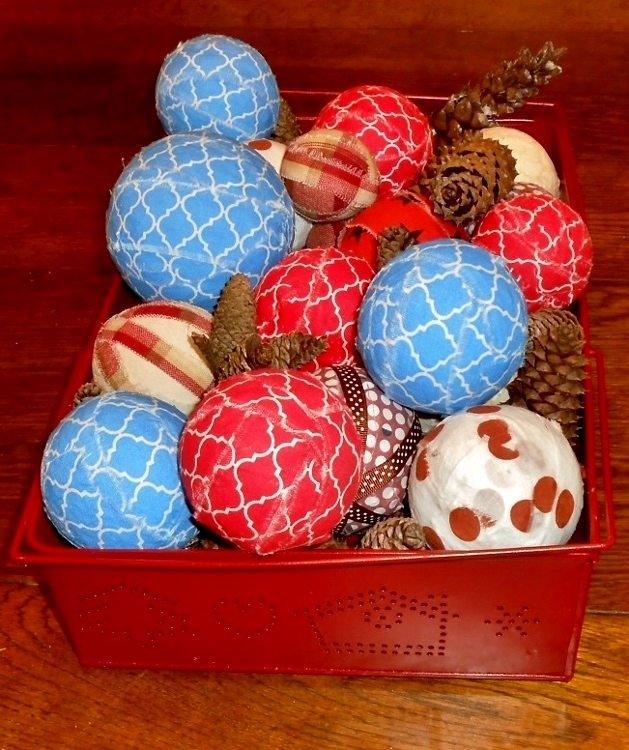
I filled the tray with rag balls. 

To make the rag balls you will need:
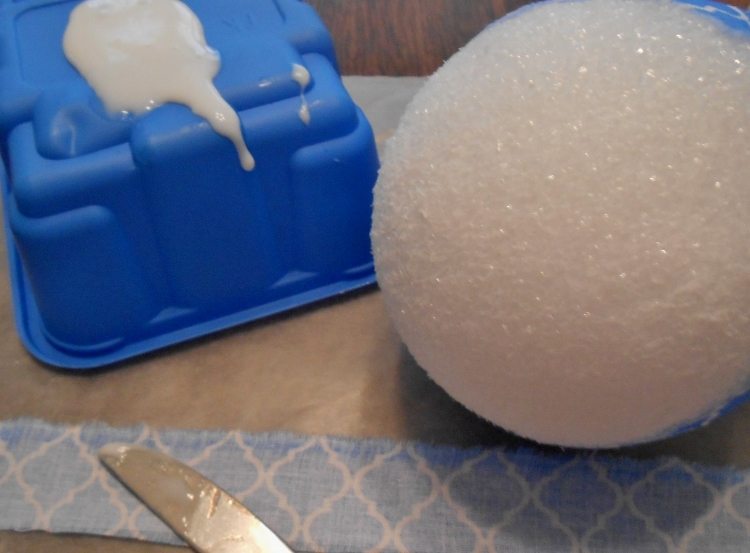
  • Foam balls – I used 2 dozen balls, sizes 2”, 3” and 4”  (I bought mine at JoAnn’s)
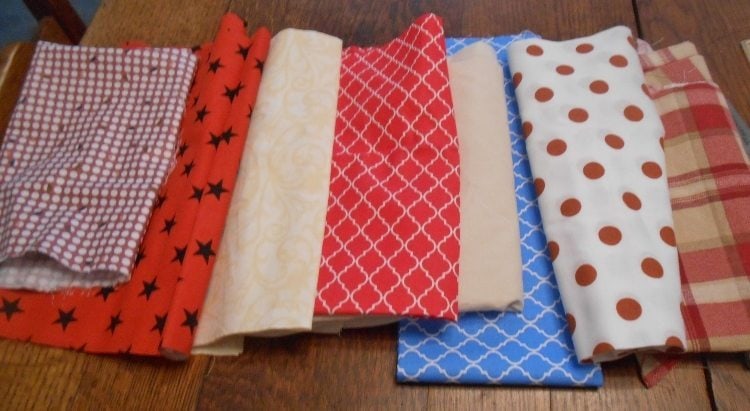
  • Fabric pieces – I used pieces that were 1/8 yard or less
  • Ruler
  • Scissors
  • Pins (optional) I only used them on the first one to figure out how many strips of fabric I would need per ball.
  • Iron
  • Glue – any glue will work, including a hot gun, but the thicker white glue worked best. (For 2 dozen balls, I used about 12 ounces of paste!)

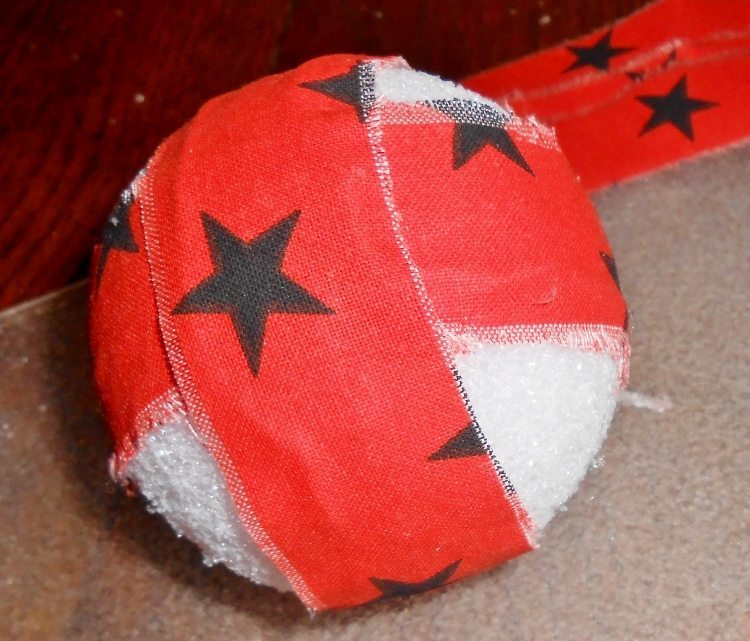
Start by cutting material.  For the 3” and 4” size balls; cut strips of fabric 1” wide and 10” – 12” long.  For the 2” ball, I  cut the strips ½” wide and 8” long.  Next, iron each piece.  I tried not ironing the pieces but for the next step they definitely worked best when ironed.

DIY Rag Balls with Fabric Scraps

DIY Rag Balls Fabric Scraps

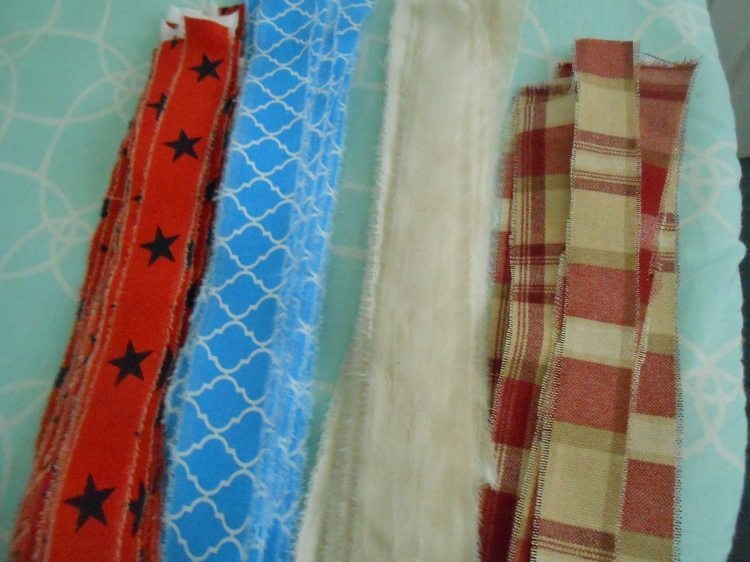
This is the step where ironing the strips makes it much easier.  Pull a few rows of threads off on each side of the pieces.

How to Make DIY Rag Balls

You’re now ready to glue the ironed fabric strips to the foam balls.  You will need to liberally apply glue to the fabric strip, including the edges.  I used an old butter knife and then wrapped each strip around the foam ball.

DIY Rag Balls How To


Alternate each strip of material using 6 strips on the 3” and 2” balls and 8 strips on the 4” foam ball until the entire ball is covered.

DIY Rag Balls Tutorial

Once finished, allow the balls to dry. I put the balls into the tray and added some pine cones (some natural, some sprayed red) from a friend’s property.  I will change the rag balls throughout the year to reflect the seasons.  With Christmas around the corner, these balls will soon be sporting red and green designs and maybe some holly and holly berries!  The possibilities are endless for this trash to treasure centerpiece!

DIY Rag Balls DIY Inspired

Check out some of my other Trash to Treasure projects:

  • Repurposed Rake Turned Dog Leash Holder
  • Kitchen Organizer from Pallet Scraps 
  • Refurbished Retro Vintage Chair Rescue 
  • DIY Rustic Pallet Flag 
  • From Funky Birdhouse to Fabulous DIY Bird Feeder 
  • Vintage Tool Box Makeover 
  • Share
  • Twitter


2 Comments

Join our Community of Crafters!

Stay updated and never miss a thing!

Disclosure and Privacy Policy
Previous Post: « DIY Herbal Spa Satchel
Next Post: Repurposed Wheelbarrow Address Sign »

Reader Interactions

Comments

  1. Melanie {The Party Suite at Bellenza} says

    October 18, 2015 at 8:06 am

    These would be great as July 4th decor!

    Reply
  2. T Berokoff says

    October 18, 2015 at 8:21 am

    Absolutely! Halloween, Thanksgiving, Christmas, Valentine’s Day, weddings, baby showers, birthdays, AND OF COURSE 4TH OF JULY, the list goes on…….! Thanks for the ideas! 🙂

    Reply

Leave a Reply Cancel reply

Your email address will not be published. Required fields are marked *

This site uses Akismet to reduce spam. Learn how your comment data is processed.

Primary Sidebar

Welcome!

DIY Inspired Profile Picture 2015Thank you for visiting! I'm Dinah and I am a full time Mother, Blogger and Writer. I'm honored to be named one of Mashable's 10 Mom Blogs Full of Inspiring Advice. {Read more about me here}

Join our Community of Crafters!

Stay updated and never miss a thing!

Disclosure and Privacy Policy

Stay updated and never miss a thing!

Footer

You might also love these

DIY Funny Bedroom Sign Ideas

DIY Guest Bedroom Signs

Thrift Store Tea Party Decorations

Upcycled Thrift Store Teapots

DIY Recycled Milk Jug Flowers Tutorial

Clever Trash to Treasure Earth Day Crafts

Easy Paper Butterflies Craft - DIY Inspired

How to Make Paper Butterflies

Front Door Wreath with Floating Numbers

Torched Address Wreath with Floating Numbers

Copyright © 2021 · Divine theme by Restored 316

Copyright © 2005–2021 DIY Inspired. Installed and customized by TCN Design Studio